Showing posts with label chia seeds. Show all posts

Friday, January 5, 2018

Raisin Bread with Berry-Chia Jam

January is for snuggling, hygge-ing, and bread making :) It is for me at least. I told you I have challenged myself to a plant-based diet for a few weeks and no sweets except those in fruit. Well for breakfast I have been enjoying Buckwheat-Date Porridge or some GF quick cooking oatmeal topped with blueberries, pumpkin seeds, coconut flakes and chia seeds...BUT when it comes to breakfast, I still love a piece of whole grain toast smothered in a seed butter and jam ;)
This bread recipe is a combination of [this oat and this buckwheat-quinoa-millet] beloved bread favorites and my favorite homemade jam [from all those frozen blueberries] that I make weekly, but this time I threw in a few new twists so as to avoid sweeteners other than fruit and add in a few other parts to get the most I could out a having bread and jam for breakfast. The raisins were added in to help bring out some natural sweetness and honestly I LOVE a breakfast bread with a little dried fruit. I am already thinking up some future bread recipes... ones with cranberry, orange and seeds, or a molasses and raisin one. I cracked open a multitude of ideas... some of those have been tucked back there for a while. But for now- it is raisins, lightly sweetened with applesauce and cinnamon, and the love is ever great and nourishing.
Raisin Bread Recipe
{gluten, dairy, egg, yeast, nut, seed, and sugar-free}

3 TB of psyllium husk powder (must be powder, not seed or husk)
2 cups of pure water or non-dairy milk (or a combination of both)
3 TB of apple cider vinegar
3 TB of unsweetened apple sauce
2 TB of olive oil
1/2-1 cup of organic raisins

1 TB of cinnamon
1 cup of finely ground fresh GF oat flour
(grind 1 cup GF rolled oats in high powered blender)
1/2 cup of quinoa flour
1/2 cup of buckwheat flour
1/2 cup of millet flour
1/2 cup of rice flour

1 ts. of sea salt
2 ts. aluminum free baking powder
1 ts. of baking soda

sprinkle up to 1/2 cup extra oat flour for kneading 


In a large mixing bowl, whisk the psyllium husk powder, water, milk and apple cider vinegar together. It will turn into a thickened blob in a few minutes, then whisk in the oil and applesauce in together. Lastly mix in the raisins and let them get wet before mixing in the dry...

Then, add all of the dry ingredients, flours, cinnamon and salts, and mix with a spatula or wooden spoon until all of the flour is blended, but be careful to not over mix and make it too sticky. Then use your hands with a sprinkle of extra flour if needed to knead and roll our the dough until it starts to get a skin and no longer sticky. Once you got a nice skin on the dough and have rolled around you will have less cracks and stickiness. This is where I roll out to a long oval-shaped loaf and tuck all the spots under the loaf that have cracks or whatever. It doesn't have to look perfect because the skin will turn into a thick crunchy crust after baking. 

No need to proof or prove or whatever you normally do with bread because there is NO YEAST!! So just after rolling out a loaf, put on a parchment papered baking sheet and bake in a 350 degree oven for 1 hour. Let cool for 20-30 minutes before cutting into. Serve warm, which is my favorite! But also let it cool and slice out the loaf and save in a bread container for the rest of the week. It does a great job at keep at room temperature but you may find that you still like to toast it to warm it up a bit. 

Berry Chia Jam Recipe
2 cups of frozen blueberries or a mix of whatever berries you have
1/2 cup of juice (I used Antioxidant Force by Smart Juice) but you could use pomegranate or other no sugar fruit juice like cherry, berry mix, or grape
1/2 cup of pear or apple juices for sweetness too
also, you can use elderberry tea as in sub from the juice (as in my other chia-jam recipe)
1 TB of grated fresh ginger
1 organic orange grated for zest and squeezed for juice
pinch of sea salt

1/4 cup of whole chia seeds

In a medium saucepan, pour in the 2 cups of frozen berries with the tea and the juice and let cook to defrost and get soft. Then add in the ginger and orange juice and zest and bring to a soft boil and bubble and cook from any where to 10-15 minutes until the berries are very hot, juicy and mushy. You can use an immersion blender to blend in half of the mixture to be more smooth and have less chunky fruit if you want a smoother jam. After this it looks like a fruit soup. Turn off the heat and then add in the chia seeds. Stir in well so not to be clumpy and then let it sit in the pan and cool and let the chia seeds soak up the moisture and turn into a thick jammy substance. When it cools for 10-15 minutes you can pour into a pint jar to continue to cool and thicken in the fridge. It will be best after at least 4 hours in the fridge. This recipe makes 1 pint jar and will keep up to 2 weeks. 

There you have it, my most favorite recipes adapted to have NO sweetener but fruit. I hope you give them a try regardless and ENJOY! It is a great way to start off the new year trying to love and nourish the body with ways that it cannot hide behind sugar, caffeine and crappy processed foods to feel numb and yucky. Feed your body LOVE, friends!

Much love as always, xoxo

Thursday, December 14, 2017

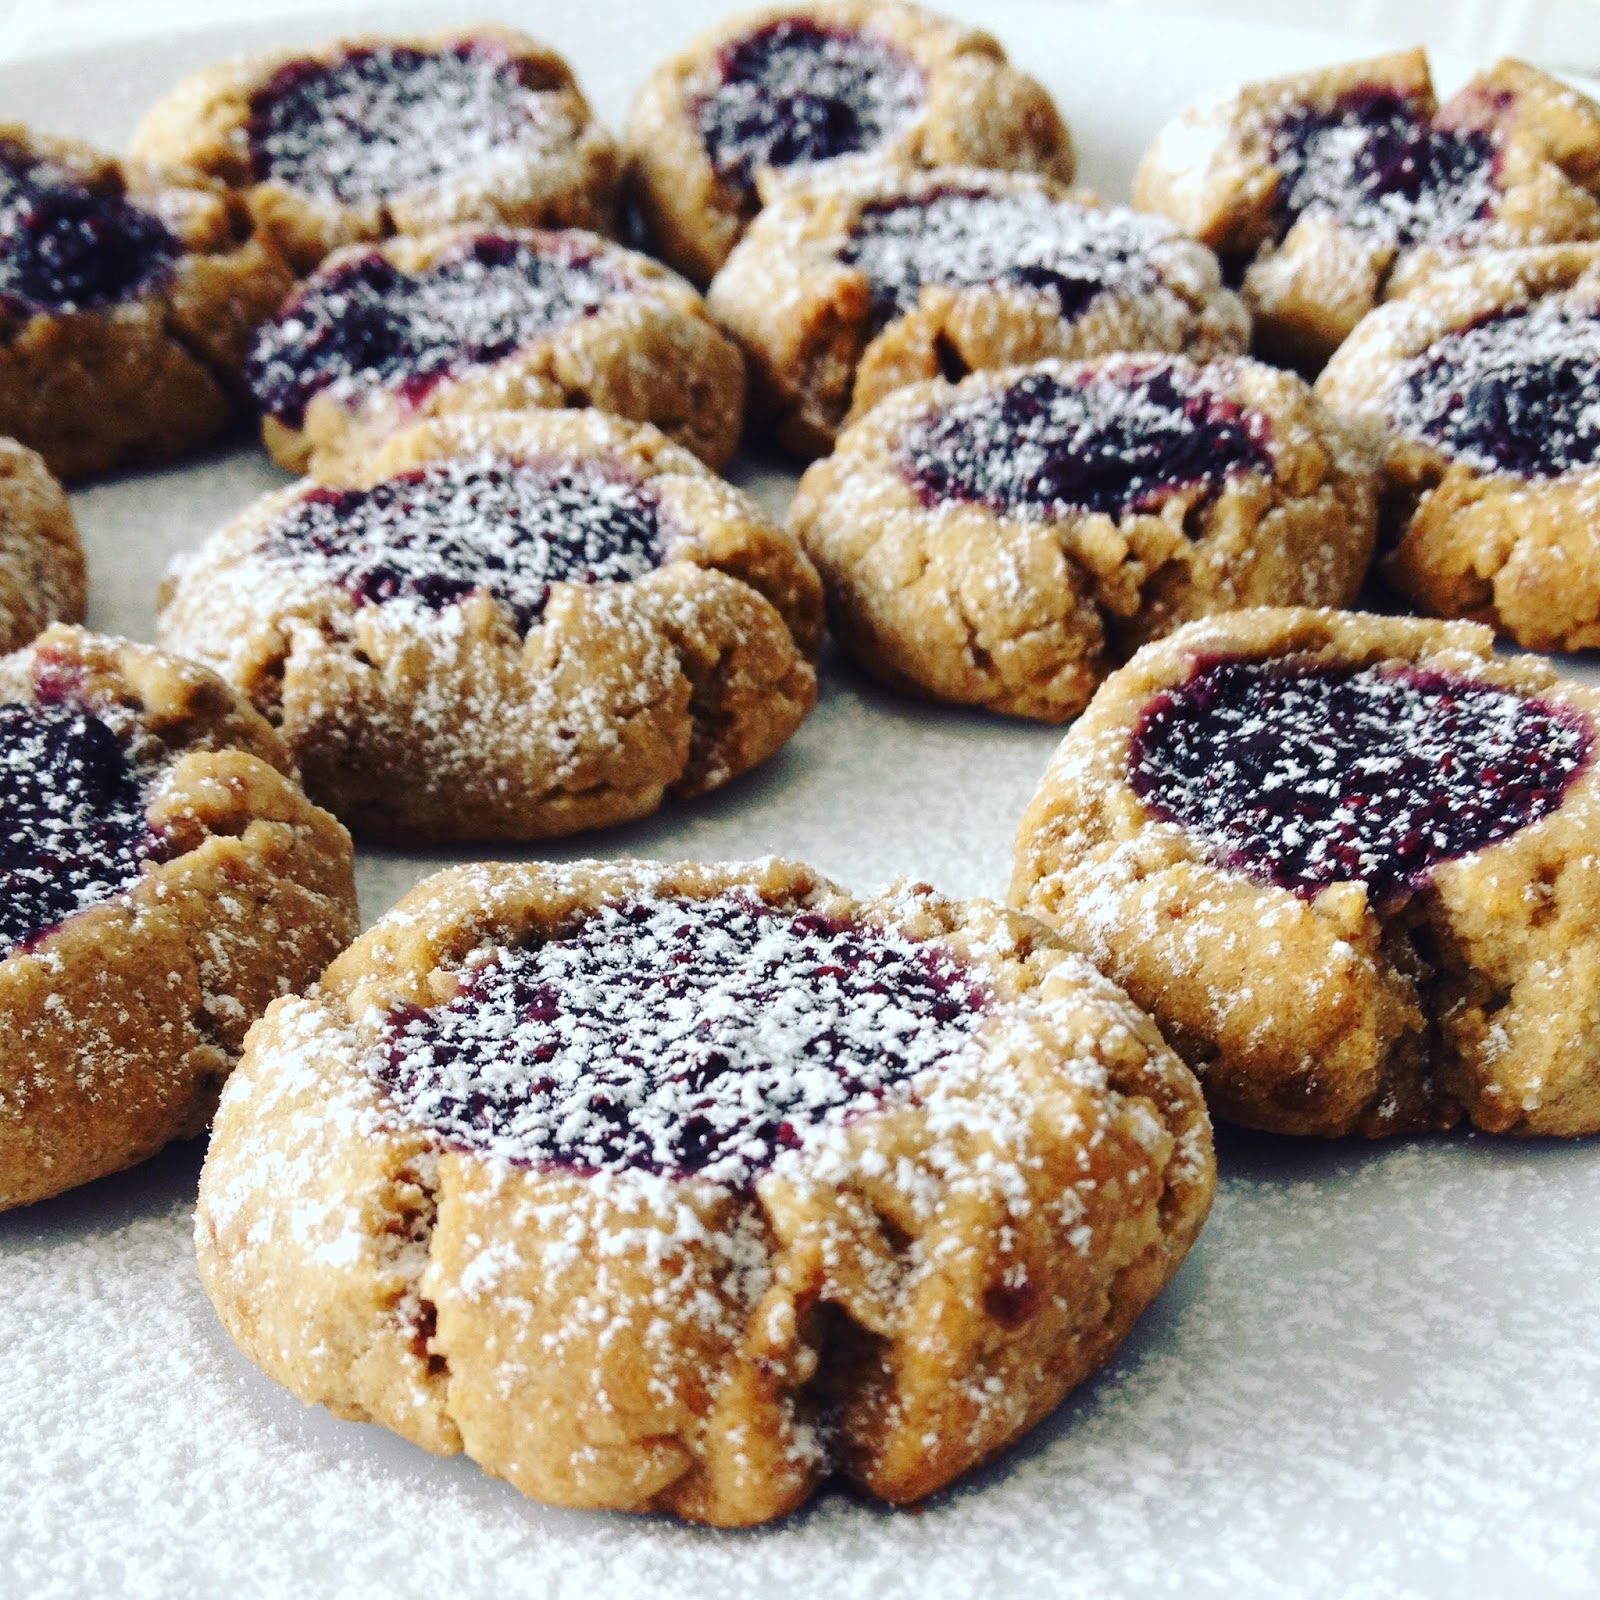
Berry Chia Jam Thumbprint Cookies

This is one feels like tradition to make around Christmas time. It must be because I grew up around an old family version with lots of butter and even cream cheese, but this one is allergy safe with no eggs, dairy or gluten, even can be without nuts or seeds too! I love how it is still soft and crispy and buttery and melts in your mouth. This version also uses my most favorite homemade jam- made with bluberries and chia seeds. It is just the perfect bite-sized piece of wonderfulness! The added sprinkling of powdered sugar matches the powdery stuff falling from the sky today. Warm, cozy and magical is the mood- these are a must to add to the holiday cookie platter- I promise!

Berry Chia Jam Thumbprint Cookie Recipe
{gluten, dairy, egg, soy, nut and seed-free options}

1 1/4 cup of finely ground gluten-free oat flour
3/4 cup of finely ground buckwheat flour
1 cup of white rice flour
1/2 cup of tapioca flour
2 TB of potato starch
1/2 cup of coconut palm sugar
1/2 ts. of baking powder
1 ts. of sea salt
1 ts. of baking soda
1 TB of apple cider vinegar
2 TB of maple syrup
1/2 cup of date paste puree

1 cup of oil: do a mix of either 1/2 cup coconut oil and palm oil shortening OR you could sub in 1/2 cup of your favorite nut or seed butter for the palm oil shortening. It adds a beloved flavor combo of PB and J kinda-touch.

I first blend up my own flours for the GF oats and buckwheat. Then in a large mixing bowl, add in all the dry ingredients first. Mix together well and then add in the wet and room temperature oils. Use a spatula to mix well, or your hands usually do the best trick at mixing equally. You want it to be soft but also all together so you can roll it into balls. It should leave a little oil to the touch on the hands. That is what makes it melt-in-your-mouth- buttery kind of texture too!

Once smoothly mixed, roll into a large ball and put in the fridge for 20 minutes to stiffen up Then pull out and roll large 1 TB-sized balls between your hands to make about 2 dozen cookie balls. Put onto a parchment covered baking sheet and then press your thumb firmly and evenly into each cookie ball. This will leave you a space to pour your jam into. Once 1 large spoonful of jam is entered into the thumb print space on the cookie- bake in a 350 degree oven for 12 minutes. Until golden and bottoms are browned- do not touch or move for another 15-20 minutes to help them from crumbling!
I used my favorite homemade berry jam as follows. If you want to make the full batch and have some more for bread and toast then YES make the full batch, but if you are looking to just make some for these cookies, half or cut the recipe by 2/3's so that you make 1/3 amount to top the cookies :) Here is the recipe for your enjoyment ;)

Immunity Boosting Berry Chia Jam Recipe

2 cups of frozen blueberries
2 cups of frozen cranberries or raspberries
2 cups of frozen strawberries
1 cup of very concentrated elderberry tea*
1/2 cup of juice (I used Antioxidant Force by Smart Juice) but you could use pomegranate or other no sugar fruit juice like cherry, berry mix, or grape. Or at the least you could use water as well.
2 TB of grated fresh ginger
1 organic orange grated for zest and squeezed for juice (could easily sub a lemon)
1/3 cup of pure raw honey
drizzle of maple syrup (or add 1/4 cup more of honey)
pinch of sea salt
pinch to 1 ts. of pumpkin pie spice blend
1/2 cup of whole chia seeds

*Soak 1/2 cup of dried elderberries in 1 quart jar of boiling water and let sit for overnight or longer and then drain the berries out and you have elderberry tea. You could also sub in some already made elderberry syrup if you used up your berries already making that and have it on hand- but you would only use 1/2 cup of the elderberry syrup and add 1/2 cup water. And since the honey is in the syrup as well you may decide to not add as much honey in the rest of the recipe. 

In a medium saucepan, pour in the 6 cups of frozen berries with the tea and the juice and let cook to defrost and get soft. Then add in the ginger and orange juice and zest and bring to a soft boil and bubble and cook from any where to 10-15 minutes until the berries are very hot, juicy and mushy. Then use an immersion blender to blend in half of the mixture to be more smooth and have less chunky fruit. After this it looks like a fruit soup. Then add in the honey and syrup and stir well while it softly bubbles and boils. Turn off the heat and then add in the chia seeds. Stir in well so not to be clumpy and then let it sit in the pan and cool and let the chia seeds soak up the moisture and turn into a thick jammy substance. When it cools for 10-15 minutes you can pour into jars to continue to cool and thicken in the fridge. This recipe makes 3 pint jars. You can half it if you are looking to make less or you can also freeze and then thaw out when needed.

Happy Christmas cookie baking (and jam making ;) I hope you are finding some space to enjoy the baking and make new memories and traditions with gluten-free versions of your favorites. 

Much love and light as always, xoxo
Thursday, September 21, 2017

Savory Pumpkin Seed Crackers

Sometimes you just need a nice... crunchy... salty... full-of-flavor snack, amiright?!? Why not make it packed full of protein, whole grains, minerals and so much good from the earth nutrition? Well this recipe is here to help you not be left out!
It is just nice by themselves, but you could easily make this to be the perfect match to any appetizer delite. Maybe hummus or salsa, or cut up fresh veg from the market or backyard. A nice little topper might be a cracker, hummus, a cucumber slice and a basil leaf. You can't go wrong with these! The added pumpkin and chia seeds are what give it the nutty flavor without the nuts and this is one recipe almost any allergen-striken friend can eat. I hope you give them a try and ENJOY!
Savory Pumpkin Seed Cracker Recipe
{gluten, dairy, soy, egg, nut and sugar-free}

1/2 cup of quinoa flour
1/2 cup of millet flour
1/2 cup of buckwheat flour
1/2 cup of garbanzo flour
1/2 cup of pumpkin seeds (pepitas)
1/3 cup of chia seeds
2 TB of olive oil
2 TB of date paste
2 TB of water
1 ts. of apple cider vinegar
1 ts. of ground rosemary powder
1 ts. of ground garlic powder
1 ts of dried onion powder
1-2 ts. of sea salt

extra flour for rolling out....
1/2 cup of GF oat flour

In a large mixing bowl, mix together all the flours and seeds and salt and seasoning. Then drizzle in the wet ingredients and use a spatula to mix it all together well. You will use another 1/2 cup of flour to roll out the sticky dough. I used GF oat flour, but you could use any of the abouve used flours too. Roll out with a rolling pin to around 1/2 inch thick. Then use a blade to cut the crackers BEFORE you bake them. I tried to cut a 2x2 square for the cracker and it made about 35-40 crackers. As you can see I did not cut very evenly- I was in the middle of a few other things and didn't focus on making it even. Still turned out fabuous and maybe I should just say I was going for the more "rustic" look anyways ;) 
Sprinkle a little extra salt before baking too.... then put in a 350 degree oven for 20-25 minutes until it gets crispy and golden brown. Let them cool completely before you eat one and this also helps them crisp up as well and get crunchy. 

Serve with hummus, salsa, veggies, even fruit, and can be used with soups, stews, and just about anything and everything. Once you try one, you will keep going back for more... I can almost promise you ;)

This recipe is especially for all my allergy-striken friends that long for a crunchy savory snack :) I hope you find ways to enjoy and nourish yourself through food, MUCH love as always, friends!

Monday, January 9, 2017

Overnight Soaked and Baked Oatmeal

Happy New Year! A week late ;) But still basking in the newness of January after the holidays. I'm not really a resolutions person lately. I think I was in the past for some years there. I think I want to believe that any day can be a FRESH NEW start even if it is a random day in the middle of the week with no holiday to celebrate. I think I know this after being through a plethora of my own setbacks, traumas, and new beginnings. Sometimes the event or day just happens. And sometimes, yes, you have to make it happen. So either way you have to find what would bring the best source of health and balance for you. So maybe it is resolutions and goals, or maybe it is a word for the year, or maybe a theme. I think all of those things are amazing. I love seeing a person grab onto something and make it a part of there life with passion and force. I've seen change happen this way. It is a powerful thing to watch and create.
So, here we are 2017- maybe you have been trying to set goals for healthy living and eating, and breathing and movement- or all of the above- I am there with you. I have been forcing myself to get some form of movement in every day. The treadmill, a yoga class, dancing. But for me it is just as much a help for my mental state as it is for my body- the mind-body-soul connection happening. This is a goal of mine I guess you could say.

And this recipe is here to help you on this journey. It is an easy make before bed and bake in the morning while you trying to get out the door or while you are spending some time on the mat or in meditation. This is a great choice to start out the day and it isn't super difficult to make it happen. I know this to be true about myself, that starting the day with a few simple positive choices, the whole day seems to stay focused. And being focused is where I want to be!
Overnight Soaked and Baked Oatmeal Recipe
{gluten, dairy, soy, egg and refined-sugar free}

2 1/2 cups of rolled GF oats
1/2 cup of chopped dates
1/4 cup of pure maple syrup
1/4 cup of coconut palm sugar
1 apple finely chopped (optional) (you could add other fruit)
1 ts of ground cinnamon
1/2 ts. of ground cardamom
1/2 ts. of ground ginger
pinch of nutmeg
pinch of cloves
2 cups of milk of choice (I used coconut milk beverage)
1/4 cup of ground flaxseed or chia seed

optional: sprinkle from frozen blueberries onto before soaking
optional #2: 1/4-1/2 cup sprinkle of roasted almonds or walnuts

In a mixing bowl, add all of the ingredients and stir together and then pour into a glass 9x9 pyrex pan.   You can sprinkle some frozen blueberries or nuts on top. It is very loose, but it will soak and sit overnight (or 3-4 hours works too) and then you can eat just like that, so to warm up put in a 350 degree oven for 25-30 minutes. Then scoop into bowls and serve with a an added drizzle of maple syrup, ghee, butter of choice and milk of choice. Or even a dollop of greek yogurt and a fresh fruit. 

This recipe fills a 9x9 pan, if you want to fill a 9x13 pan then add 1 more cup of oats and 1 more cup of milk, and additional dates, nuts and seeds of your preference. The dates add a caramelly taste and crunch to the dish to perfection.

This recipe is very similar to my Raw Breakfast Museli but this is a baked version to warm you well over the winter months with added spice and baking. 

Hope you are starting 2017 well. Don't give up and keep going...

Much love and light xoxo

Tuesday, March 24, 2015

Chocolate Cake Two Ways

                                       
What do you prefer? Sheet cake or cupcakes? Both are moist and delicious in their own special way. Both are delectably gluten-free and made with some of the best ingredients I can gather. Both will leave you oooing and ahhhhing and wanting more. You can eat them, dear gluten-free friend, and these recipes are just for you!
My wonderful mom is the mastermind behind the following chocolate sheet cake recipe. She and I go back and forth with sharing ideas with recipes and this one she has made again and again without fail. I caught on and have been making a version of this cake of my own. She has even made this recipe into other versions of pumpkin and banana cakes. I guess you now know where I get my creativity and determination at making good gluten-free baked goods. I truly believe there is something healing in making gluten-free baked goods for the gluten-free soul. It reminds you that you CAN eat something yummy and have not LOST it all when it comes to treats and desserts.

If you are new to the gluten-free baking world. My only advice is to "NOT GIVE UP!" It is not an easy transition. In fact it kind be somewhat traumatic. Or in the least it is a reminder of your health issues and what you have lost. I know. I've been there. But I have also been here where I am now, 9 years later. It gets easier. I promise. A good place to start is experimenting. If you find one or two good recipes that you and your family like then stick with those and don't try to go overboard. Keep it simple. This cake recipe is one of those recipes for me. It is a go-to, learn-it-well, and make-again-and-again recipe.  Thanks Mom for the recipe and well, for life :)


Mom's Chocolate Cake Recipe
1 1/2 cups of gluten-free flour blend (Mom uses NAMASTE perfect flour blend, but I have also used 1/2 cup of each rice flour, sorghum flour, and a tapioca or potato starch flour too.) Mixing your own flour omits the xanthan gum, and to be honest it is one of preference. If you dislike the "gummy-ness" of some gluten-free baked goods, then I would advise to mix your own GF flour blend without. But the Namaste flour mix is a good one for this cake because it is quite simple (and can be found at Costco!)

1/2 cup of cocoa powder
1 cup of coconut palm sugar
2 teaspoons of baking powder (I use HAIN brand so there is no corn product in it)
1 ts. of sea salt
1 ts. of baking soda

1 cup of baking oil (warmed coconut oil or grapeseed or light olive oil)
1 3/4 unsweetened applesauce (homemade or store bought both work)
1 TB of pure vanilla extract
2/3 cup of pure maple syrup
4 room temperature fresh eggs

In a large large mixing bowl, whisk eggs, then add the rest of the wet ingredients and slowly add the mixed dry ingredients until all is mixed well with no lumps. Then pour cake batter into a well coconut-oil greased 9x13 baking dish. Bake in a preheated 350 degree oven for 45 minutes. Make sure the cake is done by testing the middles of the cake with a toothpick. Let cool for a few hours before frosting.
Second way to make cake is by cupcakes of course! A fun and cute way to get everyone a slice without using a knife. This recipe was a conversion of a regular gluten recipe that turned out wonderfully and recently had the honor of making them for a baby shower.

This recipe would be easier to convert the real eggs for chia-seed gel "eggs" instead. The above sheet cake recipe is pretty dependent on the eggs for a good cake. But cupcakes are a little easier to switch to a vegan cake version. So I would suggest that if you are looking for a vegan chocolate cake recipe to so with cupcakes first few times around before you get better with baking without eggs and gluten.
This recipe is a little more complicated with a few different mixing bowls, but that is the nature of GF baking sometimes... like a science lab, except you can lick the spoon :)

Chocolate Cupcakes
1 cup of cocoa powder
1 3/4 cup of GF flour blend (Namaste blend works here too) But I like to mix 3/4 cup of rice flour, 3/4 cup of sweet sorghum flour and 1/4-1/3 cup of tapioca (or potato) starch flour.
1 ts. of baking soda
2 ts. of baking powder
1 ts. of sea salt

2 cups of coconut palm sugar
1/2 cup of melted Enjoy Life chocolate chips with 1/4 cup of coconut cream from the can
1 cup of coconut milk beverage mixed with 1 TB of apple cider vinegar
2/3 cup of melted coconut oil
2 TB of pure vanilla
4 fresh eggs (or grind chia seeds and mix 4 TB ground chia seeds with 1 cup of water and let sit for a few minutes to make a gel)

So first, you will mix all of the dry ingredients in a large mixing bowl, set aside. Then put the chocolate chips and coconut cream in a small saucepan and melt until a chocolate sauce has formed. Then in a separate mixing bowl, let the coconut milk beverage and apple cider vinegar mix together and make a buttermilk mixture. Lastly, if you are attempting a vegan cupcake, then mix the finely ground chia seeds with water and let that sit as well for a few minutes to make a chia-gel. Then you are ready to pour in all together. First mix the sugar and the rest of the wet ingredients together... then add the flour mixture slowly. You should end up with a frothy and creamy cake batter to pour into cupcake papers. Fill cupcake tins 3/4 way full. This recipe makes 18 cupcakes and then bake in a preheated 350 degree oven for 22-25 minutes. Cool for at least an hour before frosting. 

Chocolate Frosting
1/2 cup of pure local honey
1/2 cup of cocoa powder

You can also sub the shortening for grass-fed butter or your favorite vegan butter. You can easily double or half this recipe if needed. I have made this recipe a few times with vegan butter and it works fine, but if you use the shortening then you have a version that is more stiff and easier to use for transporting cakes if need be. I used this frosting recipe on both of the above cake recipes. Perfect every time. ENJOY!

Much love to you and may you find hope in the kitchen. xo

Saturday, March 23, 2013

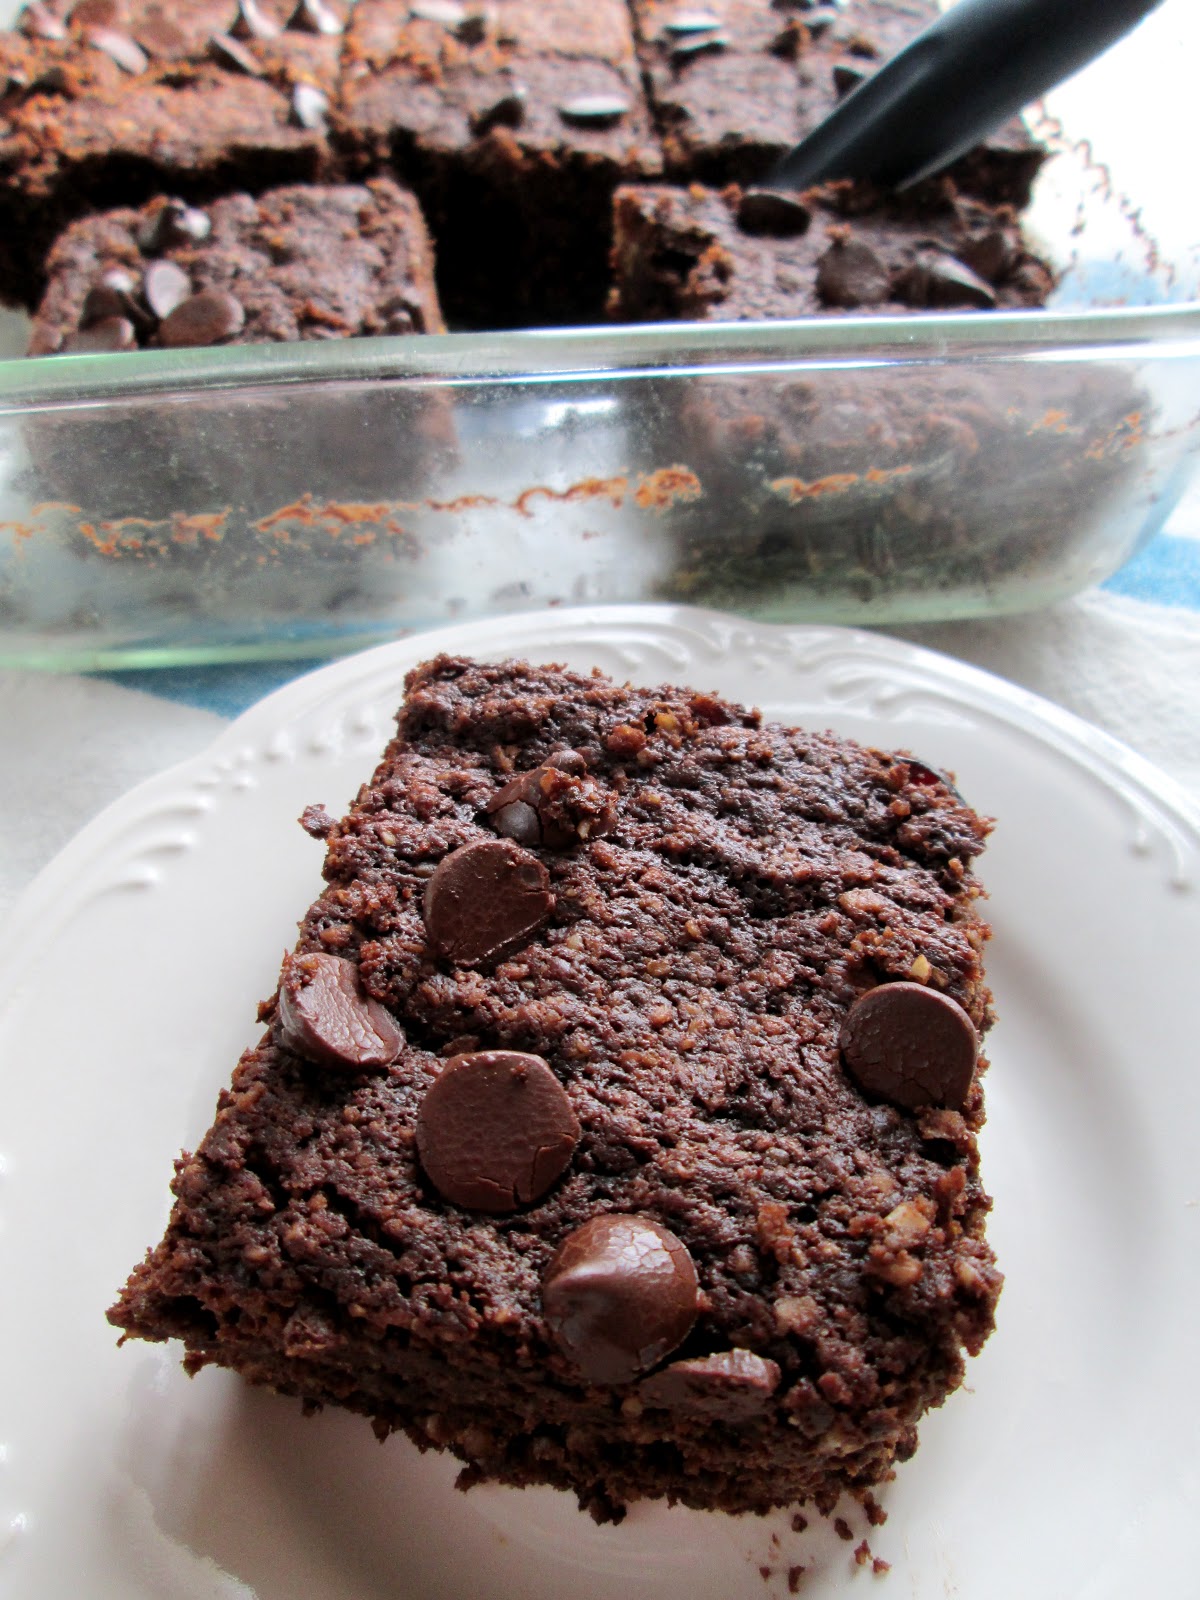
Chocolate Cherry Brownies a.k.a. Healthnut Brownies

Ya know, healthy people like us, like brownies too. Especially while pregnant! Health-nuts. Health-junkies. The weirdos. You know who I am talking about. Always excited to talk about some great recipes using chia seeds or some other super food. Admit it, you are one of "them". I find myself in this category most of the time. And sometimes I shy away and pretend I'm "normal", but in the end, all that know me well know that I will probably be subbing something in some "regular" recipe to be healthier. And my version may sometimes taste a little a off from the sugar packed artificial junk, but I try to make it always worth eating and enjoying!
This may be considered a "problem". But I like to think of it as a condition of the personality. 

I just wouldn't be me if I tried to follow a recipe from beginning to end. I've been doing this since I was a young child and started experimenting in the kitchen.    

It's ok. I've embraced this "condition" I have, and thankfully my family hasn't asked for anything different.....yet. And, it also makes it easy to justify a treat when you know it has so many healthy ingredients in it. 

I saw a recipe in a contemporary health magazine as I was waiting for a recent doctor appointment. It actually sounded pretty healthy with the use of real ingredients and even oat flour. But of course not gluten, dairy or sugar-free. I thought why couldn't I make that gluten-free and why couldn't I make that healthier.
So that is just what I have done. And, I haven't been doing a ton of experimenting over here. I have been enjoying some spring green smoothies, peppermint patties, and date donuts a lot the last month and still waiting for the cold and snowy days to turn to more spring-like occurrences. I think we still may have a few more weeks of the white stuff and cold. I think I can finally say with confidence I am ready for spring, and this baby to be born. I have just under 8 weeks to go to d-day and couldn't be more excited and full of anticipation.
So I guess the waiting leaves me baking yet again. I have a few cakes and goodies up my sleeve for this spring's birthdays, showers and celebrations, so I hope to be able to share those soon. In the meantime, enjoying simplicity in the kitchen and planning more for what the next few months will hold has been capturing my time. Not to mention a very busy 2 1/2 year old that likes to refer to me as "superman Momma" and I him as "Superman Boy" So yeah, there's that. A boost of confidence from a very little person that thinks he can fly if you tie a towel around his back.
Hope you are having an exciting spring so far...the anticipation for the season of newness and resurrection is positively in the air. Don't shy away, embrace it and enjoy each step (or new bite!) .

Cherry Oat Brownie Recipe AKA Healthnut Brownies
{gluten, dairy, vegan, and nut-option-free}
1 cup of finely ground gluten free oat flour*
(Or you can sub the 1 cup of flour here for 1/2 ground buckwheat and 1/2 oat)
1/2 cup of tapioca flour
1/3 cup raw cocoa powder
1/2 ts. of baking powder
1/2 ts. sea salt
1 ts. of pure vanilla
2 TB of pure honey (or agave nectar or coconut nectar to stay vegan)
2/3 cup of coconut palm sugar ( I use Madhava)
1/4 cup of brewed rich coffee (I use decaf)
1/4 cup of non-dairy milk (I use So Delicious coconut)
1/4 cup of chia gel eggs-2 TB of chia meal mixed with 4 TB of water, left to gel (or 2 fresh eggs)

6 TB of organic E.V.coconut oil
1 cup of dairy-free or vegan chocolate chips

1/2 cup of juice-sweetened dried cherries
optional nut addition: 1/3 cup of chopped almonds or pecans
1/4 cup or a handful of chocolate chis to sprinkle on top of brownies pre-bake

*I grind my own GF flours in my high powered blender. So I blend just under 1 cup of gluten-free rolled oats to make 1 cup of flour and the same goes for making fresh ground buckwheat flour with raw buckwheat groats. These fresh flours make the BEST GF baked goods because they have the best flavor, textures and use of natural oils and benefits. 

In a large mixing bowl, mix all of the dry ingredients first, then in a glass bowl over a double boiler, melt the chocolate chips with the coconut oil. Then mix in the melted chocolate and oil with the rest of the dry ingredients and all the rest of the wet ingredients. Mix everything together well and then add your cherries and possible nuts. Spread in a 8x8 greased coconut oil pan and then top with a handful of chocolate chips and more cherries and nuts too if you prefer lots of crunchy goodness. 

Bake in a 350 preheated degree oven for 25-30 minutes until it has popped and it's stiff. Pull from oven and let cool for 30-60 minutes before cutting so that it can settle and be more gooey and chewy when done.  Cut either 3x3 or 4x4 to come up with 9 or 12 brownies total. Serve warm or whenever with your favorite cup of cold non-dairy milk and/or tea, coffee, hot cocoa or whatever you love to mix your brownies with.

ENJOY!

Much love as always.....

Thursday, February 7, 2013

Date-Sweetened Chocolate Donuts

Hello sweet delectable chocolate donuts! So good without toxic sugar and nothing fake or horrible for you in these sweeties either. Dates are the reason behind their great flavor and perfect sweetness and texture. Dates have become one of my most favorite additions to gluten-free baking. They add moisture, texture, and nutrition to your efforts to make a baked good that doesn't crumble like sand or feel like a gummy mess. 
Dates are also a little food that I have on my mind and will especially be on my plate for the next few months as well. Since I read this study about dates for the last few months of pregnancy, and have to think that it wouldn't hurt to eat more dates if it helps me try for a better delivery with baby #2. It may be just one of those "health foods" that makes you "feel" better about yourself for consuming, but I say it can't hurt to try and have less pain in childbirth, can it?!
I have been making these sweet donuts for a while now and just haven't posted the recipe. Seems about time since Valentine's Day is around the corner and finding special chocolate treats is part of the fun. I have made these donuts without the bit of coconut sugar in the past, and I have also played around with the flour combos. I will list some of the subs at the end of the recipe. Either way, these babies are so worth the time and purchase of a donut pan. Seriously. It really helps a gluten-free friend feel like missing out on trips to the bakery a thing of the past. These donuts may just help your grieving gluten heart move on....just maybe.... 
Just maybe you can let the healing of eating gluten-free sink into your whole being. You need to love your body for it to love you back. You can expect adding gluten-poison and crap to your being will allow you to just function normally. Yes, I am talking to all you Celiacs out there, but also those of you that have noticed how wheat and gluten causes you to have pain, anxiety and in general troubles. Don't let yourself justify cheats and treats. You have to make an effort and in the end I know the grieving process takes time, but you must know that there is hope in the journey as well. Let yourself be your own valentine and make it these sweet treats. You won't regret it!
Date-Sweetened Chocolate Donut Recipe
{gluten, nut, dairy and refined sugar-free, vegan options}

1 cup of packed, chopped, pitted dates
1 cup of chocolate chips (I prefer high cacao content and no dairy/ or fake stuff in them)
1 1/4 cup of boiling water

Chop the pitted dates to a packed 1 cup amount and put in a blender (or magic bullet) with 1 cup dark chocolate chips and boiling water for at least 20 minutes, or until the water is cooled. You can soak for longer, but at least soak for 20 minutes to soften the dates. Then blend mix in the blender or magic bullet until it is a liquified mixture that resembles pudding or a thick chocolate smoothie. It should add up to close to 2 cups of mixture after blended. Then add it to the rest of the better when the following is mixed well together...

1/2 cup of tapioca flour
1/2 cup of millet flour
1/2 cup of brown rice flour
1/2 cup of coconut flour
1 1/2 ts. of baking powder
1 ts. of baking soda
1/2 ts. of sea salt
dash of cinnamon or nutmeg
1/4 cup of cocoa powder
1/4 cup of coconut palm sugar
1/3 cup of chia gel  (1 TB of chia meal + 2 TB of water)
1/3 cup of melted organic coconut oil (+ more for greasing pan)
1/3 cup of coconut milk beverage (I used So Delicious)

In a large bowl, mix all of the dry ingredients together first, then add the wet with the blended date mixture, chia gel and the rest of the wet ingredients. Mix well  all together and then let sit for a few minutes for the batter to come together. Then use a rubber spatula to pour the batter in a gallon-sized zip lock bag. Make sure to get all of the air out and then press the bag shut and the batter to the bottom of the bag. Then use a kitchen scissors and cut a 1-2 inch slit off one of the bottom corners of the bag. Then in a non-stick donut baking pan-I have a Wilton's brand pan. (I also coat mine with some coconut oil), squeeze out the batter into the donut sized holes in the pan. Fill the batter to the tops of the holes and then bake in a 350 degree oven for 22-25 minutes, until the donuts rise and are stiff. This recipe will make 12-15 large donuts, or 24 smaller mini-donuts. Pull donuts from the pan when they have cooled for at least 5 minutes, then pull donuts from pan and continue to let cool on a cooling rack or plate.

Baking Notes:
*I have omitted the coconut sugar before to have just dates and it turns out, just a bit less sweet. Also, if you avoiding sugars all together then you will want to stay away even from the chcolate chips because the ones I use contain a little amount of sugar.

*I like to use dark chocolate chips (70% cacao and no dairy)

*I have used a gluten-free flour blend for this recipe as well, and you can sub all the flours except the coconut flour for a mix. I would just use like 1/4 cup less to start and see how think the mix makes your batter. Just because some mixes contain a lot of starch and even gums sometimes. I like using Bob's Red Mill all-purpose flour best for this recipe. Too start, I would use 1 1/4 cup of Bob's mix in place of the tapioca, millet and brown rice. And have 1/4 cup more flour on hand if it seems too sticky.

When the donuts are cooled you will want to pick a frosting or make a few of each as I did :)

Chocolate glaze:
1/3 cup of chocolate chips melted with 1 TB of coconut oil

Melt the chips in a glass boil and coconut oil over a double boiler, or for 33 seconds in the microwave. Stir til melted and a thick chocolate glaze. Then drizzle or coat the donuts how you want. If you want the glaze to harden quickly, then put the donuts on a try in the fridge or freezer and within minutes your glaze will be stiff and not wet and messy.

Sunbutter frosting:
1/4 cup of sunbutter (I used SunButter or can use other favorite nut butter)
1/4 cup of room temperature organic coconut oil
1-2 TB of raw honey (or use agave or coconut nectar for vegan option)

I especially love this frosting because I have been over-eating and craving sunflower butter this whole pregnancy. Must be all the folate and vitamins in it! You can mix almost equal parts to the honey, sunbutter and coconut oil to whisk into a thick frosting. Then I add it to a piping frosting bag with a decorative tip and put the frosting on the donuts with whatever fancy idea you got. The above amount should make enough for about 6-8 donuts depending on how much you put on. But you can easily half/double the amount to make more or less if you prefer. 

If you don't have a donut baking pan, I say this recipe is enough to go invest in one. I used Wilton's and love it. Plus, baked cakey donuts are superb and you won't be wishing for the greasy fried counterpart.

I hope you enjoy!

Much love to you and your body as always!

Tuesday, January 15, 2013

Oatmeal Chia Bread

About this time every year, I start dreaming and trying to make lovely loaves of bread to eat with comforting bowls of soup. Or just to have around as a lunch or snack topped with sunflower seed butter and homemade pear butter or whatever fruit and nut you like. It's funny because when I looked back the past 3 years I have posted some form of "protein" bread in January, so I guess my instinct for bread making in January cannot be denied. This bread is no different. It is full of whole grain goodness and protein along with a hefty helping of chia seed meal to make it full of fiber, antioxidants and even more protein.
There is something about making your own bread as a gluten-free lady that makes you feel like you conquered some law of science that said it can't be done. It isn't easy, but it can be done and this one is also done without yeast, eggs, dairy and any kind of gummy addition, which is also a challenge these days. Regardless if you have failed before in the GF bread baking dept. I challenge you to try again and try and make it interesting and not always compare it to the bread from Italy, France or gourmet local bakery. Because we all know that you just can't completely compare, you are using different flours and how could you come up with the same exact result, right?! The goal is to find a bread that makes you feel like you are not settling, one that you really can say you love and that the best part is it is gluten-free.
I do have some days where I just want to stroll along the brickroad street and pick up a hearty loaf of goodness from the local baker. Especially after living over seas in the Middle East and seeing parts of Europe it seems a special simple novelty that should happen on a daily basis. I haven't found a local gluten-free bakery yet here in Grand Rapids that offers that same feel, and have only experienced once or twice in other cities while traveling. So instead of mopping and crying about it, why don't you try and make a loaf yourself. It does take some patience, and possibly some skill, but when you complete it the result is something of a feeling of accomplishment that you can only sense ever so often. Like building something from nothing or finishing a race worth running.
It is worth it. But don't take my word for it, try it out and see what happens. I bet it may not be perfect or what you intended, but just trying it will help you see that it is possible and you may find yourself trying again to perfect a recipe or try new recipes as well. I made this loaf last week to get through another gloomy day here in Michigan. Where is the snow people?! At least  if the grey was covered in white I think I could feel more romantic about winter.
In the meantime, I will be coping with some fresh homemade bread a pot of homemade soup and possible a book late into the evening. I think it is the only way to really feel the rest that winter intends for us. I hope you are finding new hopes this 2013!

Oatmeal Chia Bread Recipe
[gluten-free, vegan, nut-free and yeast and gum free]

2/3 cup of freshly ground buckwheat flour
1/2 cup of organic millet flour
1/2 cup of tapioca flour
1/2 cup of organic brown rice flour
1/2 cup of chia seed meal
1/4 cup of coconut sugar
1 1/2 ts. of baking powder
1/2 ts. of baking soda
1/2 ts. of sea salt
1/3 cup of olive or grapeseed oil
1/4 cup of blackstrap molasses

In a large mixing bowl, blend all of the gluten-free flours together with a whisk and then with the rest of the dry ingredients. You can add the oil and molasses in a pool in the middle of the dry. Then pour in the following mixture after it has sat for 5 minutes.

Separate wet ingredients:
1 cup of gluten-free rolled oats
2/3 cup of coconut milk beverage (I used So Delicious. Or sub other dairy-free milk)
1-2 TB of lemon juice
1 1/4 cup of boiling water

In a small glass bowl, pour the boiling water over the dry oats and then add the milk and lemon as well. Let it sit for 5 minutes or so to get soft and have the milk and lemon culture just a bit. Then add it to the above mixture of ingredients. Mix well and then let the batter sit for 5-10 minutes for the flours and chia to soak up the moisture and become more thick. Then grease a bread pan with coconut oil and a gluten-free flour. Pour the batter into the bread pan and smooth over like a quick bread and then top with some more flour, gluten-free oats or seed of choice.

Bake in a preheated 350 degree oven for 45-50 minutes until the bread crust is hard on top and the middle of the bread is NOT gooey to the toothpick test.

Pull from oven and let cool for 15-20 minutes before sliding from pan and continuing to let cool on a bread or cookie cooling rack. When mostly cool, then you can use a bread knife and slice thin or thick slicing depending on your preference. This bread stays well for 3 days and is great toasted the next day in a toaster oven to warm up and spread some of your favorite toast goodness on top.

Enjoy!

Much love to you and may you find rest and peace today!

Wednesday, July 11, 2012

Blueberry Zucchini Oat Muffins

I love how blueberries and zucchini are perfect for the picking about the same time every summer. And that is how this muffin recently came into existence. I just harvested my first zucchinis from the garden this week and with pounds of fresh and delicious blueberries just waiting to be eaten.... I couldn't resist.  
It also doesn't hurt that these muffins are as hearty as a bowl of oatmeal and full of enough fruits and veggies to make a snack or your breakfast worth the eating. They are moist and fresh and wonderful for the many busy days in the garden, at the beach or whatever summer fun you find yourself enjoying.
 
If you haven't guessed already, I am all about baking whole grain gluten-free goodies. And this muffin easily fits the bill. It is simple, uses only certified gluten free oats as the flour base and it is moist, chewy and everything a whole grain muffin should be. I even sneaked one with a little decaf coffee. I know, so scandalous for this reverent tea drinker. But, what's a girl to do with a hearty healthy muffin?
Blueberry Zucchini Oat Muffin Recipe
(gluten, dairy, soy, nut and egg-free)
1 cup of certified gluten-free rolled oats
2 cups of certified gluten-free oat flour
(I grind rolled 2 cups of GF oats in high powdered blender to make my own fresh flour)
2 TB of chia seed meal
1 ts. of baking powder
1 ts. of baking soda
1 ts. of sea salt
1 ts. of ground cinnamon
1 1/2 cup of freshly grated zucchini
1 cup of coconut milk beverage (I used So Delicious Dairy Free) (or other non-dairy milk) mixed with
         +2 TB of fresh lemon juice to make a "buttermilk mixture"
1/3 cup of liquefied extra virgin coconut oil
1/3 cup of local honey or maple syrup

1 heaping cup of fresh (or frozen) blueberries

In a large mixing bowl, add the rolled oats and freshly ground oat flour. Then add the rest of the dry ingredients and mix well together. Mix the coconut milk and lemon separately in a bowl and let sit for 5 minutes, and then add the milk mixture along with all the other wet ingredients. Lastly fold in the fresh blueberries and try and avoid blueberry bleeding. Mix well and let sit for a few minutes for the mixture to soak up the moisture and set well. Then use a 1/3 cup measuring cup and ladle in the batter into a muffin tins. Use muffin papers if you prefer. This recipe will make 12 large muffins or 15 small muffins. Then bake the muffins in a preheated 350 degree oven for 35 minutes or until golden brown and no gooey middles.
I have made this recipe a few times and have found that the muffins taste best when you eat them after letting them cool for at least 30 minutes. That gives them time to sit, completely bake and cool a little before eating. You could also bake them at night and let them cool overnight for a quick and easy breakfast in the morning.
That is what I did a few days ago and my son woke me up early the next morning and surprised me by eating 2 muffins all by himself. I guess he knows what's good around here, huh.
I am pretty sure those chubby toddler fingers are being used for much more good than trouble here. I couldn't resist letting him go all out and stuff his cute little face!

I hope you are staying cool and finding joy and fun wherever it may be lurking this summer!

Much love, as always!

Tuesday, May 22, 2012

Double Dark Chocolate Raspberry Namaste Cupcakes (gluten-free, vegan)

Well, you may think I almost forgot about these... Sorry, I have been busy away from baking the past few days. Been busy with the garden and planting. Which is totally worth the break. I even feel like playing in the dirt reminds me a lot of playing in the kitchen. Obviously, mixing up some delectable cupcakes is much different than dirt! But, there is something very life giving to get your hands dirty and create good food, even in the plant form!
So cupcakes... :) Need I say more...oh yeah....
double...dark chocolate...cupcakes...:) with raspberries too...
This is my last Namaste cupcake recipe for a while, and I have enjoyed playing around with their mixes. (Here are two other recent recipe posts using their mixes). Keep up with Namaste's mixes and recipes on their facebook page, HERE. Namaste's mixes are super easy to use and seem to always turn out great. I wanted to make a chocolate chocolate variety with lots of raspberry goodness. So, here is my latest take on a very delicious and tempting cupcake that will have you blushing at it's beauty, and then there's that first bite that will leave you spinning.
Double Dark Chocolate Raspberry Namaste Cupcake Recipe 
(gluten-free, vegan)
3 chia gel eggs (3 TB of chia seed meal mixed with 9 TB of pure water in separate bowl)
        *or use 3 farm fresh eggs if you prefer*
3/4 cup of melted organic extra virgin coconut oil
1 cup of pure water
a heaping 1/2 cup of fresh raspberry puree

Mix all of the above ingredients in a large mixing bowl. Make sure all is thoroughly mixed and then pour into muffin/cupcake tins. This recipe should make 12-16 cupcakes depending on how high you fill the cups. I recommend about 3/4 way full to get a nice big cupcake.

Bake in a preheated 350 degree oven for 25 minutes. Let cool completely on cooling rack before frosting. It will be at least 1-2 hours before they are completely cool. Then top with your favorite vegan chocolate frosting a few of mine are listed below...
Vegan Chocolate Frosting Recipe
2 cups of organic powdered sugar
1/3-1/2 cup of Spectrum Organic Palm Oil Shortening
1 ounce of completely melted dark chocolate 
2-3 TB of cocoa powder
splash of 
splash to 1 TB of non-dairy milk if you need it to soften up a touch

Put all of the above ingredients in a bowl and use a electric mixer to whisk up until it turns into a creamy frosting. Then top your cupcakes or use a Wilton Decorating tip and bag to make it extra fancy. 

Then top with some shaved dark chocolate (use a potato peeler on a dark chocolate candy bar) and fresh raspberries. 

Or, here is a refined sugar free frosting recipe I love too...

Honey Chocolate Frosting Recipe
1/3 cup of raw local honey
1/4 cup of extra virgin organic room temperature coconut oil
1/3 cup of Spectrum Organic Palm Oil Shortening
2-3 TB of cocoa powder
splash of pure vanilla extract 

Whisk up the above ingredients until it turns into a thick frosting. This honey frosting is a bit more soft so you may want to keep that in mind if you want a more stiff frosting for decorating. Then follow the same above instructions for topping your cupcakes.
There you have it! A perfect vegan, gluten-free cupcake that will have you lost in love. It is so good and super easy too! BUT, if you are looking for someone to make these sweet little cakes up for you or a special event, please let me know and I will make it happen. Hire me to make your gluten-free party treats great! I would love it!

And, in the meantime I have to get back to the sunshine.... and some summer sun tea. So good!

Much love as always...

Disclaimer: Namaste Food Co. donated the cake mixes for this baking adventure, but they did not give me any monetary reward for stating my review or opinion. My opinion is purely my own and would be completely willing to share that with any one who asks :)

Wednesday, May 16, 2012

Strawberry Shortcake Namaste Cupcakes

As promised, a recipe for strawberry shortcake cupcakes. Viola! This recipe is a super simple recipe for any gluten-free friend, but especially for the beginner because it uses the fabulous Namaste Vanilla Cake Mix as the main base ingredient. Who can resist a sweet strawberry treat this time of year?! Not me!
Pretty in pink and perfect for an early summer treat. Or perhaps this is just the gluten-free treat you are looking for that Memorial Day celebration coming up in a few weeks. 'Wow' your friends and family with a special treat like this and I promise you will be every one's new [gluten-free vegan] best friend. In my last post I mentioned some of the great reasons why I would choose Namaste Food's Cake mixes to make some quick cupcakes, but did I mention that the mixes are also budget friendly too?!

When you compare it to all of the costs of mixing your own GF flours for a one-time event it really is a bargain. You really get a lot for your money spent and plus there is the guarantee that it will taste good (and let's face it, when you experiment with flour mixing you can never be completely sure you are going to succeed!) Yes, I do like to bake gluten-free cupcakes from scratch most of the time, but every now and then it is nice to create a clever treat like this and make it quickly with ease.
Then you can have the most fun in the decorating process and forget the stress in baking in the first place. And working with gorgeous red strawberries makes is really really easy! Hmmmm, love at first sight! Am I right?!
Strawberry Shortcake Namaste Cupcakes 
(gluten-free, vegan)
1 package Vanilla Cake Mix from Namaste Foods
2/3 cup of pure water
1/3 cup of freshly squeezed lemon juice
optional: lemon zest from 1 lemon
3/4 cup of melted extra virgin organic coconut oil
3 chia-gel eggs (3 TB of ground chia seed meal plus 9 TB of water whisked together in separate bowl)

Mix the above ingredients in a large mixing bowl. Then let sit for a minute to let the chia eggs gel into the rest of the batter. Pour the batter into cupcake liners in a cupcake tin. Fill liners 2/3's full and you will get about 16 cupcakes. 

*NOTE* If you want to use eggs, then sub the chia gel eggs, for 3 eggs and your batter may make a few more cupcakes than 16. I have made this recipe with and without eggs, and the final product is very close to the same!

Bake in a 350 degree oven for 25 minutes and check to see that they are baked through and not gooey with a tooth pick. Then pull from the oven and let them cool on a cooling rack or counter. Let the cakes completely cool before frosting (1-2 hours). This recipe will make between 16-20 cupcakes depending on your size.
Vegan Strawberry Cream Frosting Recipe
2-3 TB of fresh strawberry puree 
1 ts. of pure vanilla extract
fresh, washed and dried strawberries for topping

Use a hand held mixer to blend up the frosting and make it smooth, then pour it into a frosting bag with a Wilton decorating tip if you want to go all fancy. Then top with a slice or half of a fresh washed and dried strawberry. Then viola, you have some pretty tasty strawberry cupcakes.

If you want to avoid powdered sugar you can use a honey-based frosting here, and just switch out the raspberry puree for strawberry puree. Just remember that using raw local honey will make your cupcakes no longer vegan. 
P.S.
I hope you try your hand at making some gluten-free cupcakes, especially as easy as these. And, if for some reason you rather have someone like me do the job for you (and you live locally!) I would love to make some cupcakes or cake for your special birthday, gathering or party. Really! I am starting to do this more and more and have been loving it. So if you or a friend is interested in hiring me for your gluten-free cake or cupcakes for your special event, then please let me know! I would love to do the job!

Disclaimer: Namaste Food Co. donated the cake mixes for this baking adventure, but they did not give me any monetary reward for stating my review or opinion. My opinion is purely my own and would be completely willing to share that with any one who asks :)

Much love [and cupcakes] to you as always!