Showing posts with label 2015. Show all posts

Sunday, May 31, 2015

Israeli Salad


Ahh, spring...fresh garden greens...plants...and flowers everywhere! A happy happy time of year :)

This past weekend I enjoyed a fun visit to my local farmer's market. All visits end with a healthy dose of happiness just soaking in all the fresh vegetables, flowers, fruits and such. This last visit my daughter caught eye of a baby honey bear and it was just too cute to pass up. So yeah, I had a two year old dipping her adorable fingers into a honey bottle and loving every second.
Here is some of my pickings. I actually bought almost double of all of the above because let's be honest this will only last till the end of the weekend. Especially after making this lovely simple salad. Fresh, simple, cheap and fabulous all summer long. Not to mention all the vitamins and nutrients... 
The cucumbers, tomatoes and parsley all came from one of my favorite farms at the market. If you are local, check out Real Food Farms at Fulton Market in Grand Rapids. They have the best, I mean the best cucumbers ever! They grow in greenhouses and the cucumbers and tomatoes that you can buy now instead of in August are so mouth-watering-amazing this time of year. The crunch and sweetness are seriously unexplainable wonderfulness.
This salad is so simple that it doesn't really need a recipe. Mainly the few needed ingredients and just making sure you have a great balance of cucumbers and tomatoes. It takes a little bit of chopping, but that's most of the fun so don't be stressed. Set up your chopping station and enjoy the colors, smells and wonderfulness of fresh local food!

This time as I was chopping I couldn't help reminiscing on my life 10 years ago this week. My husband and I were packing up our lives and heading to the other side of the globe. We moved to Jerusalem, Israel of all places and this salad only brings back intense memories. Everywhere we went we ate this salad, along with loads of fresh hummus and pita. After a few weeks, we finally learned our way around the markets and bought all of the below ingredients in bulk and made salad all-the-day-long. It was so delicious I can honestly say I never tired of such meals of hummus, pita (pre-GF- days :), salad and sometimes schwarma or falafel. The foods of the Jerusalem have a special place in my heart thats' for sure.
This salad is all about balance. You can basically make it without a recipe (or shrink or double) if you put in equal parts of the cucumber and tomatoes, the parsley and onion, and the lemon and olive oil. It can be as simple as you want it, or add other herbs, garlic, or spice if you want. It is surprising though how wonderful a few simple ingredients and the simple dressing can make an amazing combo.
Some dear friends, invited us for dinner and they served this amazing chicken dish.  This salad is the perfect pair for this dish. And I will tell you that I will be most likely be making this once, if not more, a week this summer while the fresh ingredients are bountiful. Recipes like this make it easy to be gluten-free, and even lots of allergens-free. It is great for kids and big gatherings too. I love and hoard recipes like this!
So, I'm not telling you to run to your nearest farmer's market, but maybe you should start thinking about planning to make it to your market and make this recipe in the next few weeks. Seriously, it's the least you can do to add some loving and happiness to your life.
Israeli Salad Recipe
3 large cucumbers, sliced and quartered
1 pound of cherry tomatoes or 3 large tomatoes, quartered or diced (or a mix of both or whatever tomatoes you got- key to make all pieces around the same size)
1 small onion finely diced (about 2/3 cup)
1 large handful of fresh finely chopped parsley
1 large handful of fresh finely chopped mint leaves
1/2 cup of quality olive oil
1/2 cup of freshly squeezed lemon juice
pinch or two of sea salt
pinch or two of cracked black pepper

Chop all of the ingredients and mix well in a large bowl, chill in the fridge for a little bit to let flavors meld together. Serve with hummus, greens, rice, chicken, schwarma, falafel, chickpea flatbread and the list could go on and on. 
See what I mean about simple. Why am I even posting this?! Well to get to you excited as I am about real food and fresh recipes! This is what got me started on the path to eating and enjoying fresh local foods that are naturally gluten-free and great for you.

I hope you enjoy (again and again) and much love and life to you!

Monday, April 27, 2015

Cinnamon Swirl Oat Bread

I'm sure you have heard me say before how I started my baking career at a great company, Great Harvest Bread Co. Back in the day, it was a place where I first started learning about simple ingredients and whole foods and such. But, the obvious problem to still working and eating there is the gluten. I was actually working there in college, while I discovered my Celiacs Disease and tried to keep working there for months before I knew my body just couldn't handle even being in the same room with so much whole wheat. It was hard to leave because I just love the bread making process. The delicate care of each ingredient, the kneading and making something amazing out of a lump of dough, it is truly an art. 

This is where my love for baking began and thankfully my love didn't die with needing (or kneading :)) to eat gluten-free. Baking GF means you may have to go the extra mile with ingredients and substitutions and yada yada yada. Well, you know how hard it is! But if you are determined and have just an ounce of creativity, then with lots of practice you will find a love for baking again. Some have told me that I might have a gift for such gluten-free baking, and I can see that, we all have specialities, but if you take away the intimidation of gluten-free baking then you might find that you can do it as well. The main ingredient in good bread is lots of love and care, wasn't it our grandmothers who said such advice?

This recipe is actually my Soft and Chewy Oat Baguette Bread, swirled with a simple coconut sugar, coconut oil and cinnamon paste. I have recently revised bread recipe that added a touch more flour to the recipe. I found that I was always adding a dusting more to it to make the dough sit up more firm. So I just changed the recipe to mirror that.  
Also, this recipe was completely the idea of a close friend that has started her GF journey over the last year and she has had so many struggles of her own with making this change. But she hasn't given up! She keeps trying new recipes and seeks out the best for their wisdom and inspiration. She has become an inspiration to me and that is how this recipe came into play. She said she has been making my Soft and Chewy Oat Bread and then swirling it with coconut oil, sugar and cinnamon. Genius! What a great idea! And as I was making it myself I was brought back to my Great Harvest days. I used to make a cinnamon swirl bread that always wooed customers. It took many hours to practice the perfect swirl to make sure all the insides would stay in the bread and make it just perfect. When I made this bread all of those skills came instantly back to life and I couldn't believe that I have not tried this before! Michele- this one is all you! Thanks for the inspiration and the love!


Cinnamon Swirl Oat Bread Recipe
Follow the Soft and Chewy Oat Baguette Bread recipe to make the dough. I used the white rice flour option to make this recipe.

Then, roll out the dough on a parchment paper, with a rolling pin and make a 12 x12 or 12x15 inch prices of dough about 1-2 inches thick. 
Then, mix 
1 cup of coconut palm sugar
1/3 cup coconut oil
2 TB of cinnamon (or I have used a pumpkin pie spice blend too :))
Crumble all of the ingredients in a bowl and it turns into a crumbly paste and you can spread it all over the rolled out dough. Keep it 1 inch or so away from the edges. It is hard to write out the best way to roll this up, but I will try. I learned this when making Great Harvest breads, but if you start at one end and roll a tight roll and hold in the edges while you roll you can tuck and pinch the dough in to the whole loaf to keep it nice and tight and together. You want the loaf to be a tight roll to help it slice better and keep all the sugar cinnamon goodness inside. 
Place on a parchment paper baking sheet and dust with more cinnamon or sugar and put in a preheated 350 degree and bake 50-55 minutes. Until the crust looks brown and there is some sugar bubbling at the edges. Let cool for 20-30 minutes before you slice into this goodness for the best results!

I hope you were inspired to try this recipe out. It is one of the best I know for GF bread baking. Not to mention, no yeast, eggs, nuts or seeds. It is very allergy friendly and so nice on the gut.

Enjoy! and lots of baking love to you!

Thursday, April 23, 2015

Chocolate Berry Tart

I am day 2 into my 30th year and I can say I do feel older. In a good way. My hubby took me out for a night out on my birthday and we visited some of our favorite places downtown. I thought on how many of these places consisted of college aged kids and the scene was one that I craved in my 20's. So full of excitement and life. And now as I have stepped into this new chapter of 30, these scenes seem to make me tired :) And, I'm already tired with having so much less sleep per night and busy with small children needs all day. So the night out was super fab, but also a great reminder of where my heart is now. It is in a new stage of life of being totally wrapped up at home with my sweet little family. Busy from dawn to dusk and finding rest and peace at home, in my jammies, on the couch with a slice of this chocolate goodness.
Sharing the treat with my hubby and talking about all the silliness of the day. I swear I never would have thought this to be true for me one day when I was in my early 20's. You could find me at the coolest local coffee shop talking about all the cool books and adventures till midnight. Now that seems a few chapters back. I am so enjoying the new found joy of being a home-body and mommy. This stage has been the biggest adventure yet, with the biggest challenges and darkest and lightest moments of life.
Thus far that is. As you age you can see more of the big picture and you are not in such a rush.
That is the beauty and joy of celebrating another birthday. You get to reminisce and talked about where you have been and get excited for where you are going. So much can happen in a year and yet it can seem like just a day as you look back. This must be the gift and curse of growing older.
Now, to this lovely and tempting tart I have been teasing you with.  I have made this recipe a few times now and decided I better make it again and try to perfect it for my birthday. This year I decided against a traditional cake and went with this decadent tart that does not disappoint.
The recipe idea originated from a mixed collaboration of the Nourishing Gourmet's Dark Chocolate Tart mixed with also special trips to PF Changs for their flourless chocolate dome and also a local favorite Marie Catrib's famous chocolate pudding. So this is my version of a mix of all of the above. A creamy, smooth, chocolatey treat that will melt in your mouth. It may get messy, but thats ok, it will taste amazing no matter what!
 Plus it is a very easy to make , with simple ingredients, and it doesn't hurt that it is gorgeous.
Chocolate Berry Tart Recipe
{VEGAN + gluten, dairy, egg, soy, nut, and refined-sugar free} 

Crust
1/2 cup of ground gluten-free oat flour (or you can sub almond flour if you can tolerate)
1/4 cup of tapioca flour
1/2 cup of rolled gluten-free oats
1/2 cup of unsweetened shredded coconut
dash of sea salt
3 TB of pure maple syrup
1/2 cup of soft organic extra virgin coconut oil

Mix the above in a small bowl and then sprinkle into the bottom of a 9 inch non-stick spring form pan. Press the crust dough on the bottom of the pan and then bake in a preheated 350 degree oven for 12-15 minutes. Let cool completely before you pour the chocolate in. 

Chocolate Mouse
20 ounces of Enjoy life Chocolate Chunks (2-10 ounce bags, or about 4 cups) 
2 cans coconut cream, about 1 3/4 cups of pure coconut cream
5-10 drops of Young Living Citrus Fresh essential oil (or use 1/4 ts. of pure orange flavoring)
dash of sea salt
optional additions:
a splash of pure vanilla or maple syrup for taste

To get the best coconut cream, refrigerate 2 cans of organic full-fat coconut milk and then open the cans and scrape out the cream only. Discard or save the coconut water for a smoothie or other recipe. Then in a small saucepan pour the coconut cream and all of the chocolate into the pan. On low heat stir until t is all melted and creamy. Then add the citrus oil drops.  Turn off the heat and whisk well together and let sit until it stiffens just a bit. Then pour into the cooled spring form crust pan and put pan on a plate in the fridge to completely cool and stiffen. You can also put in the freezer to quicken this process, but try not to serve straight from freezer because the crust will be hard to cut if frozen. Add the berry sauce before serving with fresh berries.

Berry Sauce + Fresh Berries
1/4 cup of each fresh berry, blackberry, raspberry, and strawberry
2-3 TB of pure raw honey
1 ts. of arrowroot or tapioca starch

In a small sauce pan add the fresh berries and honey and squish the berries and honey together until you get a jam-like sauce. You can use a small strainer if you want to omit the berry seeds and just have a sauce. Or I have also quickly blended the berry sauce to grind of the seeds a bit more before serving as well. Serve with fresh berries and sauce, or decorate the very cold chocolate tart with the cooled sauce and let sit in fridge for another hour if you would like to serve cold all together.
That's it! Pretty simple and seriously delish! It is a new favorite around here and its better to share at home with friends or also in my case in jammies, on the couch, with my hubby rather than out at a restaurant way past my bedtime. You get a bedtime again, when you are 30, right? I hope so! I feel like I have earned it after a crazy decade of my 20's.
May you enjoy life and find beauty in all it's pain and joys. 
To another year of life...!
You are loved dear ones!

Wednesday, February 4, 2015

Homemade Rustic Marshmallows


One thing that I have LOVED over the last year is Great Lakes Unflavored Gelatin. It is pure protein, and this brand makes it GMO free and is naturally gluten-free as well. It is a perfect supplement ingredient to help with healing from any digestive ailment, especially leaky gut symptoms, and also it is a ton of fun to have in the kitchen with children because what kid doesn't love jello or gummies. You can google the benefits yourself, but a link to get you started on learning more about gelatin is here by Wellness Momma.  You can also look up dozens of recipes and uses on Pinterest. I pin new ones all the time!

I have made gummies for my kids probably once a week over the last year. You can google or pinterest search hundreds of recipes. My favorites have been morphed into a simple one of my own. I use 3 TB of gelatin for every cup of fruit juice. I usually sweeten with maple syrup and use an organic all fruit juice. I split the juice in half and mix half of it with the gelatin and the other half in a saucepan on the stove with maple syrup until boiling. Mix the boiling juice with the gelatin juice and mix and whisk well to get all the lumps out and then pour into molds or pyrex pan while warm. I use a quart pyrex measuring cup to usually do this with less mess and dishes. Then refrigerate until hard or until all eaten :) My kids devour these. Our favorite juices are apple, cherry and cranberry.

But the newest way that I have been enjoying gelatin has been through homemade marshmallows. So yummy and brings back all kinds of childhood nostalgia of hot cocoa and marshmallows. Or really just eating marshmallows from the bag. I had a thing for the fluffy white stuff. This version is SO much better though. Made from wholesome ingredients and no corn yuck or high fructose corn syrup. It is a healthy way to have a treat and even had some nutrients to your life.
First time I made these I followed this homemade recipe by the Urban Poser.  But since then have kinda found a way that I like making them on my own. It's so easy you just need to try it out. I do not have a candy thermometer. I need to get one of those. But I still made these in the mean time. Here is my recipe that I have been playing with...

Homemade Marshmallow Recipe
3/4 cup of pure honey
1/2 cup of pure maple syrup
1/2 cup of pure water
sprinkle of sea salt
splash of vanilla

1/2 cup of pure water
3 TB of unsweetened gelatin

I used the above amounts but did first try to follow the Urban Poser's detailed instructions. I would suggest you do the same and then once you get your marshmallow groove on then you can kinda swing it however you like. It's pretty simple once you try it a few times. You'll be an addict like me in no time.

Some of my notes:
First I put the honey, maple syrup, 1/2 cup of water and splash of vanilla and salt in a sauce pan and start cooking. This process is long and can take around 15 minutes on medium heat. You do this until the mix is somewhat foamy and if you want more precise temperatures and instructions check out the recipe above. While doing this I have the gelatin blossoming with the other 1/2 cup of water. Then mixed the gelatin mixture into the BURNING hot honey water mixture (it is amber brown color) and slowly use a hand held mixer and mix on slow until even more foamy, then raise the speed when it gets thicker to medium and then HIGH. You will start to notice the color changing to white-ish and thickening up. You may want to lick at this point. It is super yummy marshmallow fluff. Then when the marshmallow is stiff you pour the mixture into a pre-oiled and I use tapioca flour dusted pan with parchment as well. I used tapioca flour instead of arrowroot starch. Then you have to let it sit alone for at least 4 hours and it stiffens right up. Then use a non-teeth knife and cut squares of marshmallow, using tapioca flour to help dust and keep less sticky. I stored my marshmallows in a quart ball jar on the counter for up to a week without problems. But really we eat them all in a few days, who am I kidding, haha ;)

I make my favorite homemade hot cocoa , (or make a dry mix to make an easy hot cocoa) and top with a handful of these amazing marshmallows. It makes a picture perfect delicacy every time!

I mentioned in my last post about adding these homemade marshmallows to the plate of a chocolate fondue dipping plate. These are amazing dipped in some chocolate sauce and a fun addition because friends will think these odd looking cubes may be bread, or maybe cheese, but no it's a fluffy marshmallow surprise. These treats are amazing in just about every way.

I hope you try this out VERY soon if you are in a cold and snowy climate like me. It is one of the best ways to stay happy this winter :) That and staying warm and cozy with your loved ones.

Much love to you xoxo

Monday, January 26, 2015

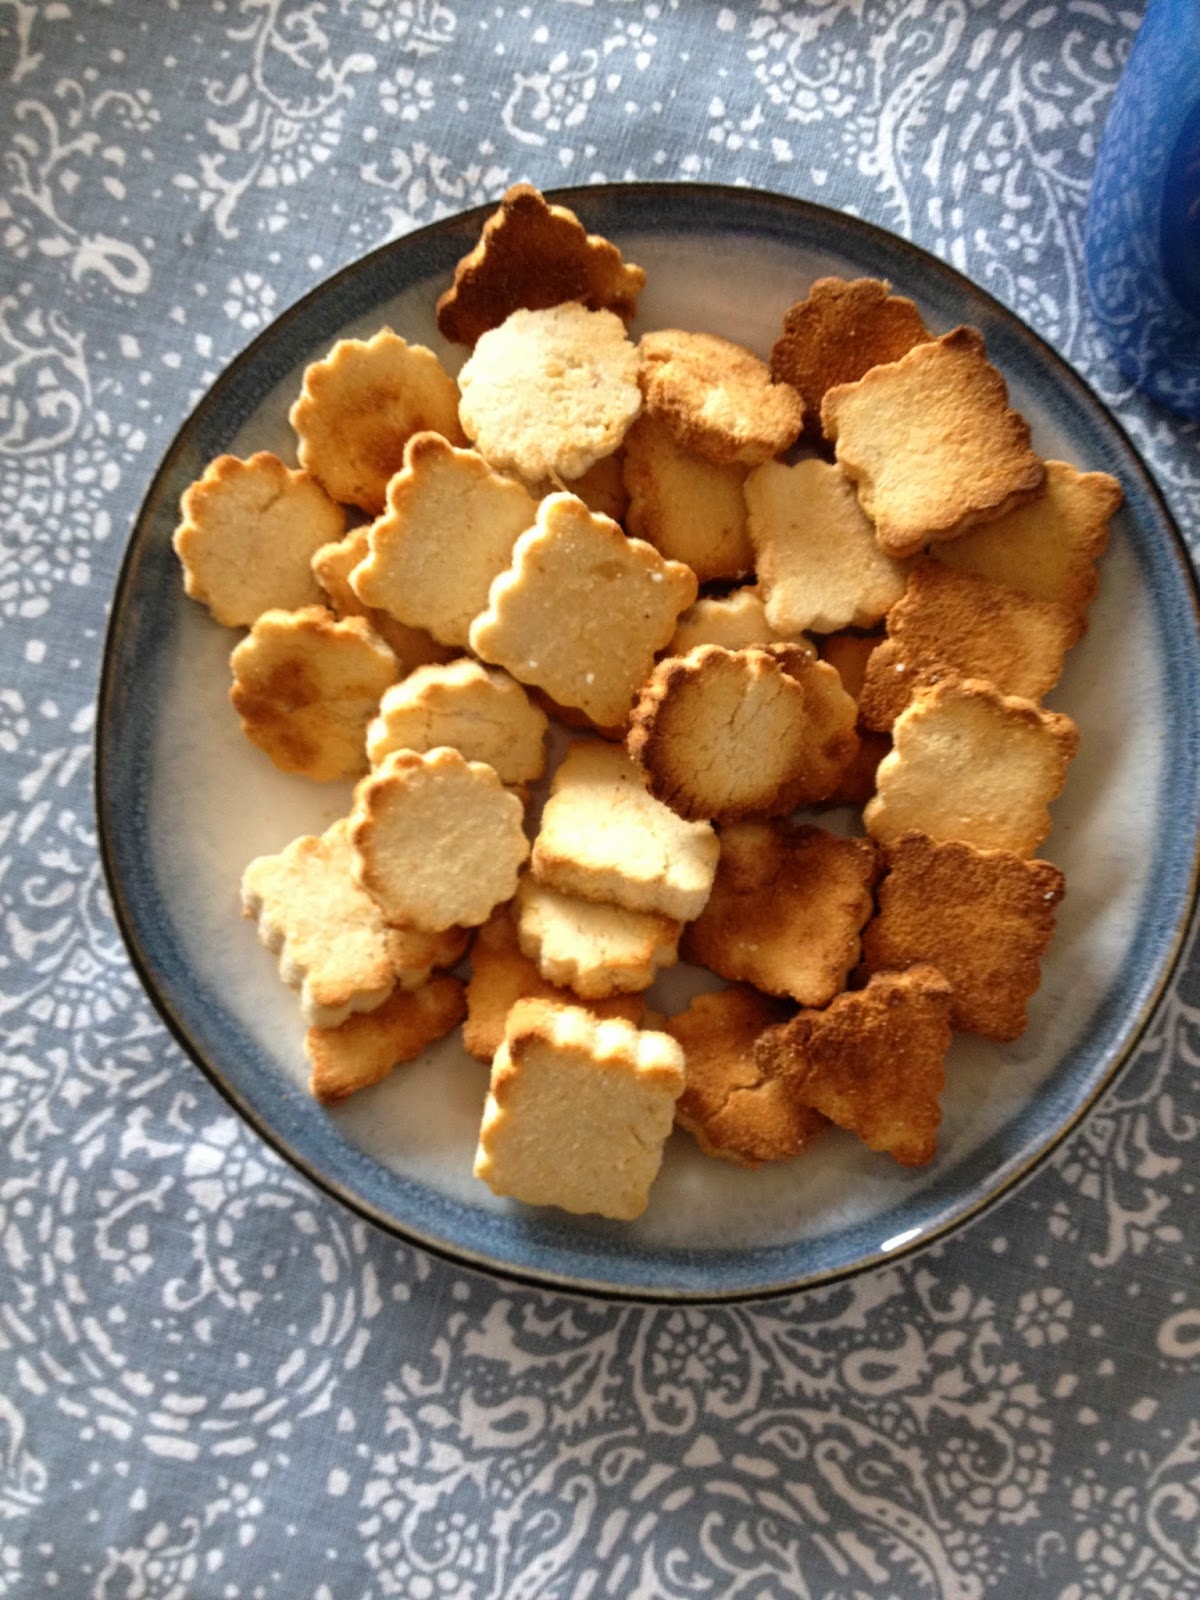
Coconut Applesauce Shortbread Cookies

Hello lovely gluten-free foodie friends. It has been a long while.
A, LONG. while :)

Last summer when I took a hiatus, I moved from our home with two small kids to a temporary {more rural} location for 8 weeks, then finally to our new home in new part of town. It was a long summer and fall and we are still trying to make sense and the craziness and get settled in 2015. I gave myself the space to put a halt to blogging and creating new recipes and just live in the moment and the convenience of the present. And for those friends that I was living with over the summer, they know I can't stay away from the oven for long. They found me baking goodies late into the night as my kids finally went to sleep.

I can't stay away. Not from gluten-free baking. Not from you.

No matter how hard I sometimes want to or need to. I can't stop baking and enjoying the attempt at new recipes and ideas in the kitchen. So I will start again. I have been making a few new recipes that I love over the past year that haven't made it to the blog yet. So that is where I will start. I hope this year will bring many new creative ventures in the kitchen and a continual pursuit of health and healing in the home. Thanks for following along and giving me another reason to put my recipes and thoughts to pen, I mean blog :)

This cookie recipe was born over the holidays when trying to make a simple cookie to serve with Against All Grain's Pumpkin Pudding Recipe. I LOVE this pumpkin pudding recipe because it is so simple and can be eaten as a treat while still sticking to a very simple and healing diet. A friend of mine posted it on facebook around December and I pulled up the link and was like whoa, I have all those ingredients already to go! Yum.

But when I was going to bring this pudding dish to a party I felt like it needed something more with it to look more than just a bowl of orangy pumpkiny poo. I wanted it to be served with a some-thing special dipping treat. So to avoid nuts, and grains, I made a simple shortbread cookie that only required a few ingredients as well. Another way I added these cookies to a holiday treat was a chocolate fondue. I made my chocolate sauce or an easy chocolate dip made from 1 can full fat coconut milk and 1 bag of Enjoy Life chocolate chips both melted together to create a creamy chocolate ganache dip. I made the chocolate dip and centered it in a bowl on a large serving platter then added these cookies, homemade marshmellows (recipe soon!), fresh fruit (clementines, strawberries, bananas, ect) and you have a pretty easy platter of simple deliciousness. These cookies are so simple with simple ingredients that I am sure you could find dozens of ways to enjoy them.

Coconut Applesauce Shortbread Cookie Recipe
{gluten, grain, dairy, egg, refined sugar, soy and nut-free}
1 cup of organic coconut flour
1 cup of soft or melted organic coconut oil
1/3 cup of homemade or unsweetened applesauce
1 TB to 1/4 cup of sweetener of choice: pure honey or maple syrup
1 ts. of ground ginger
pinch to sprinkle of sea salt

Preheat oven to 350 degrees. If your coconut oil is not soft, then melt it in a small sauce pan over medium heat. Pour the flour and ginger and salt in a pour, add the wet ingredients and then stir quickly by hand with a spatula while wet and sticky. Let batter sit for 5 minutes to let the dough get tough. It should be a soft but pliable consistency. If it is still too sticky then add a dash of flour until it more stiff and pliable. If it is too stiff then add a spoonful of applesauce or sweetener to make it more pliable. Use your hands to press and roll out the dough on a piece of parchment paper. Use a rolling pin to roll out a 1/4 inch thick piece or dough. It is best to use small cookie cutters. No bigger than 2-3 inches in diameter. This will help the final cookie product to not be so easily broken. Coconut flour is very fiberous and it easily broken when baked and dried out. So it really works best to make a small half dollar or smaller sized cookie. 

This recipe will make 3-4 dozen small cookies. Place on baking sheet and bake in a preheated 350 degree oven for 10-12 minutes. Watch closely. They bake very fast you can bake a little lighter or longer depending on your preference. I a happen to like them a bit crispy and browned so I bake closer to the 12 minute mark. 

I hope you try these lovely simple treats out and the AAG Pumpkin Pudding as well. A perfect treat even if you are trying to cleanse and heal your body this new year.

Lots of love to you!
Stephanie