Showing posts with label hope for healing. Show all posts

Saturday, March 11, 2017

Buckwheat-Quinoa-Millet Bread

This is my 'good ol bread recipe' again. But this time I revised it to be made without gluten-free oats and rice flour. The three main flours are buckwheat, quinoa, and millet. All 3 are alkaline-producing, protein-packed and have amazing doses of minerals and vitamins. All things your body needs in recovering from malnourishment from an auto-immune disorder or other digestive ailments.  My oat bread is fabulous as is, but this one offers a break from GF oats and has a much earthier taste and component. This bread also contains the psyllium husk powder and so lots of good fiber added to your gut as well. Just make sure to keep up with water drinking while consuming fiber for best results ;) I won't go into more details here...you get the point ;)
Our bodies love vegetables and fresh food, yes, but there is something very comforting and grounding about a good loaf of hearty bread. I think the vitamins and minerals in these seed-grains really have something to do with it too. The protein gained in these flours are also something wonderful and nourishing as well.  I could go on and on about my love for bread and the ways it centers, grounds and bring much love into our lives. It is something we learned to hate after our diagnosis of the GF allergy or other food allergies. It can be loved again and it starts here...
This recipe has changed my life. It all started with trying to create a GF bread without yeast and without gums. And it truly has been a gift to me and those who cannot eat yeast, and other gluten-free grains. Also such a great way to create a baked good with only a little honey to add in for breakfasts, lunches and snacks. It is the perfect pair for soups or for jam. My hope for you if that you will be brave enough to try again- start here- this is a bread recipe to pursue as you pursue healing and hope in your journey. Much love as always, and happy baking xoxo
Buckwheat-Quinoa-Millet Bread 
{gluten, yeast, dairy, egg, nut and sugar-free}

3 TB of psyllium husk powder (must be powder, not seed or husk)
1 cup of pure water
1 cup of non dairy milk (I used coconut milk beverage)
2 TB of apple cider vinegar
2 TB of raw honey
2 TB of olive oil

1 cup of finely ground fresh buckwheat flour
1 cup of finely ground quinoa flour
1 cup of finely ground millet flour (plus an extra 1/2 cup for kneading and rolling out)

*all 3 of the above flours can be ground from seed in the Vitamix or high powered blender* You can even grind them up together if that works best for you in the moment. I had my buckwheat and quinoa already ground up together and then I just added fresh ground millet to the mix.

1 ts. of sea salt
2 ts. aluminum-free baking powder (I use Hain brand)
1 ts. of baking soda

You may need 1/2 cup more of flour (a mix of the 3 or just millet) to knead and get less sticky

In a large mixing bowl, whisk the psyllium husk powder, water, milk, and apple cider vinegar together. It will turn into a thickened blob in a few minutes, then whisk in the oil and honey in together. *You can sub the honey for maple syrup if you are a strict vegan* 

Then, add all of the dry ingredients. Add in all the flours right on top of the wet ingredients blob and start by mixing with a spatula or wooden spoon until all of the flour is blended, but be careful to not over mix and make it too clumpy.  Then sprinkle in some more flour and use your bare hands to knead and turn over until you get a no-sticky anymore blob of dough that you can roll into a loaf on a parchment papered baking sheet. 

Don't be afraid to use extra rice or out flour to roll out if it is still sticky and not moldable.  Try and roll out a 12-15 inch loaf and roll out as many creases as you can. 

Bake in a preheated 350 degree oven for 50 minutes, but can last for 60 minutes if you want a crispier/thicker crust.

Pull from the oven and let cool for 20 minutes before cutting into. This will be hard for you because this bread makes your kitchen smell heavenly!

I hope you give this recipe a try if you are looking for a protein-packed and nourishing bread. Happy baking and much love and light, xoxo

Monday, February 6, 2017

Good Ol' Chicken Noodle Soup for the Soul

I felt it coming on last week. A sniffle...which led to a stuffed nose... which led to a slight headache... and I knew exactly what I was dealing with. I started drinking fresh grated ginger tea and some elderberry syrup and decided it was the perfect day to make a pot of soup to remedy the situation (and the soul, really!) Why does it do the soul good anyways? Why does it make one feel so warm and comforted? I'm not sure if I know the perfect answer to that, but there is something about 'chicken noodle soup' that presses all the right buttons when your feeling under the weather...
Well, I guess you can 'google' reasons of how the nutrient-dense and well-balanced chicken-noodle-soup triggers an anti-inflammatory immune system migration of the cells in the mucus membranes that need the immune response. Or something like that ;) So there is actual research and science backing it up. Which I just think is so amazing and hilarious at the same time because there is also the part beyond the research that the soup just is that.... a warm, comfort medicine for the soul and body when one's feeling low and grey. I don't know if I actually need the research here, and maybe it is just nostalgia for nourishing food while sick, but I would say that there is something the body does indeed love about the combination of the broth, herbs, chicken, veggies and noodles. It's just nourishing...magic.
My secrets to a good pot of chicken noodle soup include:

-Big chunks of carrots and chicken. I like a 'meaty' chunk of carrot and a hearty bite of chicken. Ones that you can easily scoop out of the broth so you can get a perfect bite. I even shop at the market and grocery store for carrots imagining how they would look in soup. No itty bitty chunks here. Good big-full-mouthful chunks, baby.

-Fresh herbs! This seems like it might not matter. But I am telling you- it really does! I use not so traditional herbs for chicken noodle soup too because I love them so much. I chop fresh sage, fresh rosemary, fresh thyme, fresh parsley and fresh leeks. I really think it makes it better. I also grate in fresh juicy tumeric, ginger and garlic. These add so much color and flavor as well. The kind of juicy flavor you sometimes miss in dried spices and herbs. Obviously, if I don't have fresh in the kitchen while I am stirring up a pot, I improvise with what I got and it's usually a mix of whatever herbs I can find in the fridge, freezer or pantry. But I know- if I really want to do it well. Fresh herbs just make it.

-Bone broth. Here is where you can pack nutrient dense collagen and proteins to help the immune system jump back faster after it has been challenged. And the flavor...it is where it's at when it comes to equal flavors of chicken and salt and depth of deliciousness. I make my own usually whenever I have extra meat bones and leftover veggies and greens. So I have a few jars stashed away in the fridge and freezer. I have also found that organic Costco chicken stock is a super great easy alternative if you don't have bone broth.

Stephanie's Chicken Noodle Soup Recipe
{gluten, dairy, nut, seed, egg, sugar and soy-free}

1 large onion finely chopped
1 cup of celery finely chopped, about 6 stalks
1 bunch of green onion or leeks, finely chopped
2 inches of fresh turmeric, finely grated, about 1 heaping TB
1 inch of fresh ginger, finely grated, almost a TB's worth
6 large garlic cloves finely grated, about 2 TB's worth of garlic
2-3 TB of avocado or olive oil
sprinkle of sea salt and black pepper (1/2 ts. of each)

In an 5-6 quart pot, saute the above ingredients to get your soup base cooking. Saute until everything starts cooking down and getting soft and coming together. Then add the...

2 cups of chopped carrots, about 6 large carrots
8 cups of broth (bone, veggie, chicken)
possible additional water if you want the soup a little more soupy or brothy

After you add the carrots, let them cook into the saute mix, then after a few minutes... add the broth. This is usually when you need to wait a little bit for the broth to cook with the carrots and get the heat back up to a boil temp. Keep cooking and you may need to turn down the heat if it starts boiling too crazy...and thats when you can add in the fresh herbs and greens. Pour them all in and keep stirring. Let sit and simmer for another 30 or so minutes after that...

fresh sage, 1-2 TB finely chopped
fresh rosemary, 1-2 TB finely chopped
fresh thyme, 1-2 TB finely chopped
1/2 cup of finely chopped fresh parsley
1/2 cup of finely chopped lacinato kale

While the soup is cooking ands simmering you can bake the thawed out or fresh chicken in the oven and then cut up into big chunks to then pour into the simmering soup not long after you add the greens....

2 pounds of chicken tenders/breasts pre-baked in salt/pepper and olive oil and a little broth then chopped in chunks to pour into soup

Add a sprinkle more of sea salt and black pepper here. Not too much- just a pinch really.

Then lastly you can either add your noodles 2 ways: 
You can  pre-cook your noodles and only add them in when you serve ups bowl to avoid them getting mushy in the soup over time. Or if you do not mind your noodles being cooked in the soup you can add about 8 ounces of your favorite GF pasta to the soup right after the chicken was added and all the carrots are soft. You could even turn off the heat here because the noodles will just soften in the boiling broth and be fully cooked within 10-15 minutes. I use usually a spiral or tube brown rice noodle... but have also used macaroni or spaghetti or whatever noodle I have on hand... 

You can see from my pictures (take on day 2 ;) that  the noodle have broken up a bit. I don't mind the broken thick noodles too much, but if you do... I would suggest just keeping them separate and adding them in whenever you serve up the steamy hot soup...

After all the parts come together, give a good stir to the pot and get ready to serve. I serve with a good hearty slice of my bread... or rolls....and a large soup spoon to do some slurping on ;)

I hope you are not under the weather and wishing someone would make you some soup- I hope that you maybe give this soup a try without the sickies connected to it. But if some some reason you feel that sniffle coming on- I hope you have enough strength to make a big pot of chicken noodle soup to get you through it.

Much love and light to you, xoxo

Monday, April 27, 2015

Cinnamon Swirl Oat Bread

I'm sure you have heard me say before how I started my baking career at a great company, Great Harvest Bread Co. Back in the day, it was a place where I first started learning about simple ingredients and whole foods and such. But, the obvious problem to still working and eating there is the gluten. I was actually working there in college, while I discovered my Celiacs Disease and tried to keep working there for months before I knew my body just couldn't handle even being in the same room with so much whole wheat. It was hard to leave because I just love the bread making process. The delicate care of each ingredient, the kneading and making something amazing out of a lump of dough, it is truly an art. 

This is where my love for baking began and thankfully my love didn't die with needing (or kneading :)) to eat gluten-free. Baking GF means you may have to go the extra mile with ingredients and substitutions and yada yada yada. Well, you know how hard it is! But if you are determined and have just an ounce of creativity, then with lots of practice you will find a love for baking again. Some have told me that I might have a gift for such gluten-free baking, and I can see that, we all have specialities, but if you take away the intimidation of gluten-free baking then you might find that you can do it as well. The main ingredient in good bread is lots of love and care, wasn't it our grandmothers who said such advice?

This recipe is actually my Soft and Chewy Oat Baguette Bread, swirled with a simple coconut sugar, coconut oil and cinnamon paste. I have recently revised bread recipe that added a touch more flour to the recipe. I found that I was always adding a dusting more to it to make the dough sit up more firm. So I just changed the recipe to mirror that.  
Also, this recipe was completely the idea of a close friend that has started her GF journey over the last year and she has had so many struggles of her own with making this change. But she hasn't given up! She keeps trying new recipes and seeks out the best for their wisdom and inspiration. She has become an inspiration to me and that is how this recipe came into play. She said she has been making my Soft and Chewy Oat Bread and then swirling it with coconut oil, sugar and cinnamon. Genius! What a great idea! And as I was making it myself I was brought back to my Great Harvest days. I used to make a cinnamon swirl bread that always wooed customers. It took many hours to practice the perfect swirl to make sure all the insides would stay in the bread and make it just perfect. When I made this bread all of those skills came instantly back to life and I couldn't believe that I have not tried this before! Michele- this one is all you! Thanks for the inspiration and the love!


Cinnamon Swirl Oat Bread Recipe
Follow the Soft and Chewy Oat Baguette Bread recipe to make the dough. I used the white rice flour option to make this recipe.

Then, roll out the dough on a parchment paper, with a rolling pin and make a 12 x12 or 12x15 inch prices of dough about 1-2 inches thick. 
Then, mix 
1 cup of coconut palm sugar
1/3 cup coconut oil
2 TB of cinnamon (or I have used a pumpkin pie spice blend too :))
Crumble all of the ingredients in a bowl and it turns into a crumbly paste and you can spread it all over the rolled out dough. Keep it 1 inch or so away from the edges. It is hard to write out the best way to roll this up, but I will try. I learned this when making Great Harvest breads, but if you start at one end and roll a tight roll and hold in the edges while you roll you can tuck and pinch the dough in to the whole loaf to keep it nice and tight and together. You want the loaf to be a tight roll to help it slice better and keep all the sugar cinnamon goodness inside. 
Place on a parchment paper baking sheet and dust with more cinnamon or sugar and put in a preheated 350 degree and bake 50-55 minutes. Until the crust looks brown and there is some sugar bubbling at the edges. Let cool for 20-30 minutes before you slice into this goodness for the best results!

I hope you were inspired to try this recipe out. It is one of the best I know for GF bread baking. Not to mention, no yeast, eggs, nuts or seeds. It is very allergy friendly and so nice on the gut.

Enjoy! and lots of baking love to you!

Wednesday, February 4, 2015

Homemade Rustic Marshmallows


One thing that I have LOVED over the last year is Great Lakes Unflavored Gelatin. It is pure protein, and this brand makes it GMO free and is naturally gluten-free as well. It is a perfect supplement ingredient to help with healing from any digestive ailment, especially leaky gut symptoms, and also it is a ton of fun to have in the kitchen with children because what kid doesn't love jello or gummies. You can google the benefits yourself, but a link to get you started on learning more about gelatin is here by Wellness Momma.  You can also look up dozens of recipes and uses on Pinterest. I pin new ones all the time!

I have made gummies for my kids probably once a week over the last year. You can google or pinterest search hundreds of recipes. My favorites have been morphed into a simple one of my own. I use 3 TB of gelatin for every cup of fruit juice. I usually sweeten with maple syrup and use an organic all fruit juice. I split the juice in half and mix half of it with the gelatin and the other half in a saucepan on the stove with maple syrup until boiling. Mix the boiling juice with the gelatin juice and mix and whisk well to get all the lumps out and then pour into molds or pyrex pan while warm. I use a quart pyrex measuring cup to usually do this with less mess and dishes. Then refrigerate until hard or until all eaten :) My kids devour these. Our favorite juices are apple, cherry and cranberry.

But the newest way that I have been enjoying gelatin has been through homemade marshmallows. So yummy and brings back all kinds of childhood nostalgia of hot cocoa and marshmallows. Or really just eating marshmallows from the bag. I had a thing for the fluffy white stuff. This version is SO much better though. Made from wholesome ingredients and no corn yuck or high fructose corn syrup. It is a healthy way to have a treat and even had some nutrients to your life.
First time I made these I followed this homemade recipe by the Urban Poser.  But since then have kinda found a way that I like making them on my own. It's so easy you just need to try it out. I do not have a candy thermometer. I need to get one of those. But I still made these in the mean time. Here is my recipe that I have been playing with...

Homemade Marshmallow Recipe
3/4 cup of pure honey
1/2 cup of pure maple syrup
1/2 cup of pure water
sprinkle of sea salt
splash of vanilla

1/2 cup of pure water
3 TB of unsweetened gelatin

I used the above amounts but did first try to follow the Urban Poser's detailed instructions. I would suggest you do the same and then once you get your marshmallow groove on then you can kinda swing it however you like. It's pretty simple once you try it a few times. You'll be an addict like me in no time.

Some of my notes:
First I put the honey, maple syrup, 1/2 cup of water and splash of vanilla and salt in a sauce pan and start cooking. This process is long and can take around 15 minutes on medium heat. You do this until the mix is somewhat foamy and if you want more precise temperatures and instructions check out the recipe above. While doing this I have the gelatin blossoming with the other 1/2 cup of water. Then mixed the gelatin mixture into the BURNING hot honey water mixture (it is amber brown color) and slowly use a hand held mixer and mix on slow until even more foamy, then raise the speed when it gets thicker to medium and then HIGH. You will start to notice the color changing to white-ish and thickening up. You may want to lick at this point. It is super yummy marshmallow fluff. Then when the marshmallow is stiff you pour the mixture into a pre-oiled and I use tapioca flour dusted pan with parchment as well. I used tapioca flour instead of arrowroot starch. Then you have to let it sit alone for at least 4 hours and it stiffens right up. Then use a non-teeth knife and cut squares of marshmallow, using tapioca flour to help dust and keep less sticky. I stored my marshmallows in a quart ball jar on the counter for up to a week without problems. But really we eat them all in a few days, who am I kidding, haha ;)

I make my favorite homemade hot cocoa , (or make a dry mix to make an easy hot cocoa) and top with a handful of these amazing marshmallows. It makes a picture perfect delicacy every time!

I mentioned in my last post about adding these homemade marshmallows to the plate of a chocolate fondue dipping plate. These are amazing dipped in some chocolate sauce and a fun addition because friends will think these odd looking cubes may be bread, or maybe cheese, but no it's a fluffy marshmallow surprise. These treats are amazing in just about every way.

I hope you try this out VERY soon if you are in a cold and snowy climate like me. It is one of the best ways to stay happy this winter :) That and staying warm and cozy with your loved ones.

Much love to you xoxo

Monday, January 26, 2015

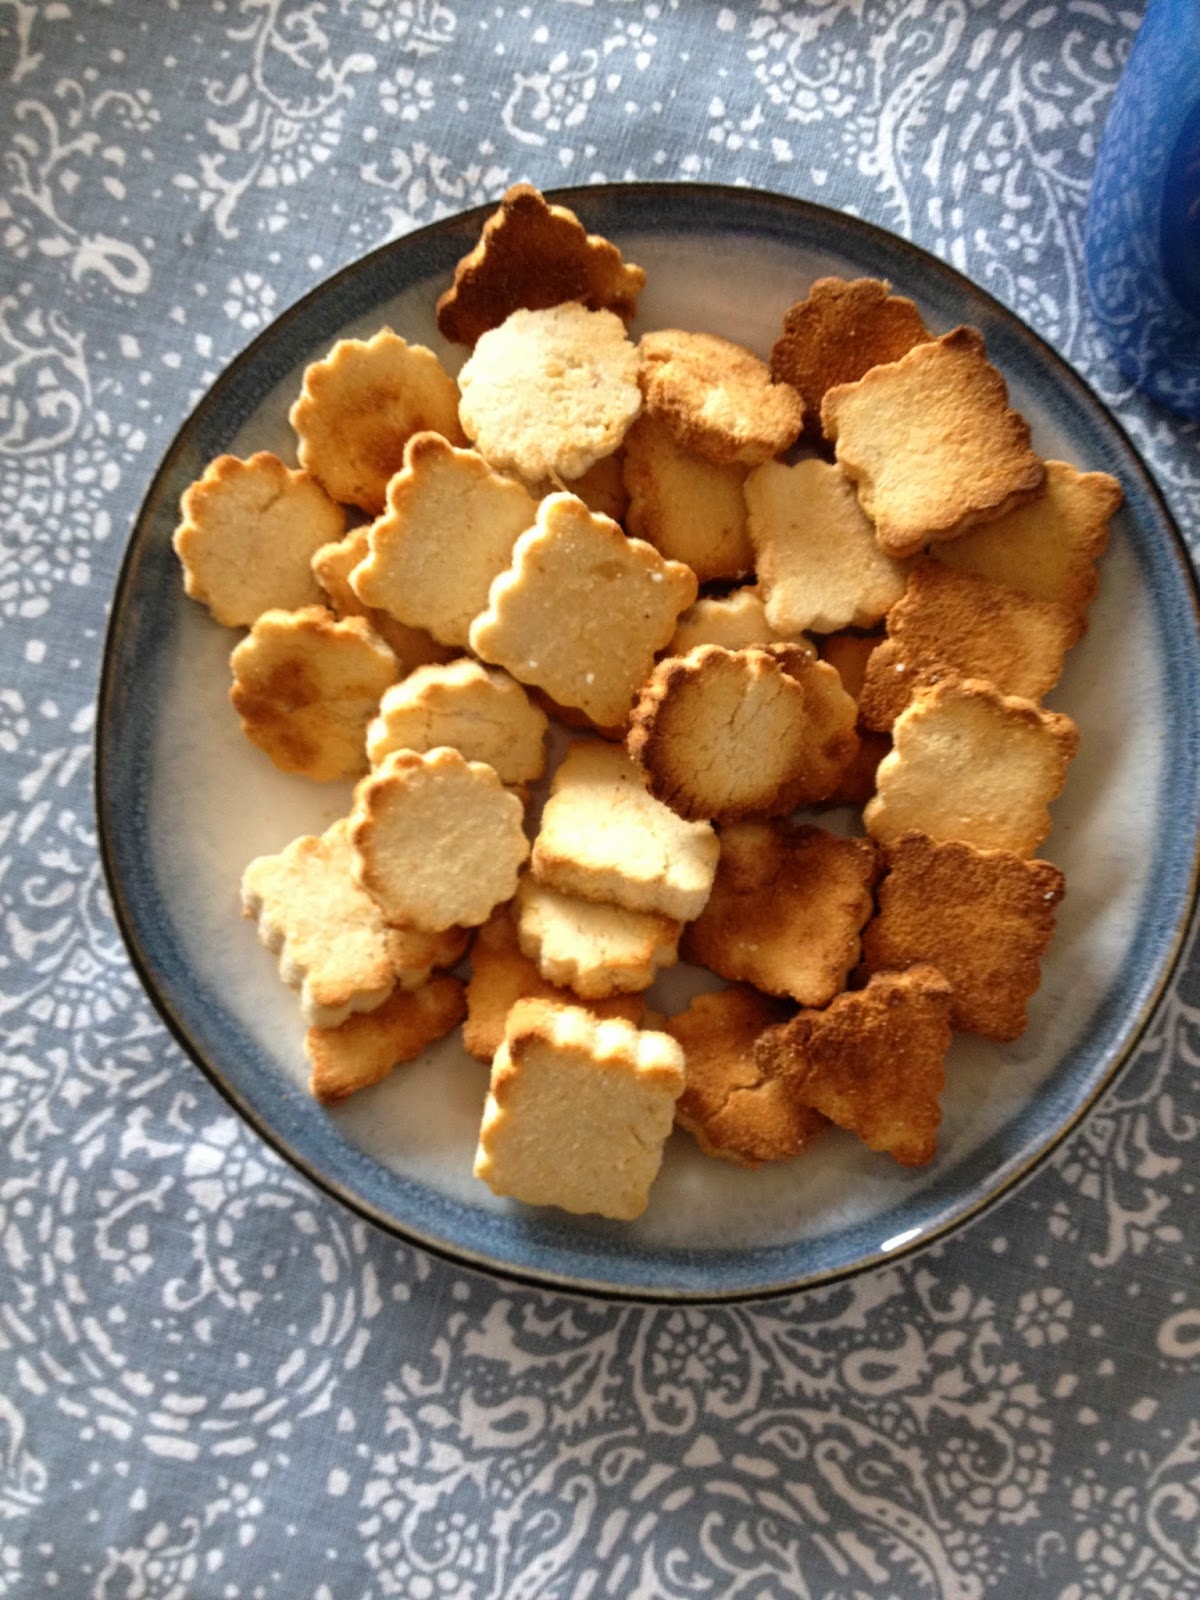
Coconut Applesauce Shortbread Cookies

Hello lovely gluten-free foodie friends. It has been a long while.
A, LONG. while :)

Last summer when I took a hiatus, I moved from our home with two small kids to a temporary {more rural} location for 8 weeks, then finally to our new home in new part of town. It was a long summer and fall and we are still trying to make sense and the craziness and get settled in 2015. I gave myself the space to put a halt to blogging and creating new recipes and just live in the moment and the convenience of the present. And for those friends that I was living with over the summer, they know I can't stay away from the oven for long. They found me baking goodies late into the night as my kids finally went to sleep.

I can't stay away. Not from gluten-free baking. Not from you.

No matter how hard I sometimes want to or need to. I can't stop baking and enjoying the attempt at new recipes and ideas in the kitchen. So I will start again. I have been making a few new recipes that I love over the past year that haven't made it to the blog yet. So that is where I will start. I hope this year will bring many new creative ventures in the kitchen and a continual pursuit of health and healing in the home. Thanks for following along and giving me another reason to put my recipes and thoughts to pen, I mean blog :)

This cookie recipe was born over the holidays when trying to make a simple cookie to serve with Against All Grain's Pumpkin Pudding Recipe. I LOVE this pumpkin pudding recipe because it is so simple and can be eaten as a treat while still sticking to a very simple and healing diet. A friend of mine posted it on facebook around December and I pulled up the link and was like whoa, I have all those ingredients already to go! Yum.

But when I was going to bring this pudding dish to a party I felt like it needed something more with it to look more than just a bowl of orangy pumpkiny poo. I wanted it to be served with a some-thing special dipping treat. So to avoid nuts, and grains, I made a simple shortbread cookie that only required a few ingredients as well. Another way I added these cookies to a holiday treat was a chocolate fondue. I made my chocolate sauce or an easy chocolate dip made from 1 can full fat coconut milk and 1 bag of Enjoy Life chocolate chips both melted together to create a creamy chocolate ganache dip. I made the chocolate dip and centered it in a bowl on a large serving platter then added these cookies, homemade marshmellows (recipe soon!), fresh fruit (clementines, strawberries, bananas, ect) and you have a pretty easy platter of simple deliciousness. These cookies are so simple with simple ingredients that I am sure you could find dozens of ways to enjoy them.

Coconut Applesauce Shortbread Cookie Recipe
{gluten, grain, dairy, egg, refined sugar, soy and nut-free}
1 cup of organic coconut flour
1 cup of soft or melted organic coconut oil
1/3 cup of homemade or unsweetened applesauce
1 TB to 1/4 cup of sweetener of choice: pure honey or maple syrup
1 ts. of ground ginger
pinch to sprinkle of sea salt

Preheat oven to 350 degrees. If your coconut oil is not soft, then melt it in a small sauce pan over medium heat. Pour the flour and ginger and salt in a pour, add the wet ingredients and then stir quickly by hand with a spatula while wet and sticky. Let batter sit for 5 minutes to let the dough get tough. It should be a soft but pliable consistency. If it is still too sticky then add a dash of flour until it more stiff and pliable. If it is too stiff then add a spoonful of applesauce or sweetener to make it more pliable. Use your hands to press and roll out the dough on a piece of parchment paper. Use a rolling pin to roll out a 1/4 inch thick piece or dough. It is best to use small cookie cutters. No bigger than 2-3 inches in diameter. This will help the final cookie product to not be so easily broken. Coconut flour is very fiberous and it easily broken when baked and dried out. So it really works best to make a small half dollar or smaller sized cookie. 

This recipe will make 3-4 dozen small cookies. Place on baking sheet and bake in a preheated 350 degree oven for 10-12 minutes. Watch closely. They bake very fast you can bake a little lighter or longer depending on your preference. I a happen to like them a bit crispy and browned so I bake closer to the 12 minute mark. 

I hope you try these lovely simple treats out and the AAG Pumpkin Pudding as well. A perfect treat even if you are trying to cleanse and heal your body this new year.

Lots of love to you!
Stephanie


Monday, April 14, 2014

Honey Yogurt Cake with Honey Cream Glaze and Fresh Strawberries

Cake. One of my favorite things to make. And eat of course. But still I think I might just love making it more. A moist, dense, fluffy cake to share with a table of people. To celebrate. To give thanks. To share. It is a treat to enjoy by just sitting and being with those you love. This cake specifically has already been shared and celebrated a few times over the past few weeks, and it isn't even my birthday yet! (hint hint, yes another cake recipe in the near future :)
This cake celebrates spring. It's finally made it's appearance and I have been enjoying every ounce of it, even the spring thunderstorm in the background of my typing keyboard. It took a while to get here this year and now that it's finally here it feel so rich and deep that I can't imagine having waited for it for so long. But that is the beauty of spring. The wonder of popping crocuses and buds. The amazement that we still have grass and plants under all those inches of frozen snow we had covering us for months. It's unbelievable, spring came again! And it's fresh morning breath breathes life, goodness and new hope for all the tomorrows.
Hope. Hope that life is so much deeper and fuller than we have ever expected and dreamed. That is also what is a needed reminder when traveling this gluten-free and healthier lifestyle. Some days are hard. You have symptoms, stress and needs that seem to never end. I encourage you to breathe deep and focus on the tomorrow. Take the steps you need to feel strong again and even if they are inch-sized steps and you are only taking one. You can do this. Celebrate the accomplishments you have made. And breathe deep gratitude for life and all it's gifts.
Celebrate. May I suggest maybe with cake? And maybe with those who love and support you most. This life is not meant to be lived alone friends. Even this gluten-free life. We are doing this together and we can find ways to make it seem more normal, more simple, and dare I say....happier than we have known before. That is what this blog is about for me. Encouraging you to stay the course with good recipes and hope for the journey and the healing process. Keep on keeping on dear friends!
Honey Yogurt Cake Recipe
with Honey Cream Glaze and Fresh Strawberries

1 cup of softened organic extra virgin coconut oil
1 cup of powdered coconut palm sugar
3 farm fresh eggs
1/3 cup of pure raw honey
1 cup of coconut culture milk or yogurt (I used So Delicious)
2 ts. of pure vanilla
1/2 cup of tapioca flour
1/2 cup white rice flour
1/2 cup of fresh ground GF oat flour
1/2 cup of fresh ground buckwheat flour
2 ts. of baking powder
1 1/2 ts. of baking soda
1/2 ts. of sea salt

First, grind up your coconut palm sugar in a high powered blender to get a powdered sugar to cream with your coconut oil. Cream the oil and sugar together until soft and creamy. You can sub using grass fed butter for the coconut oil, which I actually did once and adds a rich butter flavor to the cake. If you don't have to worry about dairy, grass fed butter is a favorite choice! Also I used So Delicious' newest product of a cultured coconut milk which is very much like a sour cream or plain yogurt. It worked perfect for this cake and makes it dairy-free. I loved how it made the cake moist and dense. If you are fine with eating dairy you could sub the coconut yogurt for any organic plain yogurt or even a greek yogurt if you prefer.
Once you cream the oil and sugar, add the eggs and whisk all together until thick and creamy batter emerges. Then add the rest of the wet ingredients and mix well. Lastly grind GF oats and buckwheat groats in your grinder/blender to get the best GF oat and buckwheat flour. Add in the flours and dry ingredients. Make sure all the dry in mixed in well and then pour batter into oiled cake pan. I used a angel food cake pan for this recipe, but you could use a bundt pan, or 2 round  9 inch cake pans. Bake cake in a preheated 350 degree oven for 45 minutes. If you choose to use 2 9 inch round pan then check cakes around 30 minutes and should be done around then or 35 minutes.
Let the cake cool and then you can whip up the cream glaze to spread over when completely cool. 
Cream glaze recipe is 2 simple ingredients.

Honey Cream Glaze Recipe
1/3 cup of organic extra virgin coconut oil
1/4 cup of raw local honey

Use a small spatula to whip up the glaze and spread over. It is super simple and delicious. Then slice 4-5 fresh organic strawberries side by side and you get 20-25 slices to decorate the top of the cake. I liked making a large strawberry flower on the top of the angel food cake circle pan. 
This cake is somewhere in between a pound cake and a sponge cake. It is so moist and not crumbly. No gums were needed to get this great texture and I love how you don't feel like you are trying to chew a gummy cake log. Cake should be perfectly moist and easy to swallow . This cake is that and recipe that I have made again and again to come out perfect every time.
This would be a good recipe to try out for an after Easter dinner dessert. Strawberries make it look and taste so fresh and beautiful.  I would make this cake again for my birthday next week, but I am thinking of making a carrot cake this year... we'll see what happens :)
Much love to you and yours. May you find a new found hope this spring and ways to rid your life of pain and bondage and welcome fresh beauty and new life. Happy Easter to you!

Thursday, February 28, 2013

Soft and Chewy Baguette Bread (gluten, dairy, yeast, nut and sugar-free)

Have you noticed? I talk about the weather a lot. I did at one point want to be a weather-gal on the evening news, but as we all know that hasn't happened (yet!). I also like how people who are farmers, gardeners, and growers are close to the weather predictions and forecasts because their livelihood depends on it. I feel like because I have become a fellow gardener I understand this more than ever.  And now, I feel like my sensitive soul is just a bit more in tune on how the weather does affect our health and moods. Call my crazy, but I defiantly see differences in how people feel and act depending on the weather and what may be brewing up in the atmosphere. Or how the cycles of the moon play into and affect our sleep (and digestion) as well. It is just another example on how everything is connected and how you have to be aware of the cause and effect of our lives and what we put into them and take out.
But it turns out, I am a baker. And this just means that I like to use the excuse for bad weather to spend some time baking in the kitchen. So for the last few days with lots more snow, rain, sleet and whatever that slushy yuck stuff is... I have been enjoying some quality baking time in the kitchen. Cooking some hearty soup and of course some bread to pair. Every gluten-free soul must let go of the fact that gluten bread is the only way to really enjoy bread and you have to go out in the world and explore ideas of making bread without wheat and gluten. It can be done. It has been done and many times it surprises you how wonderful it actually can be.
I love to experiment and try new ideas in the kitchen. I have had many failures along the way, but because my mistakes often are remade into a masterpiece later I don't give up.
This recipe was purely inspired by Iris' Easy French Bread at Daily Dietribe, but with some tweaks of my own, and some experimenting with the lack of, or love of other ingredients I came up with this bread that my family loved. I have to buy some whole psyllium husks to try a more accurate version of Iris' recipe. But I was surprised how well the powder worked in this recipe. I have to admit I was a bit nervous to eat a bread based in psyllium husks because of the fear of having too much time in the bathroom (TMI) but still there was no reason for concern for anyone in my household, so be rest assured.... it will not have the same affect of drinking a fiber supplement, unless I guess if you eat the whole loaf in one sitting!

Some of my favorite yummy soups to pair with it, a favorite chicken and rice (or rice noodle) soup recipe, Red Lentil Italian Soup, or a favorite chili recipe. Really any favorite winter soup or stew you may be craving will work perfectly with this yummy bread warm from the oven. Super easy and super healthy too!
Soft and Chewy Baguette Bread Recipe
{gluten, dairy, nut, yeast and gum-free}
Inspired by Iris' Easy French Bread at The Daily Dietribe

1 cup coconut milk beverage (I used So Delicious)
1 cup pure water
2 TB psyllium husk powder (I used powder- not whole)
2 TB apple cider vinegar

2 TB of olive oil
2 TB honey or other liquid sweetener

1 cup of white rice flour
1 cup of white sorghum flour
1 ts. of baking powder
1 ts. of baking soda
1/2 ts. of sea salt

plus handful of white rice flour for dusting


First, in a small glass bowl whisk together the coconut milk,water and psyllium powder. Then add in the vinegar and honey, oil and honey. Whisk together well and let sit for a minute or two. It will become a blob-like substance. Then add all of the mixed together dry ingredients and fold the dry into the wet. It will become a weird blob-like dough and then you can pour it onto a white-rice floured counter top or space with parchment paper. Roll a long 12-15 inch loaf into existence and then fold over and place on an oiled or parchment baking cookie sheet. Dust with more flour if it is sticky and then use a serrated knife to cut some decor lines or whatever pokes you desire. 

Put in 350 degree pre-heated oven for 45-50 minutes and let sit for 15-20 minutes depending on your oven and elevation. 

Use a bread knife to slice thick chewy slices and enjoy with your favorite soup or stew or spread with your favorite butter or jam.

Much love as always, stay warm, and remember spring is really just around the corner...

Monday, February 11, 2013

Grain-Free Banana Flax Bread

To be completely honest, the "grain-free" diet intimidates me a bit. Not in like a scary way, but in a way that seems more challenging to an already very difficult and specific allergy-free diet that I find myself in. You see, over the past year I have discovered that eating almonds and most other nuts really does bother my stomach and skin. It was a weird discovery, but one I was very glad to finally figure out. And I am not completely sure if it is permanent because I have been pregnant/nursing over the past 3 years and with these hormonal changes... your body and sensitivity levels change as well. So, with so much of the grain-free (or paleo, primal, GAPS) diet consisting ingredients like almond flour and so many nuts, it would be harder for me to stick to it in a healthy way. Although, it is totally possible with other foods like seeds and coconut, I also do not like to over eat eggs and meat as well. So, needless to say I find myself on a individual gluten-free diet that works best for me.
And as I counsel people after switching to the gluten-free diet, I encourage them to discover the same exact thing. No one diet is really perfect for every one, and it may take you doing some personal experimenting with a few or even specific foods to really know what makes you feel great and how to heal from years of not knowing how to deal with your body being extra sensitive or dealing with an auto immune disease. If you are on this journey as well, I am sure you have been discovering that this healing process takes time and new discoveries are always happening.
So, I would never be against the grain-free diet, but have just found that eating some whole (gluten-free) grains in balance with good sources of protein and as many vegetables I can consume works well for me. I do like consuming whole grain gluten-free grains best though because they are from a more "whole" state giving the most nutrients and benefits to give to the body.
But this bread is one way I have enjoyed a "grain-free" options over the past week. It does contain farm fresh eggs, so it is not vegan, but it does contain lots of protein, fiber and nutrients. Definitely a bread that I can feel good about eating for breakfast or a snack. Or if you are like me.... a huge slather of some butter or sunbutter. Hm delish!
I love how this bread sticks together perfectly and has so much flavor and texture with just a few simple ingredients. So this recipe at it's core is gluten and dairy free which is usually how most of my life goes. But it also may be a good option for those of you that have been pursuing how to eat more grain-free and without processed and refined foods or sweeteners in your life.
Grain-free Banana Flax Bread Recipe
{grain, gluten, dairy, nut and refined sugar-free}

4 small extra ripe bananas, mashed
4 pastured farm eggs
1/3 cup of milled flaxmeal
2/3 cup of tapioca starch or flour
2/3 cup of coconut flour
1/3 cup of melted coconut oil
1/3 cup of coconut palm sugar (or organic honey works too)
1 ts. of baking soda
1/2 ts. of sea salt
1 TB of ground cinnamon
optional: 1 ts. of pure vanilla, or dashes of nutmeg, cloves or ginger

First, mash the ripened bananas in a large mixing bowl, then add the eggs and whip together, then add the rest of the dry ingredients and mix well together. Add as much or as little cinnamon that you want, and add other spices or vanilla if you prefer as well.

Mix well and then pour the batter into a well-greased coconut oil glass bread baking pan. Bake in a preheated oven at 350 degrees for 55-60 minutes. This will make the crust a bit browned and crunchy, but will ensure a fully baked and firm loaf in the end.

Let cool and then pull from the pan after 20-30 minutes to continue to cool on the counter or a cooling rack. Slice thick and enjoy!

Much love to you!

Saturday, September 8, 2012

Garden Fresh Lentil Chili

I'll be honest. I'm not a big fan of the month of September. If it wasn't for my husband's birthday landing in this month I would boycott the 30 days all together. But alas, I'm just being childish and need to get my act together. September is here whether I fight it or not!

So here we are. Going into the 2nd week of September and I am trying to be brave and make it through to October. I have been asking myself why I dislike this month for a few years now, and I think I figured out maybe a few reasons this past week. 

One reason being that it is a month of starting back at school, routines, and the "normal" week. I love and savor the summer weeks of no where to be and yet plenty of places to explore. {Yes, I still live within the school-world-schedule because of my husband's job and love a summer holiday.} 

So when September shows her face I am usually willing to ignore it for a few days and then have to except it as real. Yes, September usually is a month of beginnings as well, and that is definitely something to celebrate, so I guess there is good and excitement amidst the flurry. But there is definitely a call for bravery in the discovery in how to live in that tension of the old and the new.
This month also reveals other frustrating visual tensions. Like the tension between hot summer weather and the cooler fall tempts. It has been raining on and off here the past few days and the cool brisk fall air has arrived (for a few days at least!). It seems as if summer is having her last fight and eventually gives into the cool fall breeze making itself known. I am looking forward to the cool tempts. Actually praying and dreaming for them, but the on and off hot switch leaves me a bit crazy. I rather pull of the band-aid with a rip and have us fully into cool and colorful October already!

I guess I'm discovering that I am the kind of person that doesn't do well with tension. For better or worse, this is just the kind of person I am. The healing journey will bring you to many places in the road where you start to learn more and more about yourself. More of what you can handle and more of how you need to push yourself to be something more (or less) depending on the truth you are finding in yourself. You have to be willing to live in the tension of letting go of the old and embracing the new.

This is a part of this gluten-free journey as well. Many of us have bad days with our health, diet or gluten. It's how we are wired. We are sensitive inside and out and this will show us new experiences and we have to learn how to be brave, cope and learn from the old and the new. We have to learn how to live in the tension of our gluten-free being in a gluten-filled world. We have to try and be flexible when we feel the need to live in a rigid world most of the time. Don't let bitterness, pain and frustration keep you stuck in the old. Embrace, explore and strive to discover the new. You might just find that the new can be better than you ever imagined. 

My hope for you is that you find yourself on the healing journey working through the tensions. So that you can live, celebrate and thrive actually living in the tension.  Not wishing for the life before or the life ahead. That you live fully present and live discovering more about yourself in this great amazing world.  
And that is where this lovely vegetable chili becomes a part of my September wailings. It represents the bounty still coming from my garden's womb and also the need to cook a pot of warming and inviting chili for comfort. It is a representation of hope for the fall, and a way to cope with the endings and beginnings of this time of year. 

Also, almost all of the veggies in this chili are from my own backyard and was a great use of the tons of green bell peppers I have in every corner of my kitchen counter. Which is something I needed to embrace and celebrate as well!
Garden Fresh Lentil Chili Recipe
(gluten, dairy, nut, and meat-free {vegan})
2-3 TB of olive or coconut oil for sauteing
1 large sweet yellow onion diced
1 ts. of grated fresh ginger
3-4 large garlic cloves, minced or grated
1 large cup of chopped celery (3 stalks)
1 medium-large chopped zucchini or summer squash
3 large bell peppers (or 6 small sweet peppers)
1 large cup of chopped carrots (3-4 carrots)
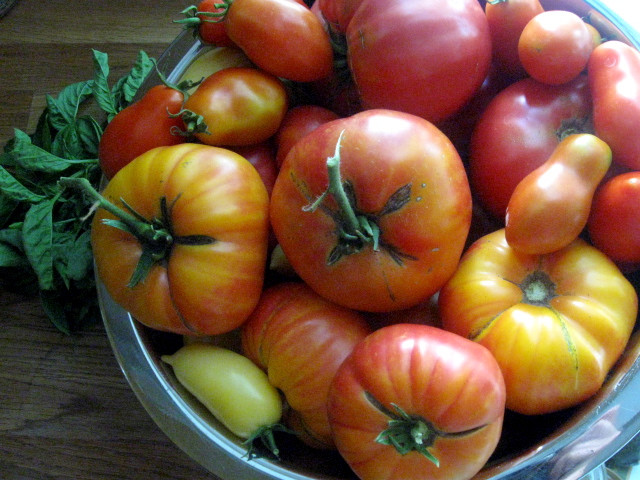
6 cups of roasted fresh tomatoes and juices (8-10 medium tomatoes)
2 medium roasted ancho or pablano peppers
4 cups of vegetable stock or broth
4 cups of pure water
2 cups of soaked and rinsed dry green lentils
2 cups of cooked chili bean mix  (black, kidney and pinto) 
or use 1 can of black beans and another can of bean of choice
handful of fresh chopped cilantro (or 1 TB of dried)
2 TB of chili powder
1 TB of ground cumin
1 ts. of ground cinnamon
sea salt and black pepper to taste

First, roast 8-10 medium to large tomatoes and 2 ancho peppers in the oven on 400 degrees or under a broiler for 10-15 minutes until the tomatoes and peppers skins shrink down or are a bit charred. Cool off and remove skins from the tomatoes and put the tomatoes in a blender if you prefer a smoother sauce. Then chop the peppers with or without the seeds to add the the chili. If you like spicier, keep the seeds in. Hold on the side until you are ready to mix together.

In a large 8.5-12 quart pot, saute the onion, garlic, ginger and celery in the oil for 5 minutes or until soft. Then add the peppers, zucchini and carrots and cook for another few minutes until color changes a bit. Then add the tomatoes (puree or roughly chopped) and the anchos. Stir well and then add the rinsed lentils, beans, broth and water. Stir well again and then add the rest of the seasoning ingredients. 

Cook on medium to high heat until a boil, then turn down the heat to a simmer and let cook for 50-60 minutes until the lentils are soft but not too mushy and the sauce is cooked and blended well together. 

Serve warm. Some options to serve up a nice bowl of this chili are over a bed of cooked quinoa or brown rice. Top with chopped avocado and fresh cilantro or herbs. Or if you prefer extras like organic corn chips, vegan sour cream or cheese those go well with this too. My favorites are cold avocado and fresh herbs. Also a fresh squeeze of some lime or lemon juice is always a nice last touch as well!

Some other additional ingredients that I did not have on hand or in my garden would be to add 1 cob of organic sweet corn kernels. Or sub the zucchini for 1-2 cups of small diced pieces of a winter squash like butternut. I will add that next time when I buy some at the market. Otherwise the zucchini or summer squash work perfect too.

I hope you enjoy this hearty bowl of delisiousness and find comfort, peace and hope for the journey today!

Much love as always!

Tuesday, August 21, 2012

PB&J Blueberry Crisp

Well... if you haven't noticed I have been neglecting the blog. Not really intentionally. It just happened. The past few weeks have been absolutely gorgeous here in Michigan and it just seems foolish to be indoors or not be on a grand adventure. And that is just what we have been up too. Two weeks ago we spent a very long week in Michigan's Upper Peninsula. I have only been there a few times, and never been to the tippy top. But this trip we went all the way up to the most northern point, called Copper Harbor. There are no words for the beauty that was all around us. We took day trips all over the region involving beach days, waterfalls, mountain trails, and yes, believe it or not, more berry picking.
There is something very healing and therapeutic about large bodies of water, fresh air and sun. It is like a healing suave that rushes over the body and spirit and brings more oxygen and life to your being. And the many colors of blue that radiant from the sky and waters is just breath taking and magnificent. So to add to your healing journey and eating real fresh foods, make sure you find some time to experience God's beauty in nature and let it bring more life and healing to your soul.
So, I'm sorry to be absent as of late, but can you blame me?!
Schedules, school and fall are right around the corner. And in the meantime finding the last minute summer adventures that await you are a must.
And, this simple crisp was a last minute...vacation assembled... masterpiece. Yes, another crisp...but this one is my favorite because it's super simple and the flavors are a combo I adore. I can't believe it has taken me this long to put these ingredients together. All that fresh clean air got to my head, I guess...in a good way!
Like I said, we found a local organic blueberry patch. (If you live in or around Houghton, Michigan then look for signs around Chassel on US-41 It is off of Klingsville Road from 41. This organic berry farm is called, Opa's and is off the beaten road a bit). These berries are grown right from the Keweenaw Bay off of Lake Superior. The blueberries mirror the lake's blue and the size and amount of these berries is really astounding. I have been picking blueberries in lower Michigan for almost 15 years and I have never seen such beauties. Some were as big as cherries and super juicy and sweet too. I was in love... to say the least.
So this crisp was created after a long day of adventures and put together with a few simple ingredients that I had with me while traveling. I do not know why I have not put seed (or nut) butter with berries before like this. It is a perfect pair, just like the classic PB&J. It has a way of melting your heart and making you feel like a child again. Perfect pair for a perfect treat. Now all you need might be a nice glass of your favorite chilled no-dairy milk (mine are either Hemp or Coconut). Or of course there is always some coconut ice cream too...
PB&J Crisp Recipe 
(gluten, dairy, nut and soy-free)

Berry Jam Filling:
3 cups of fresh (or frozen) blueberries
3 TB of tapioca flour
3 TB of coconut palm sugar
1 fresh lemon squeezed (about 3 TB of juice)

Mix all of the above ingredients together well and then pour into a 9x9 square or circle baking Pyrex pan. Make sure the flour and sugar mixed thoroughly and all berries are covered. If you do not have tapioca flour, arrowroot powder or cornstarch work as a great sub. If you want to try a mix of fresh berries like blackberry, raspberry and blueberry that would be a nice mix or even bend it a bit more with additional cherries. The key to get the PB&J taste is to stick with berries though.

Crisp Topping:
2 cups of certified gluten-free oats (I use Bob's Red Mill)
1/3 cup of natural sunflower seed butter (or your favorite nut butter works too)
1/3 cup of spiced apple butter (or add 1 ts. of apple pie spice to plain apple butter)
1/3 cup of coconut palm sugar
2 TB of light olive oil
dash- 1/2 ts. of sea salt

Mix the above ingredients together in a separate bowl, then sprinkle with a fork or your fingers over the blueberries in the 9x9 pan. Bake in a preheated 350 degree oven for 40-50 minutes. Basically until it smells heavenly and you see the blueberries bubbling over the oats. Pull from the oven and let cool for a few minutes and serve warm.  Tastes best warmed, but you could also add some vegan ice cream or a glass of milk. And make sure you save some leftover for breakfast :)
I hope you enjoy and find yourself in some late summer adventures. When we returned home we found our garden overgrown and ready for a lot of harvesting. I will share some of my garden love and creations in my next post....so much to return too when you get lost in summer fun.

Much love as always!