Showing posts with label gratitude. Show all posts

Thursday, November 30, 2017

Creamy Curry 'Leftover' Turkey Soup

You probably made your way through the Thanksgiving leftovers already, so this recipe may be coming a bit too late for you, but maybe you stuck some of that leftover turkey in the freezer or you are still planning on roasting that turkey this coming month. This recipe I have been putting together the week after Thanksgiving the past few years. Turkey soup with a touch of some new flavors, is just the excitement you need after a week of prepping for the big feast. Soup is the easy recovery meal that lasts and nourishes without all the kitchen clean-up. Which then nourishes you in more ways than one when you are needing a little space and time away from the kitchen to rest :)
I think my most favorite meals to make are the one-pot-meals. Ones that have all the veggies, proteins, grains and whatever nourishing roots and vitamins your body craves in one simple pot. It all comes together and to me represents love, family, togetherness. It fills me up in so many ways!
Creamy Curry 'Leftover' Turkey Soup Recipe
{gluten, dairy, egg, nut, seed, soy and refined-sugar-free}

2-3 TB of avocado or olive oil
1 large onion finely chopped
4-5 garlic cloves finely minced
1 TB of fresh grated turmeric
2 cups of finely chopped celery
hearty sprinkle of sea salt
sprinkle of fresh ground black pepper
2-3 cups of chopped carrots
1-2 cups of chopped parsnips
1 TB of Italian spice blend (rosemary, oregano, basil, marjoram, thyme)
Or use fresh herbs if you got them!
1 TB of curry powder

8 cups of turkey stock (or a chicken or vegetable works too!)
1 can of full fat coconut milk

2-3 cups of your leftover turkey (white and dark meat together make the best combo!)
make sure you cut into bite-sized pieces before adding in

1 cup of finely chopped fresh parsley

add in 1 cup of dry small rice pasta or already cooked rice for another added texture
add more sea salt or pepper to your taste
add in a little more water or broth if you want more of a brothy soup

In a large 10 quart pot, saute your onion, garlic, turmeric, celery in the oil for a few minutes. I usually salt and pepper here so to sweat out and cook down the flavors perfectly. Then after 5 ninutes or so when everything softens up I add in the carrots and parsnips and continue to cook for a few more minyes. Then when everything is looking a little softer and smells fabulous- I add in the spices, herbs and liquids. I first cook in the spices the curry and the dried herbs and you can instantly smell them as they are add in and start cooking. Then I add in the stock, coconut milk cream and leftover turkey. This will slow everything down with cooking, but keep the heat the same and let it come up to a boil. After cooking for 20-30 minutes and the veggies are extra soft, add in the fresh parsley and dry pasta. Or if you prefer to add in already cooked rice, that works too! Cook for another 10 minutes and the noodles will be aldente and ready to eat. Serve with a sprinkle of fresh herbs and with a side of bread or biscuits!
Creamy, full of flavor, comforting and nourishing. That is this soup. A bowl of goodness. A bowl of love and gratitude. So much to be thankful for this season, and one way I show my gratitude is cooking nourishing food for my family and sharing it with others. It is a gift that keeps on giving. Happy cooking and resting, friends xoxo

Saturday, March 11, 2017

Buckwheat-Quinoa-Millet Bread

This is my 'good ol bread recipe' again. But this time I revised it to be made without gluten-free oats and rice flour. The three main flours are buckwheat, quinoa, and millet. All 3 are alkaline-producing, protein-packed and have amazing doses of minerals and vitamins. All things your body needs in recovering from malnourishment from an auto-immune disorder or other digestive ailments.  My oat bread is fabulous as is, but this one offers a break from GF oats and has a much earthier taste and component. This bread also contains the psyllium husk powder and so lots of good fiber added to your gut as well. Just make sure to keep up with water drinking while consuming fiber for best results ;) I won't go into more details here...you get the point ;)
Our bodies love vegetables and fresh food, yes, but there is something very comforting and grounding about a good loaf of hearty bread. I think the vitamins and minerals in these seed-grains really have something to do with it too. The protein gained in these flours are also something wonderful and nourishing as well.  I could go on and on about my love for bread and the ways it centers, grounds and bring much love into our lives. It is something we learned to hate after our diagnosis of the GF allergy or other food allergies. It can be loved again and it starts here...
This recipe has changed my life. It all started with trying to create a GF bread without yeast and without gums. And it truly has been a gift to me and those who cannot eat yeast, and other gluten-free grains. Also such a great way to create a baked good with only a little honey to add in for breakfasts, lunches and snacks. It is the perfect pair for soups or for jam. My hope for you if that you will be brave enough to try again- start here- this is a bread recipe to pursue as you pursue healing and hope in your journey. Much love as always, and happy baking xoxo
Buckwheat-Quinoa-Millet Bread 
{gluten, yeast, dairy, egg, nut and sugar-free}

3 TB of psyllium husk powder (must be powder, not seed or husk)
1 cup of pure water
1 cup of non dairy milk (I used coconut milk beverage)
2 TB of apple cider vinegar
2 TB of raw honey
2 TB of olive oil

1 cup of finely ground fresh buckwheat flour
1 cup of finely ground quinoa flour
1 cup of finely ground millet flour (plus an extra 1/2 cup for kneading and rolling out)

*all 3 of the above flours can be ground from seed in the Vitamix or high powered blender* You can even grind them up together if that works best for you in the moment. I had my buckwheat and quinoa already ground up together and then I just added fresh ground millet to the mix.

1 ts. of sea salt
2 ts. aluminum-free baking powder (I use Hain brand)
1 ts. of baking soda

You may need 1/2 cup more of flour (a mix of the 3 or just millet) to knead and get less sticky

In a large mixing bowl, whisk the psyllium husk powder, water, milk, and apple cider vinegar together. It will turn into a thickened blob in a few minutes, then whisk in the oil and honey in together. *You can sub the honey for maple syrup if you are a strict vegan* 

Then, add all of the dry ingredients. Add in all the flours right on top of the wet ingredients blob and start by mixing with a spatula or wooden spoon until all of the flour is blended, but be careful to not over mix and make it too clumpy.  Then sprinkle in some more flour and use your bare hands to knead and turn over until you get a no-sticky anymore blob of dough that you can roll into a loaf on a parchment papered baking sheet. 

Don't be afraid to use extra rice or out flour to roll out if it is still sticky and not moldable.  Try and roll out a 12-15 inch loaf and roll out as many creases as you can. 

Bake in a preheated 350 degree oven for 50 minutes, but can last for 60 minutes if you want a crispier/thicker crust.

Pull from the oven and let cool for 20 minutes before cutting into. This will be hard for you because this bread makes your kitchen smell heavenly!

I hope you give this recipe a try if you are looking for a protein-packed and nourishing bread. Happy baking and much love and light, xoxo

Monday, January 26, 2015

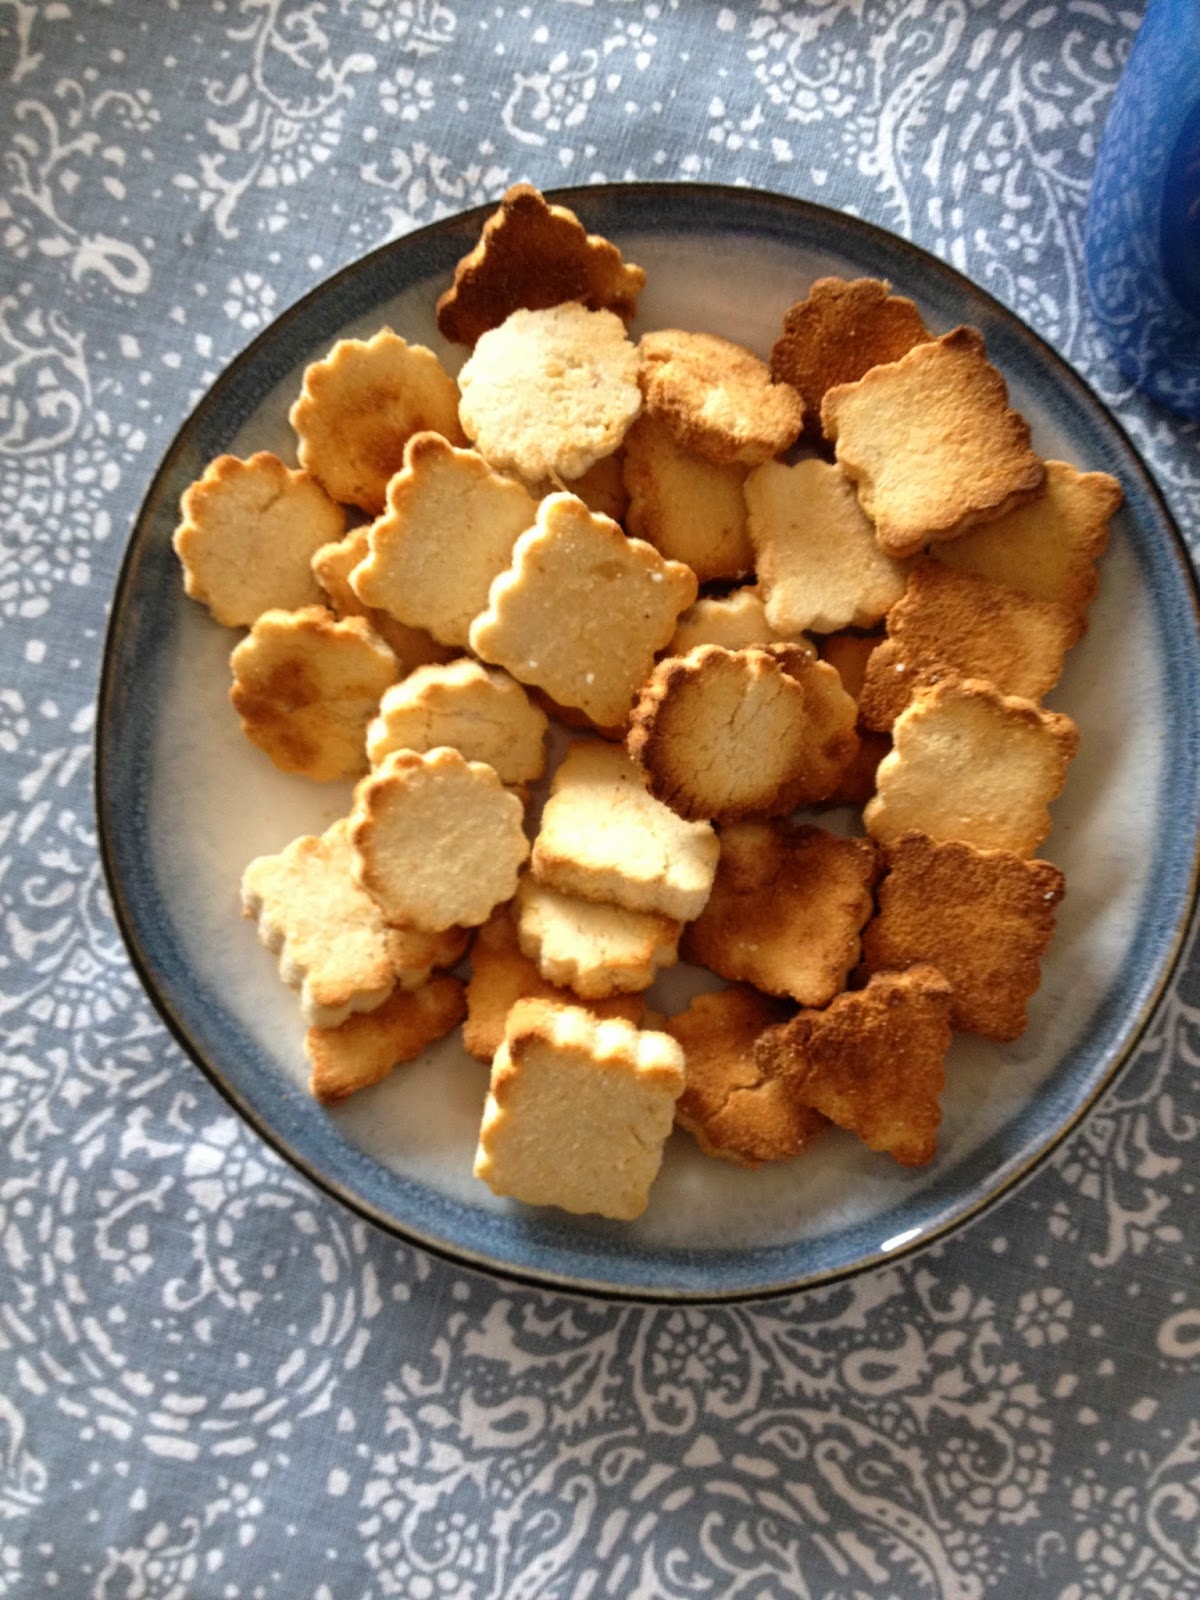
Coconut Applesauce Shortbread Cookies

Hello lovely gluten-free foodie friends. It has been a long while.
A, LONG. while :)

Last summer when I took a hiatus, I moved from our home with two small kids to a temporary {more rural} location for 8 weeks, then finally to our new home in new part of town. It was a long summer and fall and we are still trying to make sense and the craziness and get settled in 2015. I gave myself the space to put a halt to blogging and creating new recipes and just live in the moment and the convenience of the present. And for those friends that I was living with over the summer, they know I can't stay away from the oven for long. They found me baking goodies late into the night as my kids finally went to sleep.

I can't stay away. Not from gluten-free baking. Not from you.

No matter how hard I sometimes want to or need to. I can't stop baking and enjoying the attempt at new recipes and ideas in the kitchen. So I will start again. I have been making a few new recipes that I love over the past year that haven't made it to the blog yet. So that is where I will start. I hope this year will bring many new creative ventures in the kitchen and a continual pursuit of health and healing in the home. Thanks for following along and giving me another reason to put my recipes and thoughts to pen, I mean blog :)

This cookie recipe was born over the holidays when trying to make a simple cookie to serve with Against All Grain's Pumpkin Pudding Recipe. I LOVE this pumpkin pudding recipe because it is so simple and can be eaten as a treat while still sticking to a very simple and healing diet. A friend of mine posted it on facebook around December and I pulled up the link and was like whoa, I have all those ingredients already to go! Yum.

But when I was going to bring this pudding dish to a party I felt like it needed something more with it to look more than just a bowl of orangy pumpkiny poo. I wanted it to be served with a some-thing special dipping treat. So to avoid nuts, and grains, I made a simple shortbread cookie that only required a few ingredients as well. Another way I added these cookies to a holiday treat was a chocolate fondue. I made my chocolate sauce or an easy chocolate dip made from 1 can full fat coconut milk and 1 bag of Enjoy Life chocolate chips both melted together to create a creamy chocolate ganache dip. I made the chocolate dip and centered it in a bowl on a large serving platter then added these cookies, homemade marshmellows (recipe soon!), fresh fruit (clementines, strawberries, bananas, ect) and you have a pretty easy platter of simple deliciousness. These cookies are so simple with simple ingredients that I am sure you could find dozens of ways to enjoy them.

Coconut Applesauce Shortbread Cookie Recipe
{gluten, grain, dairy, egg, refined sugar, soy and nut-free}
1 cup of organic coconut flour
1 cup of soft or melted organic coconut oil
1/3 cup of homemade or unsweetened applesauce
1 TB to 1/4 cup of sweetener of choice: pure honey or maple syrup
1 ts. of ground ginger
pinch to sprinkle of sea salt

Preheat oven to 350 degrees. If your coconut oil is not soft, then melt it in a small sauce pan over medium heat. Pour the flour and ginger and salt in a pour, add the wet ingredients and then stir quickly by hand with a spatula while wet and sticky. Let batter sit for 5 minutes to let the dough get tough. It should be a soft but pliable consistency. If it is still too sticky then add a dash of flour until it more stiff and pliable. If it is too stiff then add a spoonful of applesauce or sweetener to make it more pliable. Use your hands to press and roll out the dough on a piece of parchment paper. Use a rolling pin to roll out a 1/4 inch thick piece or dough. It is best to use small cookie cutters. No bigger than 2-3 inches in diameter. This will help the final cookie product to not be so easily broken. Coconut flour is very fiberous and it easily broken when baked and dried out. So it really works best to make a small half dollar or smaller sized cookie. 

This recipe will make 3-4 dozen small cookies. Place on baking sheet and bake in a preheated 350 degree oven for 10-12 minutes. Watch closely. They bake very fast you can bake a little lighter or longer depending on your preference. I a happen to like them a bit crispy and browned so I bake closer to the 12 minute mark. 

I hope you try these lovely simple treats out and the AAG Pumpkin Pudding as well. A perfect treat even if you are trying to cleanse and heal your body this new year.

Lots of love to you!
Stephanie


Tuesday, December 10, 2013

Coconut Cut Out Shortbread Cookies

It has been snowing here non-stop for the last 4 hours and at times has been white out conditions. A perfect day to lock yourself in the house (well, kitchen) and do some holiday baking. Not to mention the absolutely freezing temperatures...the warm oven and hot cocoa are keeping me warm today and that makes me very, very thankful for a cozy kitchen. My heart aches for those without a safe warm home on a day like today. That sure is something to be grateful for this holiday season. And a reminder to give to those who are in need!

These cookies are actually grain-free if you are into that sorta thing. It is also nut-free but does have coconut, so I guess technically not completely tree-nut free. But it is an option for me who doesn't eat most nuts and especially almonds for the last few years. I miss almonds, but also know that I have felt much better since giving up nuts in my life. That can be understood in more than one way ;)

I love doing cut-out cookies, but the reality is... I am not really great at it. I guess I'm not a very patient person (or maybe dainty, detailed person). So that's my issue :) But thankfully when you have a little 3 year old that is interested in playing in the kitchen this cookie recipe is tons of fun. So you can kinda throw out all cookie making perfection out the door. Such a fun way to bake if you ask me :) 
Coconut Cut Out Shortbread Cookie Recipe
{gluten, dairy, grain, nut and sugar free}

1 1/2 cup of coconut flour
1 cup of tapioca flour
1/2 cup of unsweetened shredded coconut
1 ts. of sea salt
3/4 cup of softened organic coconut oil
2 farm fresh eggs
2 ts. of pure vanilla
1/3 cup of unsweetened apple sauce
1/2 cup of pure maple syrup

Mix all of the dry ingredients together, then add the coconut oil and mix well, almost turns into a sandy mixture or like you are making a pie crust. Then add the rest of the wet ingredients and mix well. Then use some extra tapioca flour to dust and form a ball of dough. 
Get out a parchment, rolling pin and your favorite shapes to get ready to make some cookies. I like to cut the dough ball in 4 pieces so that you can roll out the dough in chunks. 
You might need to use some extra tapioca flour for dusting and rolling. And you should try and roll the dough about 1/3 to 1/2 inch thick for easiest cutting and moving. The dough may seem a little dry and that it may fall apart, but after you bake it it stick very well together so no worries.
 Place the cookies on a parchment papered cookie sheet and bake in a preheated 350 degree oven for 20 minutes. Until the cookies have a golden edge. You can put the cookies close together on the baking sheet because they do not rise much.
 Let the cookies cool completely before you decide to frost or drizzle with chocolate.
 I decided to try out a chocolate drizzle on these cookies and it turned out delicious (and messy with a 3 year old). But the flavors are great together. Simple and good. 
I just melted 1/4 cup of dairy-free chocolate chips with 2 ts. of coconut oil and then mixed well and used a small teaspoon to drizzle it over the cookies. Let cool completely before you transfer. 
The cut outs turned out great, but you could also make this cookie dough into square shortbread cookies. Or roll out the dough into small balls and then press down slightly and then bake. You could also drizzle those cookies with chocolate for a finishing touch. 
These cookies are a perfect combination of soft middle, crunchy sides and crispy texture. Super easy and simple ingredients always make the best cookies!

Happy baking and ENJOY!

Monday, November 11, 2013

Homemade Dairy-Free Hot Cocoa Dry Mix

There's something about drinking something steaming hot on a cold winter day. It's sustenance. Snow and hot cocoa go hand in hand, and since today marks the first day of snow for this coming winter....yes, it is ONLY November 11th. We are going to have many many more days of cold and snow ahead of us before next spring. And that is why this cocoa dry mix is a fabulous addition to your pantry. Mix up a big batch and have it there ready to drink when you need some encouragement or have a moment of creativity or quiet "you" time.
Or perhaps you will want to share some of this great mix and bottle it up in some pint jars with a cutsie note and some peppermint candies and viola, you have a super cute and special homemade christmas gift for friends, teachers and grannies.
I made this mix from 3 main simple ingredients. The main difference than any other homemade mix is that I used rice milk powder. Like milk powder, but from rice milk and of course dairy-free. I was impressed with its taste and texture. Super fine and silky. So a perfect addition to a hot cocoa mix.

I bought this rice milk powder from Vitacost, but I bet you can find some at a local health store if you are desperate to search for it and buy it right away.

FYI: Now is the time to stock up on healthy holiday baking alternatives from Vitacost. Order today to guarantee you get it here before the holidays and to get the best sale and supply. I buy my coconut palm sugar, coconut oil, and some favorite GF flours. I bet you could find anything you usually bake with around the holidays...except cheaper than the "health" grocery store and maybe you'll even find a healthier alternative too!

Right now a great sale you can buy Wholesome Sweeteners Coconut Palm Sugar, 1 and the other 50% off. Vitacost brand is also offering their organic coconut oil for $16.99 right now which is a great price (5 dollars less than the usual price). There is also Enjoy Life chocolate chips that I love to use because they are allergy-friendly and good.

Also, if you are a first time buyer, you can get a $10 dollar coupon from me for your first order HERE. Super awesome to have a free $10 towards your grocery order, so take advantage and then spread the savings yourself!
Homemade Dairy-Free (vegan) Hot Cocoa Dry Mix Recipe
2 cups of rice milk powder
1 cups of dutch processed dark cocoa
3 cups of powdered coconut palm sugar
  (blend the 2 1/2 cups of sugar with 3 TB of arrowroot powder in high powered blender)
1 ts. of sea salt
1/2 - 1ts. of ground cinnamon
optional additions:
 1 ts. vanilla powder
 1 ts. of pumpkin pie spice
 1 ts. of ground ginger or cardamon
Mix all of the dry ingredients together in a large bowl with a whisk. Then use a funnel to scoop the mix into a canning jar to keep in the pantry or to share as a gift. The mix makes about 3 pint jars full and can easily be doubled or tripled to make enough if you use for gifts. 

To make the hot cocoa, put 2TB of the mix into a 8 ounce mug and pour boiling water or non-dairy milk into the  mix and stir quickly to have it dissolve.  Add some cold non-dairy milk to cool it down and cream it up.

Stay warm and enjoy!

Saturday, May 12, 2012

Pink Berry Pancakes (gluten-free, vegan)

Happy Mother's Day, to all of you mothers out there! I think I have more respect, love and thankfulness for mothers since becoming a mother myself. Especially for my own mother of five children and also for all the many many moms I have witnessed their sacrifice and love over the years.

I feel like when I became a mom I all of a sudden got accepted into this special club of mom-hood. It was like all at once I 'got it'. I understood the deep deep love for your child. The sacrifice, headaches and worries that grace your heart each and every day. Or like when you are at the grocery store and you or the other mom's kid are all of a sudden having a meltdown and you just look at each other and give each other silent support. We understand and remind each other that nap time is just around the corner!

So this 'day to celebrate mom's' means a lot more to me now than ever. I am all about having a day just for us! Seriously. Let's live it up. Have the kids make you breakfast, clean the kitchen, buy you flowers. You deserve it, and you need to let yourself be loved and cared for (even if it feels like maybe this is your only day per year!)
I think that being a mom means that you understand the tension between the simplicity and complexity of life. We get to experience the simple heart of our child and yet know that life, growth and love can some times be so complex there are no words. We can ache and have joy in the same emotion. Being a mom has been one of the greatest gifts I could ever ask for.
So this recipe comes just in time for a nice mother's day breakfast or brunch, and you may need a daddy or other helper if you have smaller children. Or, make it all together and enjoy. The pancakes have a good amount of fresh strawberry puree in them to give them a pink hue and with a touch of fresh berries, or bananas or your favorite topping these pancakes are absolutely divine!
Now that's a perfect bite. A slice of strawberry, a slice of banana and a slice of pancake. All kissed with a gentle touch of raw honey and lemon. Hmmmm, good. Love, love, love!
Whole Grain Pink Berry Pancake Recipe 
(gluten, dairy, egg, nut, sugar-free and vegan) 
1 cup of buckwheat groats 
1 cup of gluten-free rolled oats 

*Grind each grain, separately in magic bullet or high powered blender 
to make a heaping cup of flour- about 1 1/4 cup of each flour*

2 TB of aluminum-free baking powder
2 TB of chia seed meal
2 TB of grape seed oil or light olive oil
2-3 TB of maple syrup or coconut palm sugar
1 ts. of pure vanilla extract or 12 drops of liquid vanilla stevia extract
2 cup of non-dairy milk (I use So Delicious coconut milk beverage)
2/3 cup of pureed fresh strawberries (or raspberry)
1 fresh lemon juiced (1-2 TB)
optional: zest from one lemon (about 1-2 tsps.)

optional additions or toppings:
fresh strawberries
fresh raspberries
fresh sliced bananas
goji berries
local maple syrup
raw and local honey

Pancake Instructions:
*First, grind your buckwheat groats and oats separately so that you have your flour for the pancakes. Then, mix the flours and all of the dry ingredients together in a large bowl. Then add the wet and whisk well together. You know your batter is doing well when you start to see the batter-bubbles appear and the batter thickens.   

*Then, warm either your skillet or griddle and use some coconut oil or ghee to grease up the frying area. Then use a 1/4 or 1/3 measuring cup to pour batter over the hot skillet to make a good sized pancake. 

*Let cook for about 2 minutes and you will see bubbles on the top and then you know to turn to the other side. Cook for an additional 1-2 minutes. Make sure you keep the heat on low to medium so avoid burning! This recipe makes 1-2 dozen cakes depending on how large you make them.

Well, that's my kind of special 'mom' breakfast. Pink pancakes. Lots of colors, fresh sweetness and spring time lovin'. I hope you have a great weekend filled with love, flowers and the great outdoors!
Much love as always! And to all the momma's, Happy Mother's Day! 

Thursday, November 17, 2011

Pumpkin Coconut Cream Pie (vegan)


Pumpkin pie with a coconut cream twist. It is a creamy, pudding-like piece of goodness that will have you coming back for more. I just needed to post this one last recipe before I posted my gathered together 2011 Thanksgiving menu for you (I hope to tomorrow). I have been working on putting this together for weeks, and because I am hosting this year, I had a lot more planning up my sleeve to keep me busy. I am so excited for it all to come together, and share a delicious meal to celebrate life and give God thanks for all the gifts he has given us.
This dessert is perfect for fall, and perfect for the dairy-free, gluten-free, nut-free friend that may be having troubles figuring out what to make for a Thanksgiving dessert. Yes, there are a lot of options out there, but this one avoids eggs and milk, and not to mention has an amazing dose of wonderful in it. Tastes good and good for you. And can I just say, I love chia seeds and coconut. And the pumpkin is just the "cherry" on top.
I will mention that the inspiration for this recipe from comes from Iris's Squash Pie and Kelley's Pumpkin Bars. Both are other amazing options for a Thanksgiving dessert or fall treat. Thanks ladies for your inspiring devotion to gluten-free living. 

Pumpkin Coconut Cream Pie Recipe (vegan)


Crust:
1/2 cup of tapioca flour
1/2 cup of sweet sorghum flour
1 cup of fresh buckwheat flour
2-3 TB of coconut palm sugar
dash of sea salt
dash of cinnamon and ginger
5 TB of organic coconut oil
1-2 TB of pure water
2 TB of apple cider vinegar

Mix the flours first, then add the sucanat and salt. Then add the oil and mix well together. Lastly add the cider and water and get a crumbly but sticky dough. Then roll it a few times in your hands and then press with your hands on the bottom of a pie pan. It doesn't have to be perfect. Just make sure to try and even out the crust dough with a fork or your fingers. Once even to your liking, put in a preheated 350 degree oven for 15 minutes. Pull out from the oven and let cool on the stovetop.  Prepare the filling while cooling.

Pie Filling:
2 cups of fresh baked pumpkin
1 can of full-fat coconut milk
2 TB of coconut flour
1/4 cup of chia seed meal
1/3 cup of coconut palm sugar
1 ts. of ground white stevia powder or 12 drops of Nu Naturals pure vanilla stevia liquid
2 TB of soft coconut oil
1 teaspoon of pure vanilla (omit if you use vanilla stevia liquid)
1 TB of pumpkin pie spice blend (or 2 ts. of ground cinnmon,  plus 1/2 ts. of ginger, cloves and nutmeg)
1/2 ts. of sea salt

In a large blender (I used just a regular, but a high-powered or Vitamix or Blendtec would be awesome), or large food processor, put all of the above ingredients in. Then blend away and it should whip it up to a pudding-like mixture. You could also try whisking the filling in a bowl with a mixer or hand held whisk, but I liked using my blender to have less mess and work. Blend till smooth. Then pour the mixture into the cooled pie crust. You will want to lick the spatula on this one. So yummy just as a pudding mix really. Then. smooth out the filling in the pie crust and make a swirl or look pretty because it will come out this way when you are done. Then re-enter the pie to the preheated 350 degree oven and bake for exactly 30 minutes. Pull from the oven and let cool till you can touch the pan with your fingers, then put in the fridge and let cool overnight. Or at least 6-8 hours so that it is set and firm and ready for cutting.


Then, ENJOY!
Notes:
-You do not need a whip topping for this dessert, the pie is perfect as a combo of pumpkin and whip already together.

-It's best served cold. And it may get a bit messy, but the crust is firm, so you will be able to get under the crust and pull the piece out from it's roots. Try and use a clean knife to cut each piece if you are worried about the pieces sticking together.

-You can use any GF pie crust if there is one you prefer


I hope your holiday menu is coming together and you are enjoying the thought of having a feast with friends and family. I will be posting my menu tomorrow. Much love to you today!
xoxo
Stephanie

Wednesday, November 16, 2011

Maple Green Beans with Caramelized Apples

What a combo! Caramelized apples, onions and then tossed with tender and fresh green beans. Once you have this simple green bean dish you will not be wishing for some creamy green bean casserole. I know, it's true, I used to love the "traditional" green bean casserole. You know the one you eat maybe only once a year at Thanksgiving dinner. Yeah, that one, with the crispy onion tops. Yes, there is something about tradition, but I promise this dish will fulfill all of your desires in a green bean dish. It's crisp, fresh, healthy and full of flavor. Perfect for any fall feast, and could even be made into a great dinner dish on it's own.
Just look at those flavors and colors. Green beans are one of my most favorite veggies. Mostly because I love the texture and the first bite into a freshly picked and steamed beans. Crisp and crunchy. And, I love their gorgeous green color. But really, I think this simple combo of apples and green beans is the perfect addition to your Thanksgiving feast. That is why I am sharing this dish with you now, and you can also look for it on my Thanksgiving Menu line-up (that will be coming in the next post!)
The great thing about this simple green bean dish is that it can be made in minutes. With all the other craziness of preparing the Thanksgiving feast, you need to have one simpler side that is better than canned apples or beans. This is your trump card. Plus, fresh or frozen green beans are so very simple to prepare. No cutting, no pealing...so simple. I love fresh beans, but I have also bought some great frozen organic beans at Costco in the freezer section. 

This dish will have everyone ooooing and ahhhing with the great fresh fall flavors and whether you are planning a turkey or not, this dish may steal the show. I have been making this dish for a few weeks now with all the fresh apples, but now that Thanksgiving is almost here I decided this is a must for the feast. A gluten-free Thanksgiving doesn't need to be frustrating, difficult or "impossible". This simple, fresh side is a good reminder that eating gluten-free is actually an amazing journey of eating fresh and delicious food. Celebrate and be thankful, friends!

Maple Green Beans with Caramelized Apples Recipe
2-3 TB of olive oil
1 medium sweet onion, or 4 large shallots
2 medium-large apples cored, and thinly sliced (I used 3 small Empire apples)
2 pounds of organic fresh or frozen green beans
2 TB of pure maple syrup
2 TB of apple cider (or orange juice) *If you want more tangy, use apple cider vinegar instead*
sea salt and cracked black pepper for topping and taste
1/4 cup of roasted pumpkin seeds or slivered almonds for topping


optional ingredients: fresh sage, dried craisins or raisins


First, in a large skillet or pan drizzle some olive oil and saute the onions and apples. Let them saute on medium to low heat to not burn, but to caramelize and turn golden and soft. Then, bring a large pot to a boil and sprinkle some sea salt. Add green beans to the boiling water and do a quick 3-4 minute boil with the beans...until they are tender, but still crunchy crisp.  Or, you can also steam the beans for about 4 minutes if you prefer. 


Lastly, add the tender green beans to the large skillet with the onions and apples, Then add the cider (or vinegar), maple syrup and salt and pepper. Stir all together and let cook over the heat for just a minute to blend all of the flavors. Then you can toss some fresh roasted pumpkin seeds or slivered almonds to the top of the dish to serve. If you prefer to add more oil (or butter if you prefer) or syrup for more saucy flavor, then go for it. Also, I have a lot of fresh sage on hand that I thought about adding just a sprinkle of to add some more flavor. I didn't add it to the recipe though because I didn't want the sage flavor to overpower the caramelized onions and apples. So add some fresh herbs only if you like. 


Serve with dinner as a side, or pour over some quinoa and chickpeas for a nice dinner plate. This recipe will serve about 6-8 people as a side dish. 

Ok, friends... I had to post this simple and amazing recipe before I posted my Thanksgiving line-up. I am planning to roll that out by Friday and looking forward to sharing my favorites, some other's favorites and a little bit of thanks-givings-of my own.

Much love to you today!

Monday, November 14, 2011

Apple Pie Bars (vegan)

Thanksgiving is just days away and I am thinking about pie. I was thinking about the turkey as well, and the stuffing...but the pie, that is what I can't get off my mind. Who doesn't love the fresh pumpkin pie, and yet I have so many fresh apples this time of year too. Should we make both pumpkin and apple?
Hmmm, yes, I think we should. But, could we really eat a slice of both?! Even after the fabulous dinner? Who am I kidding?! Ok, ok, it is Thanksgiving after all...

What a dilemma. In a good way, of course. The dilemma alone is something to be thankful for! To have an abundance of fresh apples and pumpkins, plus the ability to make a gluten-free vegan homemade treat from a warm and cozy kitchen. Very, very thankful for the abundance of food and pleasures that we are able to have. Much to be thankful for, and much to share.

So, what if hypothetically... let's just say...we made both. But one was a bar, and the other a real pie.

Ok, ok, I can deal with that. And, superficially, it makes me feel less of a glutton. One piece of pie, and one bar...:)
It doesn't really matter (really!) because you are still eating both, but for the sake of appearances :)

The apple pie bars add variety and they are pretty cute as well. I have been thinking up this creation for a while. Especially since I love apple pie so much, but sometimes, you really don't want (or need) a whole slice of pie. Apple crisp is yummy as well, but sometimes it's hard to portion-control when you feel like you are eating oatmeal. So a cootsie-cut-up apple pie bar might just be a fun way to get the best of both worlds. Plus, these turned out to be melt-in-your-mouth delicious!
Apple Pie Bars Recipe (vegan)

Crust:
1 cup of Bob's Red Mill gluten-free baking blend (or other GF blend)
2/3 cup of millet flour
1/3 cup of tapioca flour
2 TB of sucanat
dash of sea salt
4 TB of organic coconut oil
2-3 TB of pure water

Mix the above ingredients in a small bowl, except for the water. After you have mixed the flour and oil you will have pea-shaped flour blend, then add 2 TB of water to get a doughy crumble-like pie crust. You may need to add another TB of water depending on how dry it is. Then, crumble the dough on the bottom of a 9x13 pan and press down with your hands and fingers to make a "pie crust" It doesn't have to be perfect, but if you want to use the bottom of a cup or measuring cup to smooth out and even out the crust, that works great. Then, put in a preheated 350 degree oven for 15 minutes, until golden brown, but not overly baked. Par-baked. While baking, make your apple fulling... 

Filling:
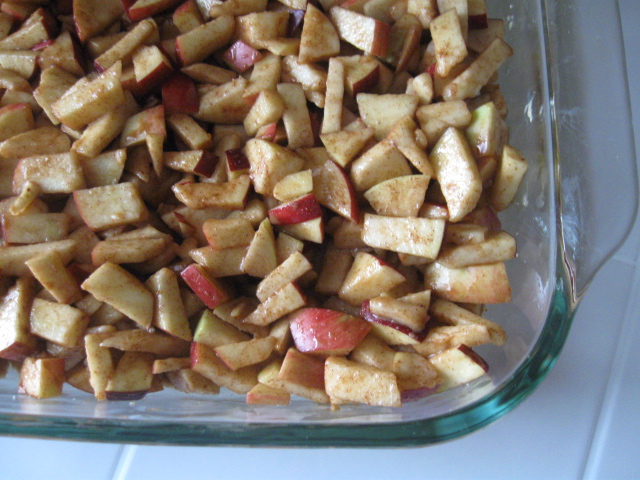
5-6 cups of finely chopped apple pieces ( I used 7 small empire apples)
1 TB of ground cinnamon
1/3 cup of tapioca flour or arrowroot starch
1/4 - 1/3 cup of maple syrup or coconut palm sugar
juice of one lemon
3 TB of pure water, or apple juice

I leave the skins on my apples because I like skins, but if you want to peal, that is fine too. Basically, fine chop your apples into small pieces, then in a medium bowl mix the apple pieces with your lemon juice, water, sweetener and flour and cinnamon. You make a nice coating of spice and flour over all of your apples. Mix well to make sure it is evenly coated. Let sit while you pull the crust from the oven and let cool just a bit. Then, when the crust is par-baked and slightly cooled, pour the apple filling over the crust in the 9x13 pan.
Then, lastly, you are ready to make the topping...

Topping:
1 1/2 cup of gluten-free rolled oats ( I used Bob's Red Mill)
1/2 cup of Bob's Red Mill gluten-free flour blend
1/2 cup of millet flour
1 cup of coconut palm sugar
dash of sea salt
1/2 cup of organic coconut oil
2-3 TB of pure water

Mix the oats, flour, salt and then mix in the oil. Lastly add the water to bind and make a crumble-like mix. Start with 2 TB of water, add  1 more if you need it to be more crumbly or wet. Then crumble the topping over the apple filling and press down firmly with a spoon or spatula (I used my hands too!) Make a firm and packed looking top and don't be afraid to press down to pack it all in together.


Then, put back in the 350 degree oven for 1 hour. Bake until you can see the apples bubbling. Then pull from the oven and let cool at least 1 hour, but 2 would be better. Cut squares, 4x5 bars in a 9x 13 pan. Use a fork or spatula to serve to be able to get under the pie crust and serve out like a bar. You can use your hands or a fork to eat. It will still be a bit messy and crumbly like a pie or crisp, but you have more control over it because you cut the squares. You can serve slightly warm or cold. 
No need for ice cream, unless you want it. They can be cut and serve on a nice platter to make it easy to pick up and put on a plate. Good for dessert, but could also be a nice party-food for a group or an appetizer.
I even had some friends be my guinea-pigs on this treat, and they also liked it. So, just don't take my word alone, even though I am my harshest food-critic. Plus they surprised me and even tasted better the next day. Just look at the apple pie goodness...
So, you may be thinking about your gluten-free Thanksgiving menu as well. I am gathering my menu together, and I am planning on sharing it with you in one of my next posts. I will share what I am making, my recipes, and even some of my other favorite links to my favorite turkey brine and roasting tips. I buy my turkey from a local farm, which I think only adds to the amazing-ness to the dinner and follows my values of eating local, farm (not factory) raised meat. More info to come in my future post...
But for now... You can bet this apple pie bar will make an appearance on my Thanksgiving menu. It turned out just as I had hoped and it will be a great addition to the fall-seasonal dinner and dessert menu.

I hope you find yourself planning with excitement and no anxiety this holiday season. Make your gluten-free menu fun and full of the foods you love. Lots of seasonal veggies and fruits, and may you have the spirit of anticipation instead of dread!

Much love to you as always!