Showing posts with label make it fresh. Show all posts

Thursday, April 19, 2018

Chicken Schwarma + Coconut Basmati + Cucumber Salad + Cauliflower Chickpea Curry

Here's a meal that you cannot forget. You know the ones... they stick with you. The smells, the textures, the memories. It has all the qualities of warmth, love, nostalgia even. It may just for me because it does remind me of my time of living overseas in Israel. It also reminds me of friends I have eaten it with. It is the kind of meal that you make for a crowd and sit around the table for hours and laugh and tell stories. So I shared this meal with a group of lovely women I cooked for at the most recent Women's Wellness Retreat. I got to share a piece of my story and my heart with these beautiful brave women. And now, I am sharing this meal with you. I hope you give a try and recreate this same nourishing and loving meal for all of your people.  It is the kind of meal that offers space for CONNECTION, LOVE and a shared LIFE together. ENJOY!

Chicken Schwarma Recipe
{gluten, dairy, egg, soy, sugar and nut-free}

2-3 pounds of chicken thighs (I search down local, organic or all-natural meat for cooking)
2-3 TB of olive oil
2 fresh lemons-squeezed for 1/2 cup of fresh lemon juice
2-3 fresh garlic cloves finely minced
1-2 ts. of sea salt
1 ts. of ground black pepper
1 ts. of ground cumin
1 ts. of ground coriander
1 ts. of ground turmeric
1 ts. of ground paprika
1 ts. of ground cardamon
1/2 ts. of ground cloves
1/2 ts. of ground cinnamon
1/4 ts. of cayenne pepper

In a 9x13 Pyrex baking dish spread out the raw chicken thighs, drizzle some olive oil and lemon juice and sprinkle all the spices and salt and pepper over. Then use a fork or your hands to massage the spices into the meat. Then cover with foil and let it chill in the fridge over night or at least for an hour. Then bake in a 350 degree oven for 15-20 minutes covered and 15-20 minutes uncovered until it is fully cooked. Let cool for a minute and then you can either serve as is or slice each piece into a few pieces and make it more easy to serve on rice or pita.
The meat is super flavorful, juicy, tender and full of goodness. I like how it has it's own sauce and can be easily put over rice, lettuce, in pita or on a flat bread. A flawless chicken dish!
Cucumber Salad or Israeli Salad
{gluten, dairy, egg, soy, sugar and nut-free}
4 English cucumbers, sliced, quartered and halved again (1/8th of a circle piece)
2-4 small campari, cherry or Roma tomatoes (basically need 1/2 cup of tomatoes, diced)
1/3 cup of finely chopped onion, I used red onion for this recipe
1/2 cup of fresh finely chopped parsley
1/2 cup of fresh finely chopped mint
2 lemons squeezed for juice (1/2 cup)
1/4 cup of olive oil
big pinch of sea salt and cracked black pepper

Chop all of the above in a large bowl and drizzle in the lemon and olive oil and herbs and viola, it is that easy. You can add more or less of all of the ingredients depending on what you got on hand or growing fresh or your preferences. It is a simple, but absolutely perfect salad. Crisp and cooling- delicious!
I make this curry recipe as a meat-alternative to this meal, but also it is good all mixed in with the meat and over the rice because it not only has all of the same spices but add textures and flavors you can not plan more perfectly! The recipe is here- Cauliflower and Sweet Potato Chickpea Curry, but I will also put it below just to have them all in the same place :)


Cauliflower and Sweet Potato Chickpea Curry Recipe
{gluten, dairy, egg, soy, and sugar-free, vegan if you use vegetable stock}

2 TB of avocado oil for sauteing
1 large onion finely chopped
4-5 garlic cloves finely minced
1-2 TB of finely grated fresh ginger*
1-2 TB of finely grated fresh turmeric*

2 cups of raw washed, cut into bite sized pieces, cauliflower
2 cups of pealed and cut and cubed pieces of sweet potato

1 14 ounce can of diced organic tomatoes
1 can of full-fat coconut milk
2-3 cups of chicken or vegetable broth
1 14 ounce can of organic pre-cooked garbanzo beans
1 ts. of curry powder
1 ts. of ground paprika
1 ts. of ground cumin
1 ts. of ground coriander
1/2 ts. of ground cinnamon
pinch of cayenne
pinch of cloves
1 ts. of sea salt
hearty pinch of fresh ground black pepper
optional: 1-2 TB of tahini, or a nut butter like almond or peanut for extra thickness and flavor

2 cups of fresh finely chopped greens (spinach, kale or chard)
handful of fresh chopped cilantro
1/2 cup of raisins (I like a mix with golden raisins included ;)

for serving:
serve over prepared basmati or jasmine rice (or quinoa)
limes juice and wedges
sprinkle of fresh cilantro or parsley

In a large pot, saute the onion, garlic, turmeric, ginger with the oil and a sprinkle of salt and pepper, when it cooks down, add in the bite-sized cauliflower, sweet potato and spices and cook for another 5 minutes, then add in the coconut milk, tomatoes, beans and broth. Let cook, bubbling and covered for 15- 20 minutes until the potatoes are soft and the broth reduced. Then add in the raisins, fresh greens and herbs and let those get soft. It is ready for serving now, or you can turn off the heat and let it sit and cool a bit and thicken up. Then serve with prepared basmati rice. With a slice of lime and a sprinkle of some fresh herbs too. 

*If you do not have access to fresh ginger or turmeric root, then you can for sure used dried spices. I would start at 1 ts. each and add in more if you desire a little more punch...


And lastly I will give my instructions for the BEST coconut oil infused basmati rice and the steps to make it flawless each and every time!

Coconut Basmati Rice 
{gluten, dairy, egg, nut, seed and soy-free}

2 TB of coconut oil
3 cups of basmati rice
6 cups of pure water
hearty pinch of sea salt

So this recipe depends on how much rice you want to make I would suggest to make at least 6 cups of cooked rice for 4 people- so that would be about 3 cups of dry rice. You can make more or less of that amount. The key is to always have double the water for the amount of rice you have. 

So first step is to melt coconut oil in a medium to large pot. Once the oil is melted over the heat, add in the dry rice and let it toast and saute for a few minutes. It will start to give off an amazing aroma and you will look to see it has almost changed it color to look more toasted. Then add in all the water and the hearty pinch of sea salt and cover. Let the water come to a boil and then turn off the heat to a low simmer. You will have to watch this so that the water does not overflow. Once you start the simmer it will cook for about 10-15 minutes and will start to soak up all the water and you will see little poke holes formed. When you see this- turn off the heat and let it continue its cook in the pot, covered but no more flame. In about 10 minutes it will be ready to removed the cover and fluff up. It will be just about PERFECT- not too sticky or wet! and the subtle sweetness from the coconut oil and sea salt is just the perfect touch for any curry dish!

Layer all of the above recipes to create the most perfect of meals! I hope you recreate this lovely meal and share in CONNECTION, LOVE and LIFE.

Much love as always, xoxo

Tuesday, September 19, 2017

Fresh Heirloom Salsa

Hey loves, I know it's supposed to be the 'first of fall' everything this week, but the weather is forcasted to be one of the hottest weeks of the summer (haha!),  well of what is left of summer. The forecast is upper 80's and even maybe 90's for the rest of the week. Soooooo my hopes of making some soups, stews and fall comfort food just doesn't seem appetizing anymore. And I don't feel like standing over a steaming pot in the steaming heat either! So, I re-worked the food plan for this week and made simple ingredients to basically make your own grain/salad/protein bowls. Kinda like the Abundance Bowls idea. They are easy, can please many types, and can be easy pull-out of the fridge and warm-up (or not) kind of food. So perfect for a busy and hot week of September!

So I made some baked chicken nuggets for the kids, turkey meatballs and even some BBQ beef too. I also made a large batch of smoky cumin and paprika kidney and black beans dish and a large batch of basmati rice. Basically make yourself a batch of a grain (rice, quinoa, millet, ect..) and a batch of meat protein, and a batch of legume protein and then chop up all the fresh veggies and herbs you got (basil, cilantro, lettuce, kale, ect)  and roast or saute some other veggies you got (beets, zucchini, carrots, sweet potatoes) and then layer it up and drizzle with dressings or salsa.

That is why this recipe came into play.  Last weekend at the farmer's market, I picked up a few pounds of heirloom tomatoes and some cute and spicy peppers. And that basically the base of any good garden blender salsa... so here's my recipe, and it's super wonderful this time of year while the tomatoes are absolute perfection! My bowl that included this salsa was a scoop of rice, meat, beans, lettuce, suated zucchini, cilantro, avocado, and this salsa- so basically a taco bowl, but you could add in and out what you got and what sounds good. It's my version of fast food ;) And now for the easy peasy wonderful fresh salsa...
Fresh Heirloom Salsa Recipe
{gluten, dairy, egg, soy, seed and nut-free}

1-2 pounds of a mix of fresh heirloom tomatoes
(I choose a yellow, red, orange and green variety to add to my mixture...)
I like to add in the yellow and orange because they are less acidic and help balance it out
I usually just cut out the tops if they are overly tough or dried out

2 small jalapeno peppers (or you can use any favorite heirloom hot pepper)
If you are not into too much heat, then use a knife to cut and scrape out the seeds and do not use the seeds in the salsa. If you enjoy a little spice then I would just chop off the tops and throw in the pepper. If you use one large pepper- then you will want to chop up before you put in the blender to help it blend more evenly.

1 small sweet onion, roughly chopped

2 ts of ground dried garlic powder
2 ts. of sea salt
1/2 cup of coconut palm sugar
1-2 cups of fresh chopped fresh cilantro
1 lime squeezed
1 lemon squeezed

Put all of the above in a blender and blend well until thick and all equally chopped.

Serve over a taco bowl, salad, grain bowl, or just eat by the gallon-full with your favorite tortilla chips and guac. I don't eat corn, so my absolute favorite chip is the Beanfield's White or Black Bean chips with this salsa. These chips are my chip of choice!!! I could eat these every day :)

Hope you give it a try- Hope you eat and enjoy this beautiful food that can nourish you and show your body love. Enjoy and MUCH love to you as always, xoxo

Thursday, August 17, 2017

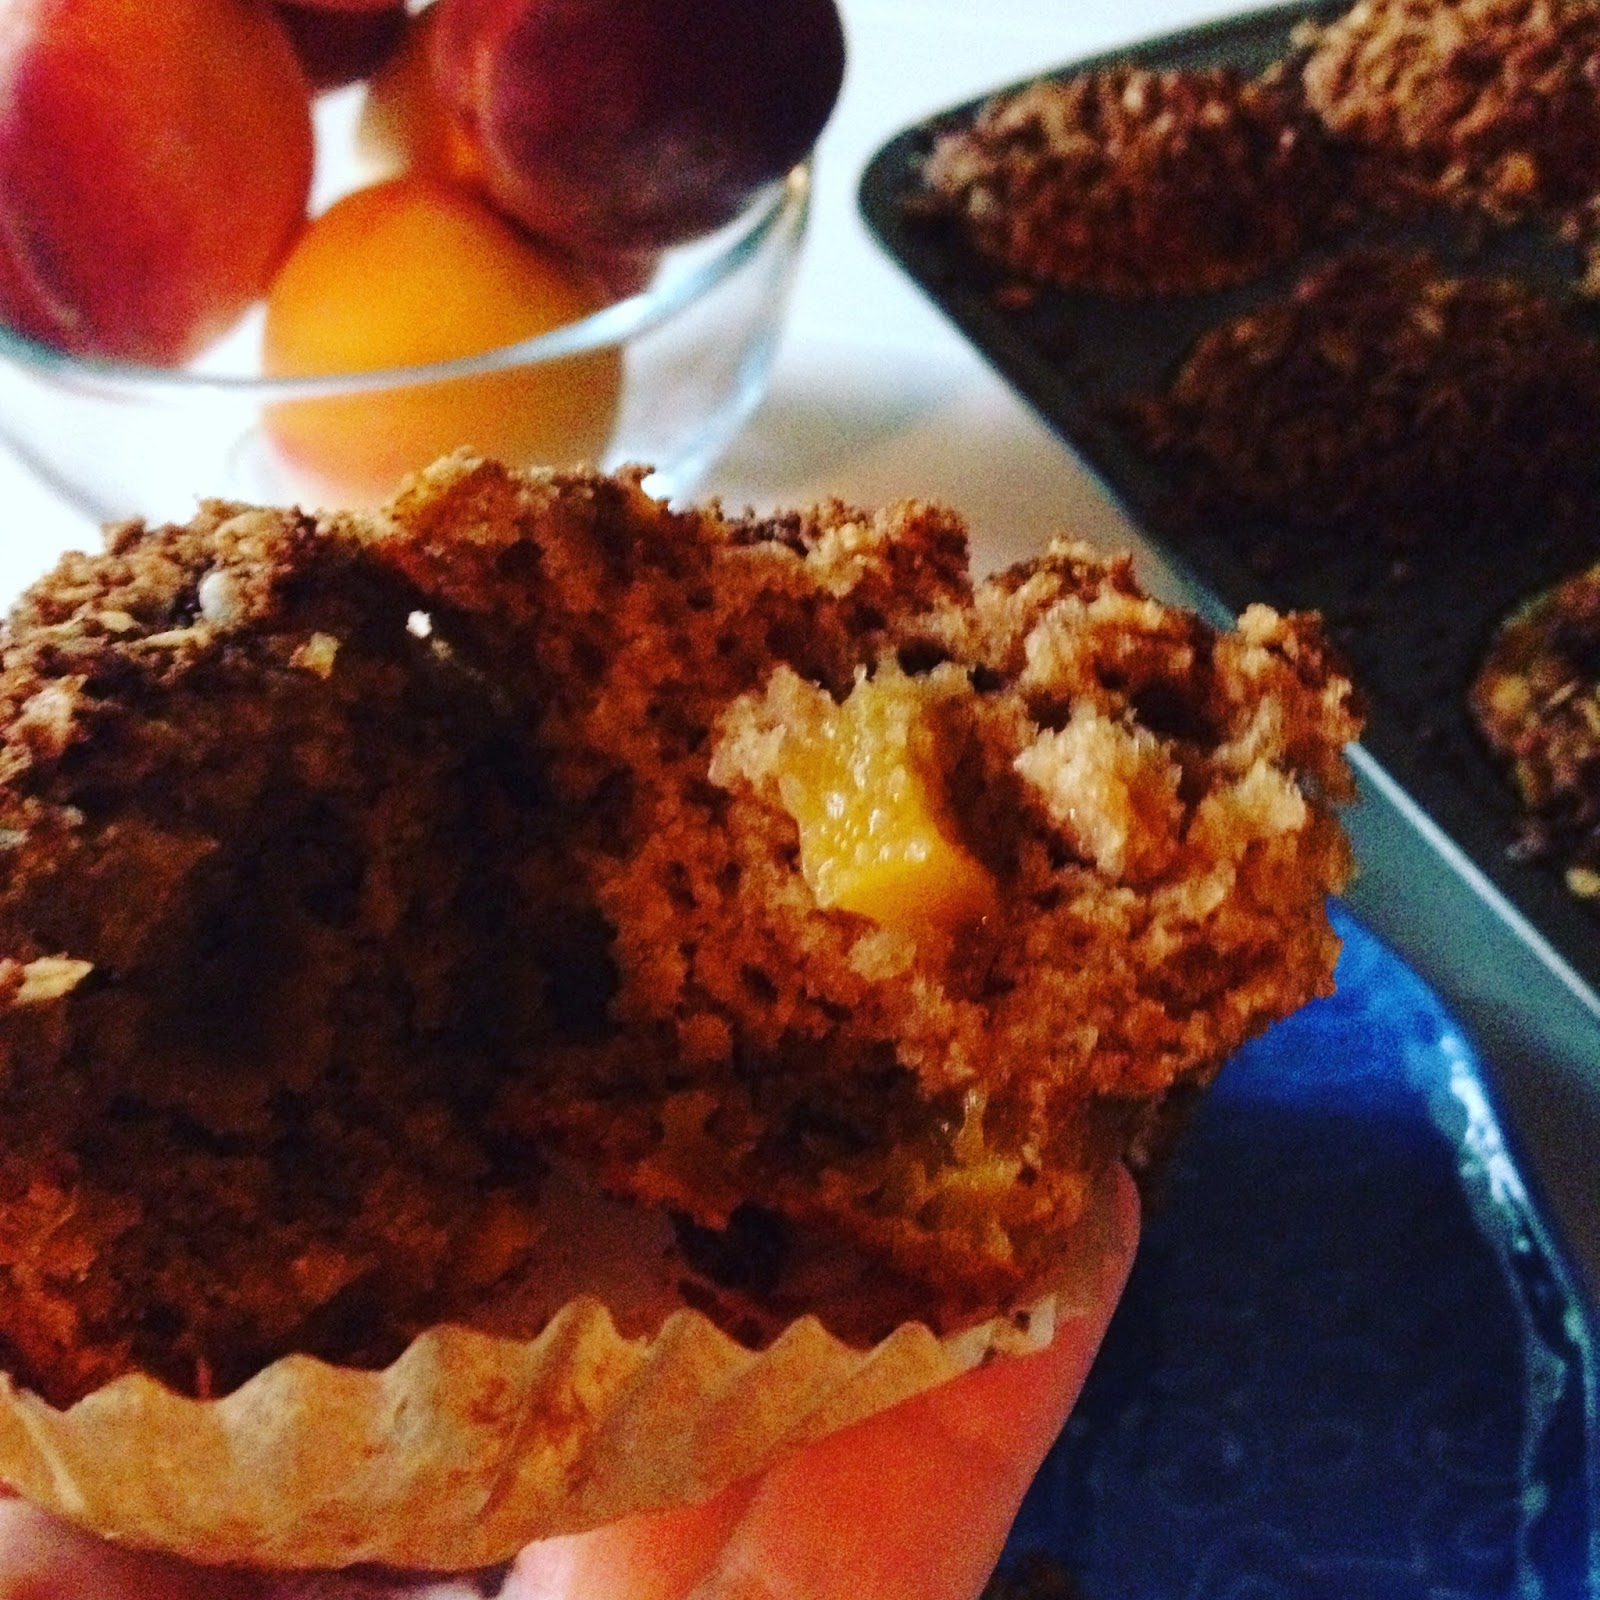
Peach Crumble Muffins

You guys- the Great British Baking Show on Netflix has taken over my life recently. Have you seen this show?! It might bring up some sorrow because there is so much to be missed from glutinous baking. Like pastry. Oh my! But the other night I found myself crying through the season 3 finally because of some of the words the winner said about herself. Ones that she would not set up boundaries for herself anymore. Ones that she would believe that anything is possible for herself. I love this show for so many reasons. First one starting with all the UK accents (I LOVE THEM!) but also all of the creative, art, science, beauty, determination, and perfection that can come out of baking. It is something I can resonate with, and even enjoy, though there is past grief that there is so much because of Celiacs Disease I cannot enjoy anymore. But in the same vein- we can not limit ourselves and loose heart- we must have determination to keep going and not give up on finding joy out of all areas of life. For life is a gift!
And I think we know this even more than the next guy because of the art and science and experience it takes to actually produce and love GF baked goods. I had that on my mind as I whipped up these muffins this morning. It was a perfect morning to bake as it is raining here and staying inside in a cozy kitchen was just the right thing for today. I felt like maybe speaking with my own British accent and making comments about my bake would almost have me imagining I was in the white tent myself ;)
The fresh amazingly sweet peaches were my subject of creativity today. I was hoping to make a slightly spicy, but sweet tart muffin. Trying to get a crumble topping as if you were biting into a warm piece of peach crumble or pie. If you've got peaches- give this a try and happy baking, friends!
Peach Crumble Muffin Recipe
{gluten, dairy, soy, egg, nut, seed, and refined-sugars-free}

1 1/4 cup of finely ground certified GF oat flour
1/2 cup of white rice flour
1/3 cup of tapioca flour
1/4 cup of potato flour
1/4 cup of coconut flour
2/3 cup of coconut palm sugar
2 ts. of baking powder (I use corn-free Hain brand)
1 ts. of sea salt
1 ts. of baking soda
1 ts. of ground cinnamon
1 ts. of ground nutmeg
1 ts. of ground cardamon

3/4 cup of date puree paste
1/3 cup of maple syrup
1/3 cup of coconut milk
2 TB of apple cider vinegar
1 fresh organic lemon zested and juiced
1/2 cup of softened coconut oil or avocado oil

1 1/2 cup of cubed and slightly stewed peaches*
I cut up 3 peaches and warmed them on the stove and cooked them down for 5 minutes with a drizzle of maple syrup and lemon juice, then cooled them down and added them to the recipe last to fold in- there may be a little liquid with cooked down peaches, and that is ok.

In a large mixing bowl, whisk all the dry ingredients together first and then add in the wet and fold in together well, you will notice the baking soda/powders doing their job with the apple cider vinegar right away. Fold in the stewed peaches last and then scoop 1/3 cup of the batter into each muffin tin. This recipe should make 12-15 muffins. Then before you bake off sprinkle with the following crumble topping...

Crumble Topping:
1 TB of coconut oil
1 TB of rice flour
1 TB of potato starch
1/4 cup of coconut palm sugar
1/4 cup of quick cooking GF oats
1 TB of cinnamon or 1 ts of each:cinnamon, cardamon, nutmeg
pinch of sea salt

Mix all of the above in a small bowl and sprinkle over each pre-baked muffin in the tins right before you put in the oven. Bake in a 350 degree oven for about 25 minutes. Let cool for another 15-20 minutes before serving or moving for best results.
 I hope you give these little sweet and spicy treats a try. The peaches are just about perfect right now. I am hoping to have a few more peach recipes in the next few days as I am finding so much love and inspiration for them this season. Much love as always and happy baking, xoxo

Sunday, August 13, 2017

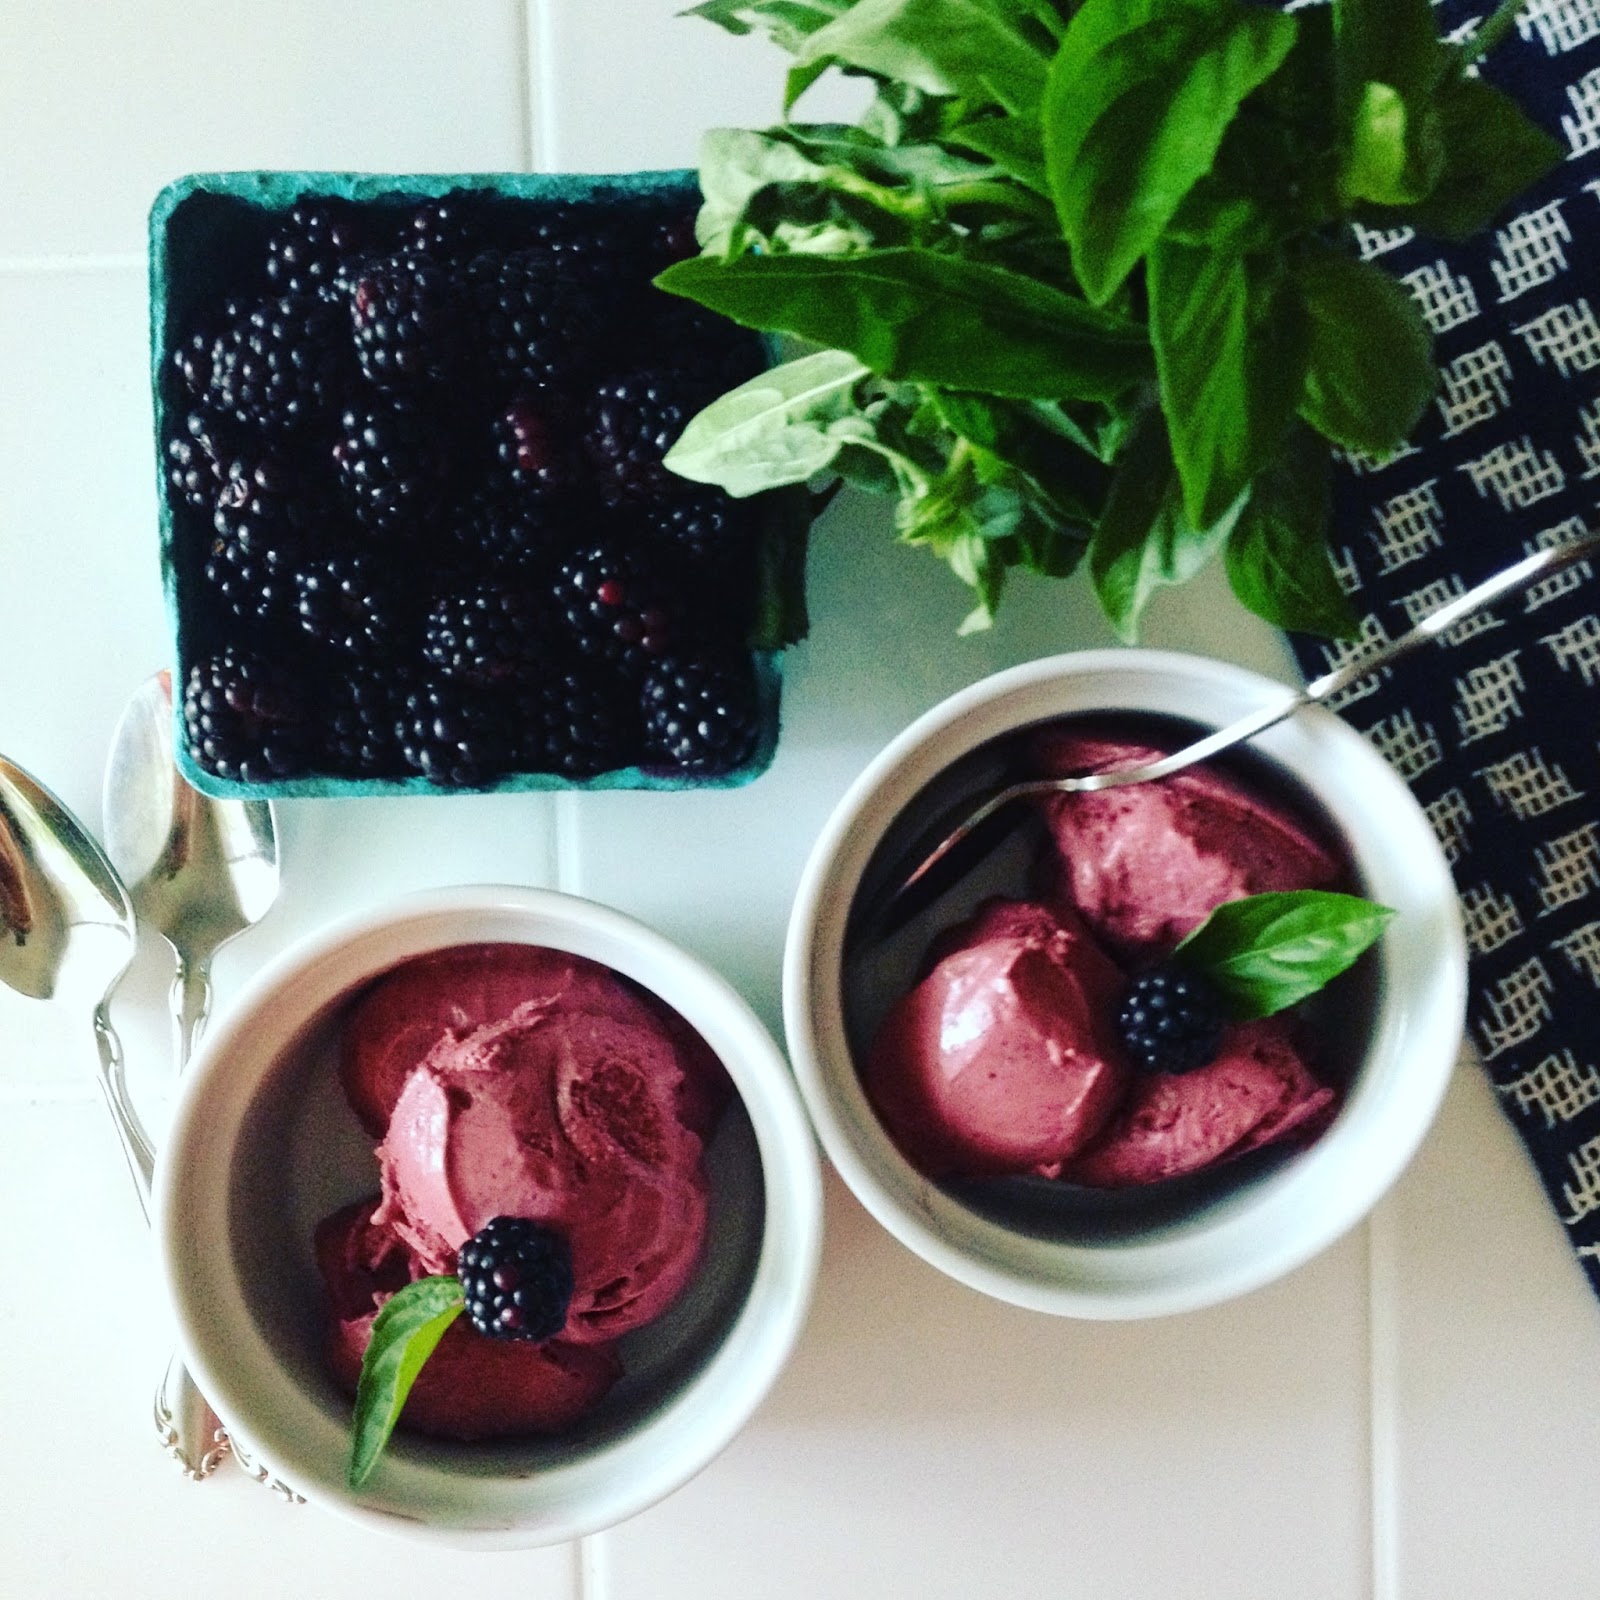
Blackberry Basil Coconut Ice Cream

Yessss, it's another vegan ice cream experiment!  Over the weekend, I was inspired by the plump gorgeous blackberries at the farmer's market and the strong aroma of fresh basil. My husband has been loving basil this season almost as much as me :) so it's also motivating to use it in just about every dish ;) 
Yes even in ice cream. Somehow that flavor of basil, almost liquorice-like, that adds just the right match to the sweet-tart of berries. I have added it to berry crisps before but to the coconut cream ice cream it is just about the perfect subtle touch. I didn't even add the leaves into the blend... just let them soak and simmer into the coconut milk before it's blended. Sooooo good!!! Be inspired by fresh colorful amazing food and let yourself be nourished and ENJOY!
Blackberry Basil Coconut Ice Cream Recipe
{gluten, dairy, egg, soy, nut, and seed-free}

2 cans of coconut cream (14 ounce cans, just scrap out the cream and discard/reuse water)
1 TB of tapioca starch
1 lemon squeezed
1/2 cup of maple syrup
1/4 cup of coconut palm sugar
pinch of sea salt
1 handful of fresh basil tied with twine

1 pint of fresh blackberries

In a saucepan, put the coconut milk cream on low heat and let it get soft and liquid. Then sprinkle in the tapioca flour and put in the rest of the ingredients. Keep the basil in the twine because it is just soaking in the cream and not being blended in. In a seperate saucepan, cook and mash blackberries until soft and juicy. Then pour over a micro-sieve and use all of the flesh and juices but omit the blackberries seeds to have a creamier ice cream finish. If you liek the texture of seeds then just add the berries right into the milk mixture. 

Take out the basil and cool down the coconut milk mixture and then add to the high powered blender with the berry mix and blend on high until creamy and smooth. Then pour into a container to cool down more if it is still warm, and if you need to refrigerate for a while that's fine. When room temp or cooled down, add to a ice cream maker and let it do it's job for 20 minutes or so and then spread into a container to sit in the freezer for 1 hour or more. Then you can pull out and use a regular ice cream scoop to serve up perfectly. Serve with fresh fruit or with or however you like ice cream best!


If you have not invested in the Cuisinart Ice Cream Maker- then you might want to in time for this summer. I got this as a birthday gift last year and have enjoyed using it. The instructions before you make the ice cream is to deep freeze the mixture container. It must be super cold! Then once you do that you can hook up the container and follow the instructions- which for this ice cream includes just pouring in the mixture while it has already started spinning. This will take anywhere from 20-30 minutes to thicken up the ice cream. It is like soft serve and ready to top or eat, but if you want a more scoop-able ice cream then let the machine run for the allotted time and then pour into a container and put in the freezer and within 30 minutes it will be a perfect scoop!

ENJOY and much love as always xoxo

Thursday, August 10, 2017

Refrigerator Dill Pickles

This is a little nugget of a recipe I have been making for a few years now. It isn't rocket science, and there are many easy peasy recipes for this out there in world wide web land and Pinterest... buuuutttt, I thought I would share my version anyways because I use a few substituted ingredients to help with yeast overgrowth in the gut.
This is the recipe I was inspired by years ago...
Shannon Martin's Recipe

I switch out white sugar and white vinegar for coconut palm sugar and apple cider vinegar. It's minor but for me and how I am conscience of the over use of vinegar in dressings and such. I always choose apple cider vinegar over any edible vinegar because I have found it to be not as aggravating to candida and high histamine issues I have had over the years. But I guess this is no surprise I use these ingredients in all my baking and they are staples in my pantry.
A wonderful gift in August in the large amounts of fresh fruit, veggies and herbs you can find at your local farmer's market, backyard or road side stands. I bought the above produce at my local farmer's market for a whopping total of TWO dollars. I am sure you could even find it cheaper or maybe you have a garden or access to a friends or family member's garden too. These are so easy and cheap to find right now. So basically you can make this whole quart of pickles for around 2 dollars- what a fun fresh bargain to enjoy this season!
Steph's Version of Refrigerator Dill Pickle Recipe
{gluten, dairy, egg, soy, nut, seed and refined-sugars-free}

2 TB of coconut palm sugar
1 TB of sea salt
1 ts. of whole black peppercorns
1/2 ts. of dry mustard powder (or whole seeds)
4 fresh garlic cloves chopped
1/2 cup of apple cider vinegar
3 cups of pure water
1 handful of fresh dill roughly chopped
1 quart small cucumbers

In a quart sized Ball jar put in the coconut palm sugar, salt, pepper, mustard, chopped garlic and vinegar and fresh dill. Stir if need be so that the sugar and salt dissolve into the vinegar. Then wash and slice up the cucs and layer them in the jar. When up to the top, stop and fill with pure water to cover all of the cucs. I usually give a little shake to let the fluids evenly cover all through the jar. Screw on a top and put in the fridge. I think they taste best after 24 hours and then you can keep them in the fridge for up to two weeks for best tastes in my opinion.

Hope you are enjoying the fresh summer produce from your garden and markets. Much love to you as always and let's enjoy these last few weeks of summer shall we?!? xoxo

Saturday, July 15, 2017

Cherry Chocolate Chunk Coconut Ice Cream

Remember all those cherries I picked a few weeks ago- well they are showing up once again with their partner in crime....chocolate. This time in a cool melty treat, but now that I htink about it, could be a nice topping to my latest brownies too ;) 
Cherries are such a treat by themselves. You can make them a meal and dessert just by washing them off and making them the centerpiece to the kitchen table. But this creation was just a fun treat we had this last week. My kids and I decided that we can never have too much cherry ice cream. It's been our dessert of choice lately and I'm not sad about it one bit!
One bite at a time. You don't need much to feel satisfied with such a delacacy. A little bit goes a LONG way and once you start making your own dairy-free ice cream- it's hard to go back and it's easy to imagine and want to create a 100 new combinations.  
This is a pretty standard combo and since we have all those fresh cherries to use up this was a no brainer. I would usea bit more maple syrup that my vanilla version since it helps sweeten the cherries just the right amount. I also think if almonds or amaretto don't bother you that they would be an ammazing addition as well. Here's my simple combo and hope you give it a try xo

Cherry Chocolate Chip Ice Cream Recipe
{gluten, dairy, soy, egg, nut, seed, and refined sugar-free, VEGAN}

2 cans of full fat coconut milk cream - should amount to 2 cups of cream
(scoop out the cream and save/discard the water in the can)
1/2 vanilla bean pod scraped
1/2 lemon squeezed (1 large TB of juice)
1/3 cup of pure maple syrup or a mixture of honey/maple syrup if you are not vegan
hearty pinch of sea salt
1 TB of tapioca starch (this ingredient helps the ice cream to be so much easier to scoop from the freezer and even I think allows it to be creamier and melt just the right way instead of it being too hard or icy- you can omit it too, but from my experiments I like it better added!)

1 1/2 cup of finely chopped cherries (fresh or frozen)

1/2 cup of dark chcolate chunks or use mini chips by ENJOY LIFE

In a small saucepan, warm up the coconut cream with the rest of the ingredients, make sure to whisk in the tapioca starch well and as the milk warms under the flame it will slowly thicken the cream. DO NOT warm too much to a boil. Just warm enough for the starch to thicken and turn off the heat and let it cool off. 

Then use an immersion or regular blender and blend the mixture to get a bit frothy and bubbly. 

You can stir cherries into already mixed cream mixture or blend together with cream when you blend it all together. I usually add in half of the cherries before blending and then have half of the mixture just stirred in last. 

Pour into a container and let full cool off in the fridge for 2 hours- overnight, or in the freezer for 30 minutes. After the cream has cooled down a bit you can add the chocolate chunks or chips right before you process together in the ice cream maker. 

Then if you have not invested in the Cuisinart Ice Cream Maker- then you might want to in time for this summer. I got this as a birthday gift last year and have enjoyed using it. The instructions before you make the ice cream is to deep freeze the mixture container. It must be super cold! Then once you do that you can hook up the container and follow the instructions- which for this ice cream includes just pouring in the mixture while it has already started spinning. This will take anywhere from 20-30 minutes to thicken up the ice cream. It is like soft serve and ready to top or eat, but if you want a more scoop-able ice cream then let the machine run for the allotted time and then pour into a container and put in the fridge and within 30 minutes it will be a perfect scoop!

Hope you are enjoying summer for all it's fresh and warm gifts! Much love as always xoxo

Friday, June 23, 2017

Spicy Buffalo Cauliflower with Dairy Free Ranch

Everyone needs a fun and easy app recipe in their back pocket when it comes to summer gatherings and picnic parties and such. I love the vibrant color and flavors of this dish and is a crowd-pleaser among most foodies :)

This recipe was inspired by Against All Grain's buffalo chicken wings and dairy free ranch. But I wanted to make a few substitutions- one of them being to make the "wings" out of cauliflower and not chicken :) And the other way using a vegan mayo so that it didn't have any eggs in it, so my following recipes reflect those options.
I made this appetizer for a gathering recently and explained how simply I made it because because I used a few already prepared sauces and spreads to make it easy. If I have some extra time up my sleeve in a month or so when eggplant and peppers come into season- I am going to make a spread of my own out of roasted eggplant and peppers. But the Trader Joe's spread is a great option and is made with clean ingredients and easy to use in a variety of ways. Check it out!
 
Spicy Buffalo Cauliflower Recipe
{gluten, dairy, egg, seed, nut, soy and refined-sugar-free}

1 large head of fresh cauliflower washed, and chopped up in easy to pick up pieces
1/3 cup of avocado (or olive) oil
1/2 cup of Trader Joe's Red Pepper Spread with eggplant and garlic
1 TB of apple cider vinegar
1 TB of maple syrup or honey
1 lemon squeezed and drizzled over
1/2 ts. of ground paprika
1/2 ts. of dried granulated garlic
1 ts. of sea salt
black pepper to taste

optional to make it spicy hot:
1 TB Arizona Pepper's Organic Harvest Hot Sauce 

Wash and chop the cauliflower and let it dry weel. Then in a large bowl mix the rest of the ingredeitns with the cauliflower and make sure each piece is spread well with the mixture. Then spread out each piece of cauliflower on a parchment papered baking sheet and bake in a 400 degree oven for 25-30 minutes until the pieces get a bit soft and crispy. Let cool for 5-10 minutes and put on your serving dish ready to serve. Serve with hot sauce on the side and fresh celery sticks and some of the dairy-free ranch dip below....


Dairy-Free Ranch Dressing or Dip Recipe
{gluten, dairy, egg, soy, nut, seed, and refined -sugar-free}

1 cup Hampton Creek Just Mayo
1/2 cup coconut milk beverage
1/2 cup of fresh parsley leaves
1/2 ts. of dried chives (you can use fresh (1 TB) if you got it)
1/2 ts. of dried dill (you can use fresh (1 TB) if you got it)
1 ts. of dried Italian herb blend
1/2 -1 ts. of sea salt
1/4- 1/2 ts. of crack black pepper
1 ts. of dried garlic
1/2 ts. of dried onion
1 lemon juiced (1/4 cup) add some of the zest if you want


In a high powered blender, mix up the above ingredients for a few pulses, being carful to not overly blend so that the parley stays just finely chopped. Pour into a Ball jar and have it ready to dip veggies, cauliflower wings, and pour over salads. 

There you have it- I hope you give it a try if you are looking for a new fun appetizer!

Thursday, June 15, 2017

Fresh Herb Garden Pasta Salad

This is a salad I start making almost every summer about this time. The fresh herbs and produce you can find at the farmer's market is a part the inspiration- not to mention an easy dish to pass at a gathering, pack up for a picnic, and serve from the fridge when it's super hot and sweaty.

It's not overly difficult and you can switch out different veggies for what you got available. It is a great "detox" summer meal because of the fresh herbs and veggies and with the GF pasta it is a great allergy-free option as well. Also, it can easily be vegan- but if you want to add some parmesean or motzarella cheese it would be that much more fabulous too. I have also added organic chicken sausages and those not only had flavor but added protein too. So it can be made a few ways, but if you make it the fresh herbs in the dressing is what makes the difference in my opinion. The dressing is super fresh, green and wonderful!

Hope you give this super easy and fabulous summer salad a try!
Much love and light to you xoxo

Fresh Herb Garden Pasta Salad Recipe
{gluten, dairy, egg, nut, seed and sugar-free}

1 cup of cherry tomatoes halved
1 cup of chopped sweet bell peppers
1 cup of sliced and quartered cucumbers
1/2 cup of thinly sliced and cubed radishes
1/4-1/3 cup of thinkly sliced and chunked red onion

1 12 ounce package of GF pasta (my favs include brown rice, or a rice and quinoa mix option. I avoid the GF pastas with corn because of digestion issues and they get too mushyin my opinion)

Herb Pesto Dressing Recipe
1 cup of fresh parsley
1 cup of fresh cilantro
(if you got other fresh herbs growing I sometimes add a handful of fresh basil, chives, oregano or thyme too...)
1/3 cup of quality California olive oil
1/3 cup of fresh squeezed lemon juice
lemon zest from squeezed lemon
1-2 ts. of dried italian herb blend
1 ts. of dried garlic
pinch of dried onion
big pinch sea salt and black pepper
optional: add in a drizzle of honey or maple syrup before blending

Blend all of the above in a high powered blender to emosify and be a creamy green dressing. I sometimes double or triple this recipe above and make it available in the fridge to marinate meat, pour over salads and just have available to flavor rice, quinoa, or whatever other summer salad you got going. It's an added treat to just about anything savory!

Cook your GF pasta in boiling water and drain when it is AL DENTE! Then rise with a little cool water and pour into a large bowl with all the added veggies (and sausage if you are adding that) and then mix well together with the dressing and viola you got yourself a salad! If you are adding any cheeses or extra chopped herbs do that after it is all mixed well. Serve warm, or chilled, or however you damn please ;)

Hope you are well and enjoying the season of summer! Much love xoxo

Thursday, April 20, 2017

Lemon Berry Muffins

Tis' the season to start seeing new life pop up all around you. Right now, I am looking out my kitchen window at my budding trees, swaying daffodils, and my neon green grass after a night of thunderstorms and rain. The colors are so vibrant and new. This live backdrop gives me such a feeling of creativity as I step into my day, also wanting to get outside and soak up all the newness. My 3 year daughter even mentioned this morning while driving the pink 'leaves' on all the trees that she loved from the backseat. She was actually noticing all the flowering trees that line our streets this time of year. But I was excited that she was watching and wondering about so much beauty and newness all around her. It's hard to ignore - the earth is waking up all around us!
This time of year usually also gets me all excited about lighter and fresher flavors in my baked goods and kitchen. Ones of lemons and berries and less creamy thick spice filled flavors that seem to keep me warm and comforted throughout the fall and winter months. So today lemon and berries made it into our muffins. And it has me sharing these sweet and tart beauties with you as well...
Lemon Berry Muffin Recipe
{gluten, dairy, soy, egg, nut and seed-free}

1 cup of finely gournd GF oat flour (or buckwheat flour)
1/2 cup of white rice flour
1/2 cup of tapioca flour
1/4 cup of millet flour
1/4 cup of coconut flour
1 ts. of baking soda
1 ts. of sea salt
1 1/2 ts. of baking powder

2/3 cup of maple syrup or pure honey or a mix of both*
1/2 cup of soft or melted coconut oil
1/2 cup of coconut milk beverage or other non-dairy milk
1 TB of apple cider vinegar
1/4 cup of applesauce
1 organic lemon--- use the 1/3 cup of fresh lemon juice + the zest from the whole lemon (1 TB)
1/2 ts. of pure lemon flavoring (or use food-grade lemon essential oil 10-12 drops [I used Young Living Lemon Oil])

1/2-1 cup of chopped fresh strawberries
1/4 cup of frozen or fresh blueberries

*I used a mixture of honey and maple syrup to keep the muffins a lighter color as well,plus their flavors with the lemon is amazing- but if for some reason you want to use coconut sugar instead or regular sugar you can add in 1/2 cup of sugar of choice 1/4 or so cup of either honey or maple syrup. 

First, mix all the GF flours and dry ingredients together in a bowl, then add in the wet ingreidents and whisk together well. Then you can use an oiled 1/4 cup scoop and pour batter into the mufin tins. Then I distribute the fresh and frozen berries on the tops of all the muffins... you can squish them in and cover each top generously. You could also pour all the berries into the batter and fold in bfore you scoop into muffin tins- I put the berries on top this time around so that they would look pretty and bake right on top. Either way is great or do a little of both too. You just have to be carefut to not over stuff each muffin with too many berries. 
Bake in a 350 degree oven for 25 minutes and then take from oven and let cool well for at least 15 minutes before moving to avoid crumbling. 

These muffins could be made into minis too- just maybe make sure your berries are cut smaller and do not domintae the smaller size. 

I must say, lemon and berries is one of my most favorite flavor combos. So for me, these are a comfort muffin - but I hope they offer you some color and fresh flavor to your spring steps. 

Much love and happy baking, xoxo

Monday, February 6, 2017

Good Ol' Chicken Noodle Soup for the Soul

I felt it coming on last week. A sniffle...which led to a stuffed nose... which led to a slight headache... and I knew exactly what I was dealing with. I started drinking fresh grated ginger tea and some elderberry syrup and decided it was the perfect day to make a pot of soup to remedy the situation (and the soul, really!) Why does it do the soul good anyways? Why does it make one feel so warm and comforted? I'm not sure if I know the perfect answer to that, but there is something about 'chicken noodle soup' that presses all the right buttons when your feeling under the weather...
Well, I guess you can 'google' reasons of how the nutrient-dense and well-balanced chicken-noodle-soup triggers an anti-inflammatory immune system migration of the cells in the mucus membranes that need the immune response. Or something like that ;) So there is actual research and science backing it up. Which I just think is so amazing and hilarious at the same time because there is also the part beyond the research that the soup just is that.... a warm, comfort medicine for the soul and body when one's feeling low and grey. I don't know if I actually need the research here, and maybe it is just nostalgia for nourishing food while sick, but I would say that there is something the body does indeed love about the combination of the broth, herbs, chicken, veggies and noodles. It's just nourishing...magic.
My secrets to a good pot of chicken noodle soup include:

-Big chunks of carrots and chicken. I like a 'meaty' chunk of carrot and a hearty bite of chicken. Ones that you can easily scoop out of the broth so you can get a perfect bite. I even shop at the market and grocery store for carrots imagining how they would look in soup. No itty bitty chunks here. Good big-full-mouthful chunks, baby.

-Fresh herbs! This seems like it might not matter. But I am telling you- it really does! I use not so traditional herbs for chicken noodle soup too because I love them so much. I chop fresh sage, fresh rosemary, fresh thyme, fresh parsley and fresh leeks. I really think it makes it better. I also grate in fresh juicy tumeric, ginger and garlic. These add so much color and flavor as well. The kind of juicy flavor you sometimes miss in dried spices and herbs. Obviously, if I don't have fresh in the kitchen while I am stirring up a pot, I improvise with what I got and it's usually a mix of whatever herbs I can find in the fridge, freezer or pantry. But I know- if I really want to do it well. Fresh herbs just make it.

-Bone broth. Here is where you can pack nutrient dense collagen and proteins to help the immune system jump back faster after it has been challenged. And the flavor...it is where it's at when it comes to equal flavors of chicken and salt and depth of deliciousness. I make my own usually whenever I have extra meat bones and leftover veggies and greens. So I have a few jars stashed away in the fridge and freezer. I have also found that organic Costco chicken stock is a super great easy alternative if you don't have bone broth.

Stephanie's Chicken Noodle Soup Recipe
{gluten, dairy, nut, seed, egg, sugar and soy-free}

1 large onion finely chopped
1 cup of celery finely chopped, about 6 stalks
1 bunch of green onion or leeks, finely chopped
2 inches of fresh turmeric, finely grated, about 1 heaping TB
1 inch of fresh ginger, finely grated, almost a TB's worth
6 large garlic cloves finely grated, about 2 TB's worth of garlic
2-3 TB of avocado or olive oil
sprinkle of sea salt and black pepper (1/2 ts. of each)

In an 5-6 quart pot, saute the above ingredients to get your soup base cooking. Saute until everything starts cooking down and getting soft and coming together. Then add the...

2 cups of chopped carrots, about 6 large carrots
8 cups of broth (bone, veggie, chicken)
possible additional water if you want the soup a little more soupy or brothy

After you add the carrots, let them cook into the saute mix, then after a few minutes... add the broth. This is usually when you need to wait a little bit for the broth to cook with the carrots and get the heat back up to a boil temp. Keep cooking and you may need to turn down the heat if it starts boiling too crazy...and thats when you can add in the fresh herbs and greens. Pour them all in and keep stirring. Let sit and simmer for another 30 or so minutes after that...

fresh sage, 1-2 TB finely chopped
fresh rosemary, 1-2 TB finely chopped
fresh thyme, 1-2 TB finely chopped
1/2 cup of finely chopped fresh parsley
1/2 cup of finely chopped lacinato kale

While the soup is cooking ands simmering you can bake the thawed out or fresh chicken in the oven and then cut up into big chunks to then pour into the simmering soup not long after you add the greens....

2 pounds of chicken tenders/breasts pre-baked in salt/pepper and olive oil and a little broth then chopped in chunks to pour into soup

Add a sprinkle more of sea salt and black pepper here. Not too much- just a pinch really.

Then lastly you can either add your noodles 2 ways: 
You can  pre-cook your noodles and only add them in when you serve ups bowl to avoid them getting mushy in the soup over time. Or if you do not mind your noodles being cooked in the soup you can add about 8 ounces of your favorite GF pasta to the soup right after the chicken was added and all the carrots are soft. You could even turn off the heat here because the noodles will just soften in the boiling broth and be fully cooked within 10-15 minutes. I use usually a spiral or tube brown rice noodle... but have also used macaroni or spaghetti or whatever noodle I have on hand... 

You can see from my pictures (take on day 2 ;) that  the noodle have broken up a bit. I don't mind the broken thick noodles too much, but if you do... I would suggest just keeping them separate and adding them in whenever you serve up the steamy hot soup...

After all the parts come together, give a good stir to the pot and get ready to serve. I serve with a good hearty slice of my bread... or rolls....and a large soup spoon to do some slurping on ;)

I hope you are not under the weather and wishing someone would make you some soup- I hope that you maybe give this soup a try without the sickies connected to it. But if some some reason you feel that sniffle coming on- I hope you have enough strength to make a big pot of chicken noodle soup to get you through it.

Much love and light to you, xoxo

Saturday, January 28, 2017

Homemade Pizza Crust {gluten, dairy, egg and yeast-free}

Pizza... either you dream of it or despise it in your newly made gluten-free life. I understand. Mostly I miss the convenience of just ordering a pizza like it's no thang. The nostalgia....oh and so easy.... and loved by most. And let's be honest... pizza and your favorite drink of bubbly [mine currently is grape kombucha ;)] is just the BEST home-date-night food with your love [and holey comfy clothes, faithful couch and your favorite show]!  Plus, I love the creativity of colors, flavors and textures of making homemade pizzas. I grew up on making homemade pizza dough weekly and that's why I probably ached to find a recipe to start making for my own little family. Friday night is now known as pizza night in our house... and my son reminds me most nights of the week how many days till Friday because of it ;)
Although I am just sharing, I actually have been making this dough for years. It is based on 'my bread' recipe with a few adjustments that I have developed over the years to make it a crispy crust and a softer-chewier center and all around great crust. It also has no yeast- or eggs- so it is VERY allergy friendly, not to mention wonderful to not have to wait for anything yeast-rising or proofing. It is just ready to go after you whip it up and roll it out. Like magic ;)
The recipe makes 4 personal-sized pizza doughs, or 2 large, or 3 mediums. I usually end up making 3 different pizzas in our house. One for the dairy-lover, one for the dairy-free and even one for the just sauce and toppings and no cheese/cheeze too. So yes, we have our fair share of allergies and opinions around these parts. Which makes creating your own personal pizza that more fun. They also freeze GREAT- so roll out and bake an extra, then freeze to be ready to just pull out and top with your toppings and bake- its the closest thing to frozen pizza if you ask me :)
The beauty of pizza is that you can make it what you like. Oh the toppings and combos I have made over the years! Some of my favorites have included using a hot pepper jelly, cilantro, leftover BBQ shredded chicken, with fresh herbs and a possible sprinkle of goat cheese ;) I love the sweet, spicy combo almost always and so having a fruit (apples, pineapple, pears, raisins) addition is totally my favorite. Another great topping was caramelized onions and apples over a pizza with BBQ chicken and forgo the cheese option altogether.  That is fab too. My go-to, have in the fridge already combo is peppers, onions, kale, sausage, and herbs and cheese option (Daiya is pictured, but we have used goat, organic mozzarella and other local farm cheese combos). We have one child with severe dairy allergies in the house, and a child that can tolerate and LOVES cheese, so I am NON-judgmental when it comes to whatever kind of cheese or no cheese you add to a pizza. It really is what you make it and I have had some great pizzas with and without it too. So don't let the cheese discourage you from making a pizza.....pile it high with veggies, slaw, saute, more sauce or whatever makes you happy and your body can still feel great too.
Homemade Pizza Crust Recipe
{gluten, yeast, dairy, egg, nut, seed, soy and sugar-free}

4 TB of psyllium husk powder
1 cup of pure water
3/4 cup of non-dairy milk (I used coconut milk beverage) Or even add more water
1/4 cup of apple cider vinegar
2 TB of honey
2 TB of olive oil

In a large mixing bowl, whisk up the above well until it starts to thicken and make sure NO clumps. Then add in the following dry ingredients...

1 1/2 cup of finely ground certified GF oat flour (I ground GF rolled oats to make flour)
1 cup of white rice flour* (plus 1/2 cup more for kneading and rolling out)
1/3 cup of potato starch
1/3 cup of tapioca flour
2 ts. of baking powder
1 ts. of sea salt
1 ts. of baking soda

Use a spatula to first mix up the wet and dry together well. Then start to use your hands to knead and roll the dough into a large ball. Use a sprinkle of more rice flour if it is sticky when you knead to get a nice large ball of dough. If you are making personal pizzas.... cut the ball into 4 quarters. Otherwise, break up the big lump into 2-3 pieces and place each ball onto a parchment paper with a sprinkle of rice flour. Roll out with a rolling pin into a 6x6 inch for personal circle and then to get perfect edges, cut with a clean pizza cutter roller and make the sharp edge. Use the remaining dough cut off in another lump of dough until you are done.

Then bake the crusts first before adding toppings in a 375-400 degree oven for 10-12 minutes until golden brown. I left a range for tempts and times because each person varies on whether they like crispy/crunchy  or a softer crust. That is up to you ;) Bake and let sit for 15 minutes before adding toppings or let cool completely and have ready for the dinner hour, or wrap up and put in the freezer. 

*You can also sub in different flours for the oat, and rice. If you are trying to avoid those grains, you can sub buckwheat for the oats, millet for the rice and quinoa to cover the rest. That is a protein rich combo as well. It is a bit more earthy tasting and perhaps a little more "healthy granola crunchy" tasting. But still does the job if you have been on a strict grain-free diet- it is a good starting place to add in the easier digesting grains or some even call them seed grains because they are much more commonly digested like seeds over grains. 
After your crusts are ready, add your favorite sauce and toppings and bake for another 15-20 minutes in a 375-400 degree oven. I have found that baking at a higher tempt with shorter time gets the toppings right where I like them, but also a slower bake works too.... Another thing based on preference. So just watch it carefully so that you don't burn. I have also found baking closest to the middle section of any oven proves the best results. 
Now it's time to settle in and ENJOY! I love pizza night just as much as the kids, so I guess I shouldn't blame it all on them that it stuck :) It is such a great family night and a way to add some traditions and routine into our home. I hope you give this recipe a try and find your own groove with it and enjoy it as much as us. Much love as always. xoxo

Friday, December 9, 2016

Sweet Potato, Kale and Turkey Meatball Soup

This not-so-great picture was snapped on my iPhone a few months ago, it was my last bowl of soup from a magical masterpiece soup I made out of what was leftover in my fridge one day. I snapped a photo as a way to say- "Goodbye...I thought you were amazing! I hope we meet again". I savored and looked forward to every bite. Yes, it was one of the first pots of soup I made in a while since it was newly autumn and I don't tend to make many soups during the hot summer months. So maybe it was just that... "a magical moment of time", loving the fact that "soup season" had returned, OR maybe it was just the perfect amount of leftover ingredients that made this combo so great!

Like I said, it was thrown together with ingredients to empty and clean out the fridge. That is one way to make the grocery budget to last a little longer! I chopped it all up and stirred it all together and I was surprised at it's deliciousness- I savored each bowl for 3 days and then when it was gone....I licked the bowl clean... and cried. So a few weeks later I tried to re-create it, trying to remember exactly what I did and what I added. It just wasn't exactly the same the second time. And I already knew going in...that magic could only happen once in a great while :) BUT it was still pretty fantastic, so I thought it would be worth writing down and sharing with you dear friends. You deserve to give it a whirl too, right?!? Maybe your leftover's soup will give way to a magical moment in time. The take-away is that you should most definitely use up and get creative in the kitchen with your leftovers- you may just never know what could conspire. Happy cooking, friends!
Sweet Potato Kale Turkey Meatball Soup Recipe
1 medium onion finely chopped
1 handful of green onions finely chopped
1-2 TB of grated fresh ginger
1-2 TB of grated fresh tumeric
4-5 garlic cloves finely minced
2-3 cups of bite-sized chopped carrot circles
4-5 cups of bite-sized cubed sweet potatoes
3 TB of finely chopped fresh parsley
3 TB of finely chopped fresh cilantro
2-3 TB of fresh thyme leave
1 TB of dried Italian herb seasoning blend
pinch of (about 1/4 ts.of each) cinnamon, turmeric, ginger, paprika
2 cups of tomato sauce or leftover marinara pasta sauce
3 cups of finely chopped kale
4 cups of vegetable or chicken broth
4 cups of water
juice from 1 lime
spoonful of honey
splash of apple cider vinegar

1 pound organic (or free range) ground turkey
1 pound of free range ground turkey breakfast sausage(seasoned with paprika, garlic, sugar, oregano)

8 ounces of rice pasta noodles (spiral, spaghetti, whatever)


First, chop up your onion and garlic and the rest of the veggies and get them sautéing in a large 8 quart soup pot. Saute until onion and garlic are soft and then add the herbs, kale and keep cooking for a few more minutes and then add in all the liquids. Let cook on medium heat until the sweet potatoes and carrots are soft. While this is cooking together you can...

Mix your thawed ground turkey and sausage together, and add a pinch of sea salt and ground pepper. Then add a sprinkle of Italian seasoning blend and a little ground garlic, ginger and paprika. I add about a 1/2 ts. of each spice and a drizzle of olive oil and mix it all up together and then scoop out 1 TB-sized amounts of meat and roll them into a meatball. Place them on a parchment baking sheet and 2 pounds should make about 24 meatballs. Bake in a 375 degree oven for 20-25 minutes. 

About the time the meatballs are done, they will be ready to add to the soup. Dump those in hot from the oven and add the pasta. Stir in the pasta and let it get soft in the broth from the soup for 10-15 minutes. Then the noodles will be soft and you are ready to serve up. You can top with a fresh herb for serving. I would say parsley or cilantro would taste best. 

I made this soup with turkey meatballs because I had those in the fridge to use up. But you could easily make this soup vegan by taking out the meat and adding in leftover pre-cooked beans (garbanzo or white would be my first choices) or cooked green lentils. It would be easy to dump those in from the cans too if you have those as pantry items. 

A great thing about this soup is the leftovers. The sweet potatoes start to break down and make the soup very creamy and thick. The first day cooking you can still get it to be a little creamy if you start to mush up some of the cooked sweet potatoes. But over time the sweet potatoes just start to melt into the soup by themselves and it makes it extra yummy!

Happy cooking, let those creative juices flow and make a masterpiece soup out of what you got!

Much love, xoxo

Sunday, May 31, 2015

Israeli Salad


Ahh, spring...fresh garden greens...plants...and flowers everywhere! A happy happy time of year :)

This past weekend I enjoyed a fun visit to my local farmer's market. All visits end with a healthy dose of happiness just soaking in all the fresh vegetables, flowers, fruits and such. This last visit my daughter caught eye of a baby honey bear and it was just too cute to pass up. So yeah, I had a two year old dipping her adorable fingers into a honey bottle and loving every second.
Here is some of my pickings. I actually bought almost double of all of the above because let's be honest this will only last till the end of the weekend. Especially after making this lovely simple salad. Fresh, simple, cheap and fabulous all summer long. Not to mention all the vitamins and nutrients... 
The cucumbers, tomatoes and parsley all came from one of my favorite farms at the market. If you are local, check out Real Food Farms at Fulton Market in Grand Rapids. They have the best, I mean the best cucumbers ever! They grow in greenhouses and the cucumbers and tomatoes that you can buy now instead of in August are so mouth-watering-amazing this time of year. The crunch and sweetness are seriously unexplainable wonderfulness.
This salad is so simple that it doesn't really need a recipe. Mainly the few needed ingredients and just making sure you have a great balance of cucumbers and tomatoes. It takes a little bit of chopping, but that's most of the fun so don't be stressed. Set up your chopping station and enjoy the colors, smells and wonderfulness of fresh local food!

This time as I was chopping I couldn't help reminiscing on my life 10 years ago this week. My husband and I were packing up our lives and heading to the other side of the globe. We moved to Jerusalem, Israel of all places and this salad only brings back intense memories. Everywhere we went we ate this salad, along with loads of fresh hummus and pita. After a few weeks, we finally learned our way around the markets and bought all of the below ingredients in bulk and made salad all-the-day-long. It was so delicious I can honestly say I never tired of such meals of hummus, pita (pre-GF- days :), salad and sometimes schwarma or falafel. The foods of the Jerusalem have a special place in my heart thats' for sure.
This salad is all about balance. You can basically make it without a recipe (or shrink or double) if you put in equal parts of the cucumber and tomatoes, the parsley and onion, and the lemon and olive oil. It can be as simple as you want it, or add other herbs, garlic, or spice if you want. It is surprising though how wonderful a few simple ingredients and the simple dressing can make an amazing combo.
Some dear friends, invited us for dinner and they served this amazing chicken dish.  This salad is the perfect pair for this dish. And I will tell you that I will be most likely be making this once, if not more, a week this summer while the fresh ingredients are bountiful. Recipes like this make it easy to be gluten-free, and even lots of allergens-free. It is great for kids and big gatherings too. I love and hoard recipes like this!
So, I'm not telling you to run to your nearest farmer's market, but maybe you should start thinking about planning to make it to your market and make this recipe in the next few weeks. Seriously, it's the least you can do to add some loving and happiness to your life.
Israeli Salad Recipe
3 large cucumbers, sliced and quartered
1 pound of cherry tomatoes or 3 large tomatoes, quartered or diced (or a mix of both or whatever tomatoes you got- key to make all pieces around the same size)
1 small onion finely diced (about 2/3 cup)
1 large handful of fresh finely chopped parsley
1 large handful of fresh finely chopped mint leaves
1/2 cup of quality olive oil
1/2 cup of freshly squeezed lemon juice
pinch or two of sea salt
pinch or two of cracked black pepper

Chop all of the ingredients and mix well in a large bowl, chill in the fridge for a little bit to let flavors meld together. Serve with hummus, greens, rice, chicken, schwarma, falafel, chickpea flatbread and the list could go on and on. 
See what I mean about simple. Why am I even posting this?! Well to get to you excited as I am about real food and fresh recipes! This is what got me started on the path to eating and enjoying fresh local foods that are naturally gluten-free and great for you.

I hope you enjoy (again and again) and much love and life to you!