Welllllll, I didn't mean to post ANOTHER chocolate treat recipe...but, it just happened like that. This one was made around the Christmas holiday to add to the cookie plates. But now that we are looking forward to new year celebrations it seemed even more appropriate :) I mean it is a chocolate ball of goodness that you will need to drop in your mouth :) That is my husband rubbing off on me- he loves to play on words and puns :)
But seriously- this is one of those recipes that I have been making for years and just realized I never shared with you. I felt terrible and excited all at once because now I will share it and you can have this gem of a goodies tucked away for all the special occasions, or at the least for yourself when you are looking in the pantry and there is nothing to make but you have these random pantry items just waiting there to be created! This is a must try....
Raw Chocolate Coconut Truffle Recipe
{gluten, dairy, soy, egg, nut and seed-free}
1/3 cup of raw cacao powder
1/3 cup of finely ground coconut sugar
1/3 cup of unrefined coconut oil
1/2 cup of dairy-free chocolate chips
1 can of full-fat coconut milk (just use the cream, reuse/discard the water juices)
drizzle of maple syrup (1-2 TB) for flavor and sweetness
hearty pinch of sea salt
optional:
add in a drizzle of vanilla or organic orange flavoring...
additions for the rolling process:
1/2 cup of ground powdered coconut sugar with cacao powder blended to make a cocoa powder mixture for rolling. This is equal parts of cacao and sugar
OR
1/2-1 cup of shredded coconut flakes/pieces to roll into
In a medium saucepan, put all of the above ingredients on low heat until they all melt and dissolve and turn into a ganache looking pudding. Then put a lid on it and put into the freezer or fridge until it is solid. This is about 4-6 hours. Then, use a TB-sized spoon to scoop out a ball and roll on parchment or in your hands until you get a solid ball and then roll in raw cocoa powder (or hot cocoa mix ) or raw shredded coconut. You should get about 2 dozen truffles. After rolling out the ball place on a parchment and place in a covered container to chill until you serve. They will be fine to pull out for a party but then keep in the fridge to stay stiff. But who am I kidding? These are easily gone after one party :)
As we reflect, gather and look forward to another year--- I hope you are able to reflect on the gifts and losses of this past year and let go of what needs to go so that you can embrace this coming year with arms wide open and free! Happy New Year's friends- I hope you ENJOY and much love as always xoxo
Showing posts with label christmas. Show all posts
Friday, December 29, 2017
Wednesday, December 27, 2017
Pumpkin Seed Cranberry Chocolate Bark
Merry Christmas, friends- I hope you are still enjoying in the glow and magic of Christmas! It has been easy for us to do that around here because we have the next week off of school and work. Plus, we have been heavenly blessed with buckets of snow. You can read that as sarcastic or enthusiastic depending on how you feel about it ;) Either way this magical winter land (with a whopping 6 degrees) has allowed us to get all nuzzled and snuggled up inside with old Christmas movies, hot cocoa and marshmallows. So we are enjoying the space to rest and reflect and enjoy each other company (for the most part ;)
This recipe was made before Christmas here and we have been enjoying a little bit every day. I am thinking I will make another batch before the New Year's celebrations- well, because, it's just that good!
I have said it before, simple ingredients makes the best treats! This is defiantly one of those recipes. And one of those that you don't really need a recipe for- but sometimes it's helpful too ;)
This was the easiest treat I made for Christmas, and was my favorite one to go back to! We travelled a bit all over for Christmas parties this year- visiting lots of all-sides of our families and included snowy drives, white-out's, sub-zero temperatures and of course lots of holiday cheer! So this was an easy one to bring with us on all of our travels :)
Pumpkin Seed Cranberry Chocolate Bark Recipe
{gluten, dairy, soy, egg, nut-free}
2 cups of roasted pumpkin seeds
1 TB of avocado oil drizzled
1 ts. of quality sea salt
On a large baking sheet spread out 2 cups of raw pumpkin seeds (green pepitas) with a sprinkle of salt and a drizzle of avocado oil, then roast them in a 350-375 degree oven for 12 minutes. Until they are no longer green but a roasted brown color. Then let them completely cool off. You will hear them snapping and crackling while they cool- such a fun surprise :)
Then when they are cooled, mix with them on the pan...
1 1/2 cup of organic dried cranberries (or raisins... or dried cherries)
Then in a pan or double-boiler, melt the chocolate and coconut oil on low heat until it is all liquefied and then let sit for a few minutes before pouring over the roasted seeds and cranberries. Stir and spread and basically just mix and spread out the mixed seeds with the chocolate. Spread thin all over the 12x15 pan until it is all covered...
2 cups of dairy-free chocolate chips (12 ounces)
2 TB of coconut oil
Once it is all spread out you can put in the freezer or fridge to harden, and then once after 30-60 minutes you can break up in uneven pieces to be a crunchy bark. You could also top with some course sea salt half way through it's cooling process if you want to add a bit more salt to the sweet...
Serve cooled and hard. If you need to keep for a few days if it is not gobbled up- then you can best keep in the fridge or in a cooler place so that the chocolate doesn't melt. This is an ideal winter treat- I be it would turn into a melty mess if it was the 4th of July ;)
I hope you try and ENJOY this recipe as you stay snuggled up close to all that brings you love and hope. Much love and light to you!!!
This recipe was made before Christmas here and we have been enjoying a little bit every day. I am thinking I will make another batch before the New Year's celebrations- well, because, it's just that good!
I have said it before, simple ingredients makes the best treats! This is defiantly one of those recipes. And one of those that you don't really need a recipe for- but sometimes it's helpful too ;)
This was the easiest treat I made for Christmas, and was my favorite one to go back to! We travelled a bit all over for Christmas parties this year- visiting lots of all-sides of our families and included snowy drives, white-out's, sub-zero temperatures and of course lots of holiday cheer! So this was an easy one to bring with us on all of our travels :)
Pumpkin Seed Cranberry Chocolate Bark Recipe
{gluten, dairy, soy, egg, nut-free}
2 cups of roasted pumpkin seeds
1 TB of avocado oil drizzled
1 ts. of quality sea salt
On a large baking sheet spread out 2 cups of raw pumpkin seeds (green pepitas) with a sprinkle of salt and a drizzle of avocado oil, then roast them in a 350-375 degree oven for 12 minutes. Until they are no longer green but a roasted brown color. Then let them completely cool off. You will hear them snapping and crackling while they cool- such a fun surprise :)
Then when they are cooled, mix with them on the pan...
1 1/2 cup of organic dried cranberries (or raisins... or dried cherries)
Then in a pan or double-boiler, melt the chocolate and coconut oil on low heat until it is all liquefied and then let sit for a few minutes before pouring over the roasted seeds and cranberries. Stir and spread and basically just mix and spread out the mixed seeds with the chocolate. Spread thin all over the 12x15 pan until it is all covered...
2 cups of dairy-free chocolate chips (12 ounces)
2 TB of coconut oil
Once it is all spread out you can put in the freezer or fridge to harden, and then once after 30-60 minutes you can break up in uneven pieces to be a crunchy bark. You could also top with some course sea salt half way through it's cooling process if you want to add a bit more salt to the sweet...
Serve cooled and hard. If you need to keep for a few days if it is not gobbled up- then you can best keep in the fridge or in a cooler place so that the chocolate doesn't melt. This is an ideal winter treat- I be it would turn into a melty mess if it was the 4th of July ;)
I hope you try and ENJOY this recipe as you stay snuggled up close to all that brings you love and hope. Much love and light to you!!!
Tuesday, December 19, 2017
Peppermint Crunch Fudge
Are you a fudge lover? Peppermint lover? How about a combo for another Christmas cookie treat? I made this freezer fudge this summer and fell in love with an easy simple, not-too-much goodness, treat that you could make last minute or have for days. This one has a Christmas peppermint twist with some added candy cane goodness. Fudge isn't really photogenic if you ask me, or maybe were all just too excited to consume it so it doesn't last long enough to snap a photo, haha!
But there is a lot more there on these ones than what a picture can show. Maybe if it was scratch and sniff you would get the real idea here :) Oh I will stop! Just do yourself a favor and make some and share some with all the Christmas cookie goodies this year!
Peppermint Crunch Freezer Fudge Recipe{gluten, grain, dairy, egg, soy, nut, and seed-free, also vegan and paleo}
1 - 1 1/2 cup of date paste puree
1/2 cup of cacao or cocoa powder
1/2 cup of mini chocolate chips (Enjoy Life brand)
1/3 cup of organic virgin coconut oil
1/4 cup of maple syrup
1/2 ts. of quality sea salt
1 heaping teaspoon of all natural peppermint oil flavoring
optional add in: add in 1/2-1 cup of rice cereal to add some texture, or else you can keep that out and only add the crushed candy canes to the fudge mix and topping...
(2)- all natural peppermint candy canes crushed into extra small pieces for twirling and topping.
Put all of the above ingredients, (except peppermint and optional cereal) in a small saucepan and melt and whisk together. Then lastly add in the peppermint oil flavoring and taste to make sure you don't want more. Then if you want to add in 1/2-1 cup of rice crunch cereal and quickly pour into a parchment covered 9x9 pan or a 8x10 pan and spread smooth. Lastly mix or top the crushes candy canes before you put in the freezer to get hard. Put in the freezer for 2 hours and then cut into 2x2 squares. Keep in the fridge or freezer to stay fresh longer.
Labels:
2017,
allergies,
christmas,
clean ingredients,
coconut oil,
cookies,
dairy free,
dates,
dessert,
essential oils
Thursday, December 14, 2017
Berry Chia Jam Thumbprint Cookies
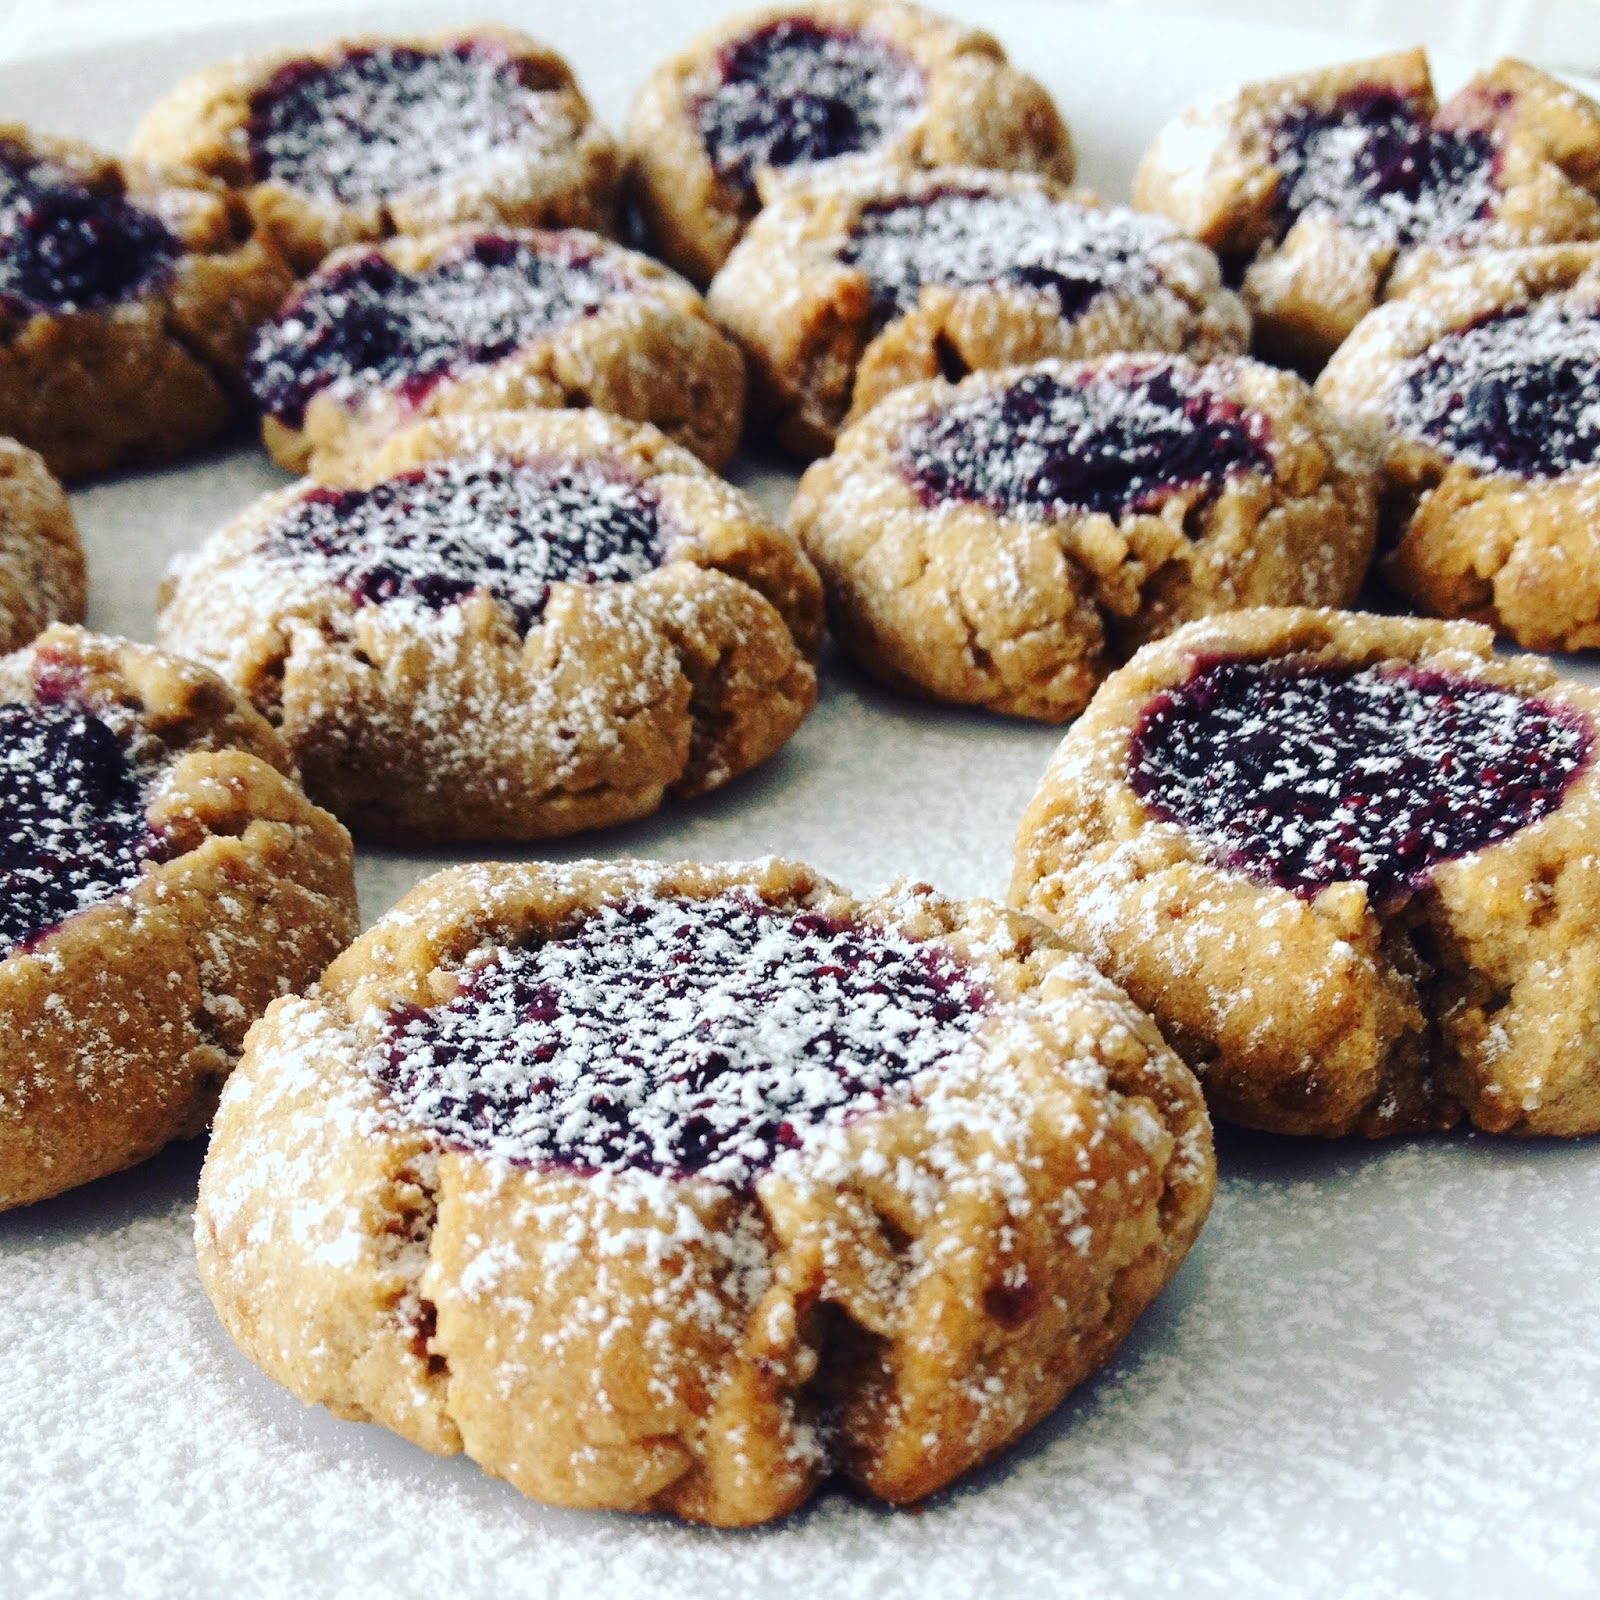
This is one feels like tradition to make around Christmas time. It must be because I grew up around an old family version with lots of butter and even cream cheese, but this one is allergy safe with no eggs, dairy or gluten, even can be without nuts or seeds too! I love how it is still soft and crispy and buttery and melts in your mouth. This version also uses my most favorite homemade jam- made with bluberries and chia seeds. It is just the perfect bite-sized piece of wonderfulness! The added sprinkling of powdered sugar matches the powdery stuff falling from the sky today. Warm, cozy and magical is the mood- these are a must to add to the holiday cookie platter- I promise!
Berry Chia Jam Thumbprint Cookie Recipe
{gluten, dairy, egg, soy, nut and seed-free options}
1 1/4 cup of finely ground gluten-free oat flour
3/4 cup of finely ground buckwheat flour
1 cup of white rice flour
1/2 cup of tapioca flour
2 TB of potato starch
1/2 cup of coconut palm sugar
1/2 ts. of baking powder
1 ts. of sea salt
1 ts. of baking soda
1 TB of apple cider vinegar
2 TB of maple syrup
1/2 cup of date paste puree
1 cup of oil: do a mix of either 1/2 cup coconut oil and palm oil shortening OR you could sub in 1/2 cup of your favorite nut or seed butter for the palm oil shortening. It adds a beloved flavor combo of PB and J kinda-touch.
I first blend up my own flours for the GF oats and buckwheat. Then in a large mixing bowl, add in all the dry ingredients first. Mix together well and then add in the wet and room temperature oils. Use a spatula to mix well, or your hands usually do the best trick at mixing equally. You want it to be soft but also all together so you can roll it into balls. It should leave a little oil to the touch on the hands. That is what makes it melt-in-your-mouth- buttery kind of texture too!
Once smoothly mixed, roll into a large ball and put in the fridge for 20 minutes to stiffen up Then pull out and roll large 1 TB-sized balls between your hands to make about 2 dozen cookie balls. Put onto a parchment covered baking sheet and then press your thumb firmly and evenly into each cookie ball. This will leave you a space to pour your jam into. Once 1 large spoonful of jam is entered into the thumb print space on the cookie- bake in a 350 degree oven for 12 minutes. Until golden and bottoms are browned- do not touch or move for another 15-20 minutes to help them from crumbling!
I used my favorite homemade berry jam as follows. If you want to make the full batch and have some more for bread and toast then YES make the full batch, but if you are looking to just make some for these cookies, half or cut the recipe by 2/3's so that you make 1/3 amount to top the cookies :) Here is the recipe for your enjoyment ;)
Immunity Boosting Berry Chia Jam Recipe
2 cups of frozen blueberries
2 cups of frozen cranberries or raspberries
2 cups of frozen strawberries
1 cup of very concentrated elderberry tea*
1/2 cup of juice (I used Antioxidant Force by Smart Juice) but you could use pomegranate or other no sugar fruit juice like cherry, berry mix, or grape. Or at the least you could use water as well.
2 TB of grated fresh ginger
1 organic orange grated for zest and squeezed for juice (could easily sub a lemon)
1/3 cup of pure raw honey
drizzle of maple syrup (or add 1/4 cup more of honey)
pinch of sea salt
pinch to 1 ts. of pumpkin pie spice blend
1/2 cup of whole chia seeds
*Soak 1/2 cup of dried elderberries in 1 quart jar of boiling water and let sit for overnight or longer and then drain the berries out and you have elderberry tea. You could also sub in some already made elderberry syrup if you used up your berries already making that and have it on hand- but you would only use 1/2 cup of the elderberry syrup and add 1/2 cup water. And since the honey is in the syrup as well you may decide to not add as much honey in the rest of the recipe.
In a medium saucepan, pour in the 6 cups of frozen berries with the tea and the juice and let cook to defrost and get soft. Then add in the ginger and orange juice and zest and bring to a soft boil and bubble and cook from any where to 10-15 minutes until the berries are very hot, juicy and mushy. Then use an immersion blender to blend in half of the mixture to be more smooth and have less chunky fruit. After this it looks like a fruit soup. Then add in the honey and syrup and stir well while it softly bubbles and boils. Turn off the heat and then add in the chia seeds. Stir in well so not to be clumpy and then let it sit in the pan and cool and let the chia seeds soak up the moisture and turn into a thick jammy substance. When it cools for 10-15 minutes you can pour into jars to continue to cool and thicken in the fridge. This recipe makes 3 pint jars. You can half it if you are looking to make less or you can also freeze and then thaw out when needed.
Berry Chia Jam Thumbprint Cookie Recipe
{gluten, dairy, egg, soy, nut and seed-free options}
1 1/4 cup of finely ground gluten-free oat flour
3/4 cup of finely ground buckwheat flour
1 cup of white rice flour
1/2 cup of tapioca flour
2 TB of potato starch
1/2 cup of coconut palm sugar
1/2 ts. of baking powder
1 ts. of sea salt
1 ts. of baking soda
1 TB of apple cider vinegar
2 TB of maple syrup
1/2 cup of date paste puree
1 cup of oil: do a mix of either 1/2 cup coconut oil and palm oil shortening OR you could sub in 1/2 cup of your favorite nut or seed butter for the palm oil shortening. It adds a beloved flavor combo of PB and J kinda-touch.
I first blend up my own flours for the GF oats and buckwheat. Then in a large mixing bowl, add in all the dry ingredients first. Mix together well and then add in the wet and room temperature oils. Use a spatula to mix well, or your hands usually do the best trick at mixing equally. You want it to be soft but also all together so you can roll it into balls. It should leave a little oil to the touch on the hands. That is what makes it melt-in-your-mouth- buttery kind of texture too!
Once smoothly mixed, roll into a large ball and put in the fridge for 20 minutes to stiffen up Then pull out and roll large 1 TB-sized balls between your hands to make about 2 dozen cookie balls. Put onto a parchment covered baking sheet and then press your thumb firmly and evenly into each cookie ball. This will leave you a space to pour your jam into. Once 1 large spoonful of jam is entered into the thumb print space on the cookie- bake in a 350 degree oven for 12 minutes. Until golden and bottoms are browned- do not touch or move for another 15-20 minutes to help them from crumbling!
I used my favorite homemade berry jam as follows. If you want to make the full batch and have some more for bread and toast then YES make the full batch, but if you are looking to just make some for these cookies, half or cut the recipe by 2/3's so that you make 1/3 amount to top the cookies :) Here is the recipe for your enjoyment ;)
Immunity Boosting Berry Chia Jam Recipe
2 cups of frozen blueberries
2 cups of frozen cranberries or raspberries
2 cups of frozen strawberries
1 cup of very concentrated elderberry tea*
1/2 cup of juice (I used Antioxidant Force by Smart Juice) but you could use pomegranate or other no sugar fruit juice like cherry, berry mix, or grape. Or at the least you could use water as well.
2 TB of grated fresh ginger
1 organic orange grated for zest and squeezed for juice (could easily sub a lemon)
1/3 cup of pure raw honey
drizzle of maple syrup (or add 1/4 cup more of honey)
pinch of sea salt
pinch to 1 ts. of pumpkin pie spice blend
1/2 cup of whole chia seeds
*Soak 1/2 cup of dried elderberries in 1 quart jar of boiling water and let sit for overnight or longer and then drain the berries out and you have elderberry tea. You could also sub in some already made elderberry syrup if you used up your berries already making that and have it on hand- but you would only use 1/2 cup of the elderberry syrup and add 1/2 cup water. And since the honey is in the syrup as well you may decide to not add as much honey in the rest of the recipe.
In a medium saucepan, pour in the 6 cups of frozen berries with the tea and the juice and let cook to defrost and get soft. Then add in the ginger and orange juice and zest and bring to a soft boil and bubble and cook from any where to 10-15 minutes until the berries are very hot, juicy and mushy. Then use an immersion blender to blend in half of the mixture to be more smooth and have less chunky fruit. After this it looks like a fruit soup. Then add in the honey and syrup and stir well while it softly bubbles and boils. Turn off the heat and then add in the chia seeds. Stir in well so not to be clumpy and then let it sit in the pan and cool and let the chia seeds soak up the moisture and turn into a thick jammy substance. When it cools for 10-15 minutes you can pour into jars to continue to cool and thicken in the fridge. This recipe makes 3 pint jars. You can half it if you are looking to make less or you can also freeze and then thaw out when needed.
Happy Christmas cookie baking (and jam making ;) I hope you are finding some space to enjoy the baking and make new memories and traditions with gluten-free versions of your favorites.
Much love and light as always, xoxo
Labels:
2017,
baking,
chia seeds,
christmas,
clean ingredients,
comfort foods,
cookies,
dairy free,
dates,
dessert,
egg free baking
Wednesday, December 13, 2017
Cranberry Orange Shortbread Cookies
The past few Decembers, (8!) but who's counting ;) I have been blogging recipes about gluten and dairy-free Christmas cookies. And this month is no different- it's like once the Christmas tree is up and the snow starts falling all that I want to do is bake Christmas cookies and read stories by the hue of the magical lights. And these are just about the best of the best for that...
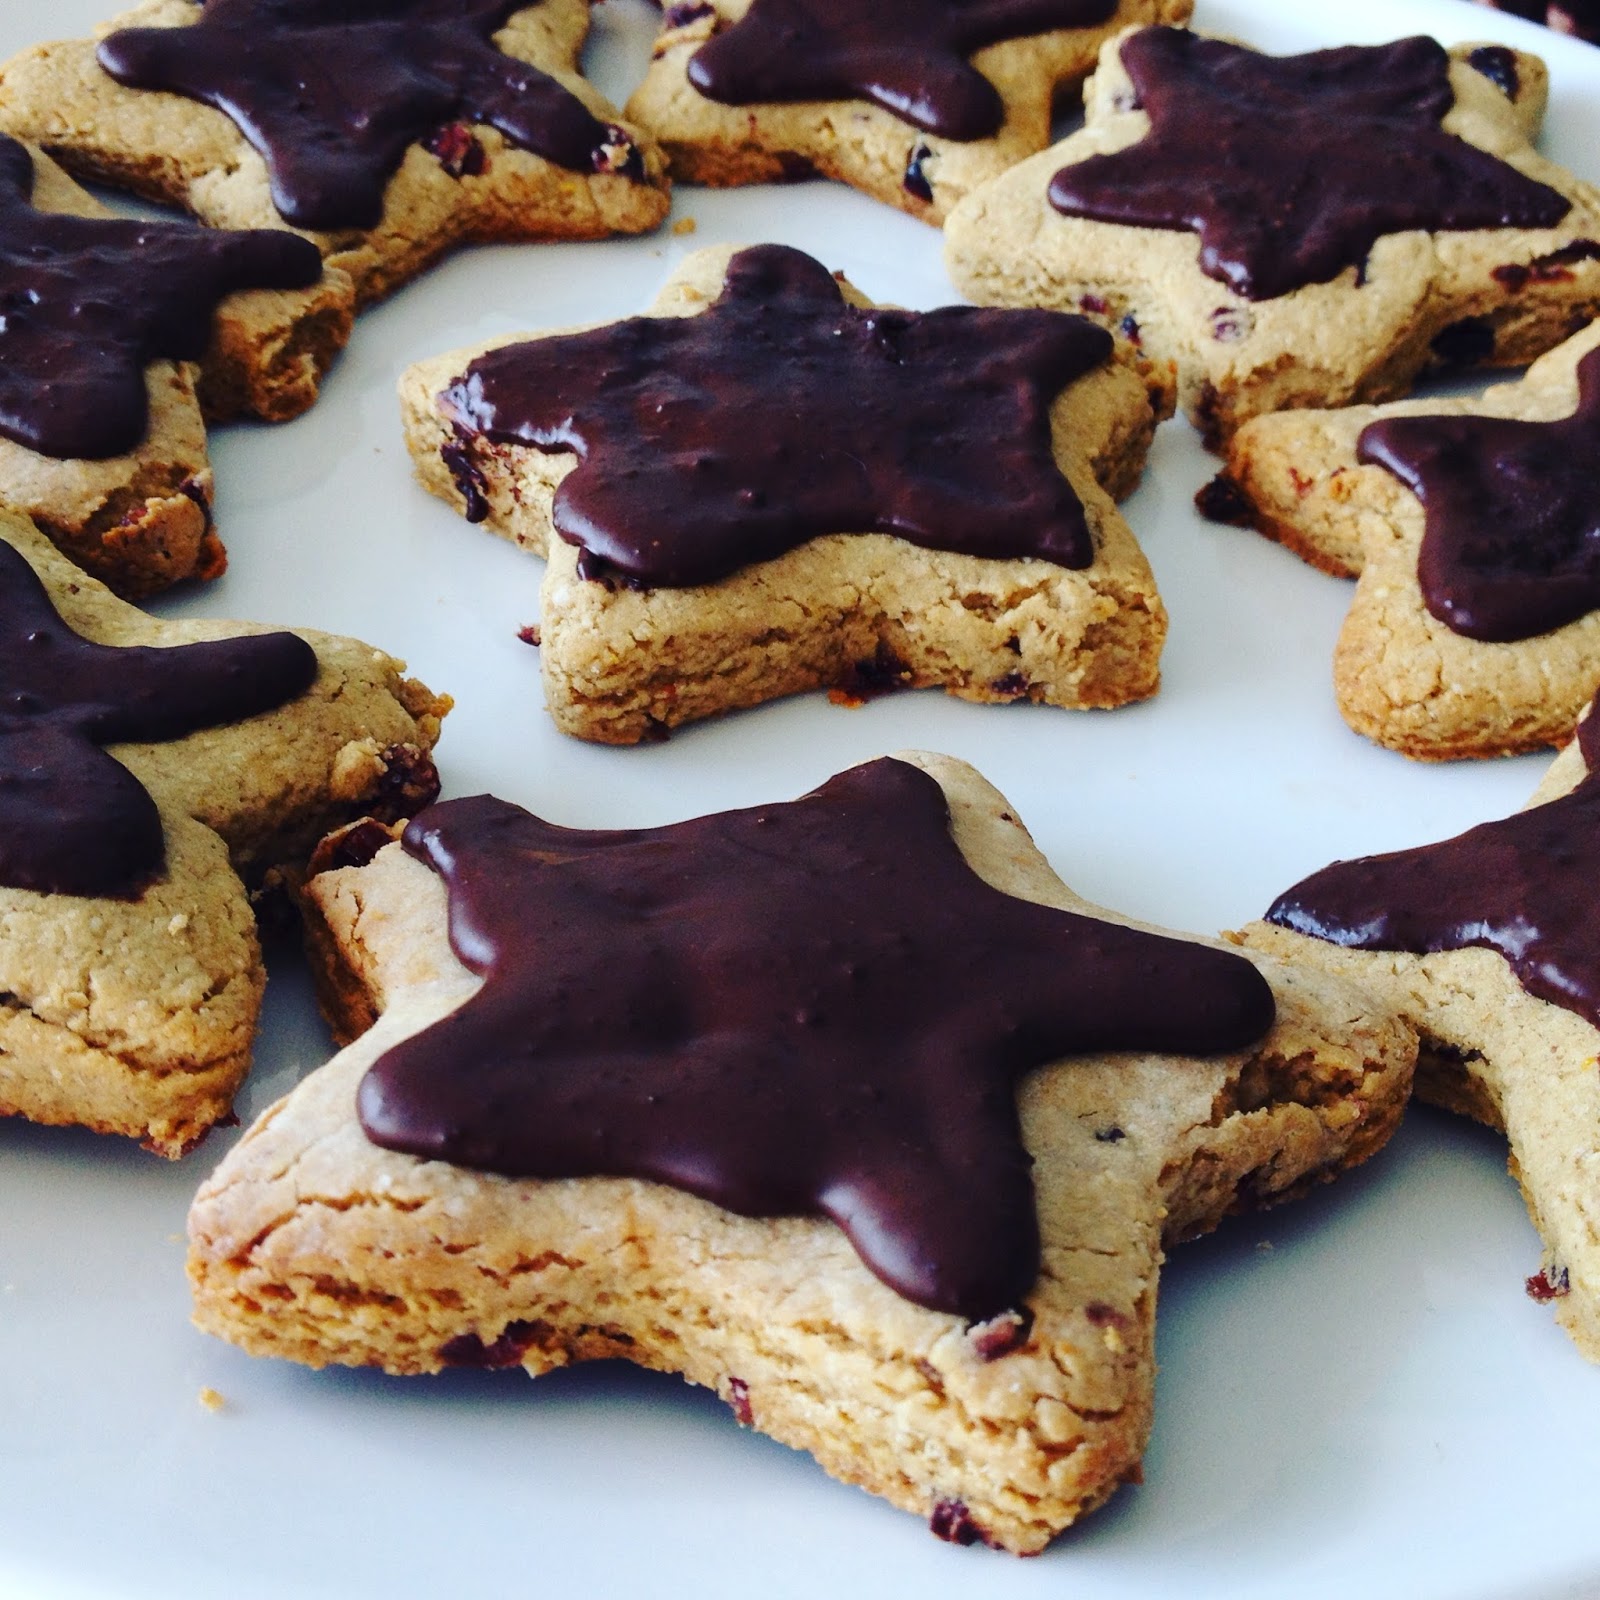
These perfect little cookies were born by chance at finding these lovely already diced and minced dried cranberries at my local market and at first sight it was love. I already dreamt up these cookies in my mind before I checked out of the store! I was thinking they would be the perfect flavors and colors for a Christmas cut-out cookie and goodness gracious- the result proved to be fabulous!
And then... I added some melted chocolate to some of them... whoa whoa whoa! Now the cookies are good and I feel like I could eat them with tea at just about any time of the day, but when you add that orange flavor infused chocolate- now that just feels fancy! A dessert really. Can a cookie be a dessert? Definitely at Christmas time ;)
But mostly, I just love making the cookies, the varieties, the traditions, the flavors, the colors. It is all just magical and joyous! We have been talking alot about hope and joy at our house the past few weeks, and the kids and I agreed- that making Christmas cookies is one of the best ways to have and share the Christmas joy with others. I love teaching my littles that the beauty of Christmas is actually in the hope, joy, peace and love that we share. That is actually where the magic is, and these cookies are just a picture of that love that we share, and enjoy and give away. So... I hope you are enjoying some Christmas cookie making this December- get ready- I am about to share a few more in the next week ;) Happy baking and happy sharing joy!
{gluten, dairy, egg, soy, nut, seed and refined-sugar free}
3/4 cup of certified gluten-free oat flour
(I grind my own out of rolled oats)
3/4 cup of fresh ground buckwheat four
3/4 cup of rice flour
3/4 cup of tapioca flour
1/4 cup of coconut palm sugar
2 TB of potato starch
1 1/2 ts. of baking soda
1 ts. of sea salt
1 ts. baking powder
1 organic orange for 3-TB of fresh zest and 1/2 cup of fresh juice
1 TB of apple cider vinegar
1/3 cup of maple syrup or honey
1 cup of oil: I use a mix of coconut oil and palm oil shortening
1/2 cup of date paste puree
In a large bowl, mix together the flours and dry ingredients first, then add in the wet and oils, use a spatula to make sure the oils are evenly pressed through and the batter is soft. Then add in..
(PLUS ONE MORE CUP of GF oat flour added at the end for firming up and rolling out)
and 1 cup of finely chopped dried cranberries (you can use or more or less for preference!)
Roll all together and let sit in the fridge to firm up just a bit, like 15 minutes. Then roll out and cut out the cookies with your favorite cutters. Bake in a 350 degree oven for 15-18 minutes, until golden brown on the bottom. Let cool for at least 20 minutes from the oven before moving to help with less breakage.
They are also fun to use the cut-out cutters, but you could easily spread this batter out with a rolling pin in a 12x15 pan and pre-slice 3x3 or 3x2 cookie squares before baking for about 20-30 minutes at 350. They are a play on Scottish or Irish shortbread squares. They would look a bit more simple, but the flavors and red popping out would make them just as wonderful. I might have tried that first if it wasn't December- and when I have little ones that want to use the Christmas shapes all day every day, you appease them.
You could also top with some melted chocolate that is infused with some orange flavoring, or some sweet orange essential oil that is made to eat. I melted 1 cup of bittersweet chocolate in a bowl over a pan of boiling water and then dropped a few drops of orange flavoring in it. It only amplifies the orange flavors! One of the most classic flavor combos- chocolate and orange- I can't resist!
You can use a special frosting pouch and decorator if you want to get even and fancy lines on the cookies, or you can do a rustic job as I did this go around and trace the shapes and fill in the middles. Once the chocolate dries- it will be stiff and hard like a chocolate bar.
End result is fabulous! I love a little bitter sweet chocolate with a chewy cranberry crunch all smothered in a citrusy orange infusion! These cookies are also easy to make ahead of Christmas and freeze and pull out here and there for parties and gatherings. That is if you really want to make and wait to eat them ;) They are so yummy you will find yourself going back for more and then thinking about them in January when you decided to tighten up the sweets and goodies in your life ;)
But for NOW... ENJOY and happy baking friends, sending love, hope, joy and peace xoxo
Labels:
2017,
baking,
celebrate,
christmas,
coconut oil,
cookies,
dairy free,
dates,
dessert,
egg free baking,
fall recipes,
farmer's market,
winter food
Friday, December 1, 2017
Cardamon Pear Muffins with Cranberry Sauce
December! The Christmas tree is up. The twinkle lights are shining magic from room to room. The sun goes down at like 4:30pm...but right now, we don't care because the Christmas lights and magic is in full force. And it hasn't snowed here yet, so we are still anticipating that magic, but to help us get in the Christmas spirit the kids and I were making our baking treats list. Which for sure included cut-out sugar cookies and fudge and sprinkles and candy canes... ok I think the kids were more excited about all the other Christmas treats and I was thinking about the baking :) No surprise here!
These muffins are the perfect combo of moist, spice and texture. They are good for the soul. Yes, maybe I talk too much about how food can nourish you, or even how food can do more than just feed the stomach. But these little muffins remind me of just that. They bring joy and cheer. They bring hope and peace. They are just little muffins, yes, but they touch all of the senses when you mindfully surround yourself into the baking process. Each ingredient is added in love and opens your senses to the warmth, spice and delicious flavors of the season.And... these little beauties can use up some of that leftover Thanksgiving cranberry sauce (if you still got it), and start the magical month out with a little special muffin baked with amazing cardamon and pear. The scents will fill the kitchen and will have you all warm and fuzzy from joy!
Homemade Cranberry Sauce
{gluten, dairy, egg, soy, seed, nut and refined-sugar-free}
16 ounces of fresh raw cranberries (I use organic if I can find them in Michigan)
1/2 cup of water
1 organic navel orange for 2 TB of fresh zest
plus 1/2 cup of fresh squeezed juice
Put all of the above in a small/medium saucepan, let the water and juices come up to a boil and POP the cranberries from their skins. This will take anywhere from 5-10 minutes. Then let them cook down just a bit and swirl in some honey and a pinch of salt
pinch of sea salt
1/3- 1/2 cup of honey or maple syrup
After cooking for 15-20 minutes, the liquids will cook down and the sauce will be ready to dish into a glass jar or bowl. Cover well and let it cool down and "set" in the fridge. After a few hours you will see that it naturally almost gels a bit and is the perfect sauce to top on just about everything ;)
Cardamom Pear Muffin Recipe with Cranberry Sauce
{gluten, dairy, egg, seed, nut and refined-sugar-free}
1 1/4 cup of ground GF oat flour
1/3 cup of white rice flour
1/3 cup tapioca flour
1/4 cup of potato starch
1/4 cup of coconut flour
1/2 cup of coconut palm sugar
1 ts. of baking soda
1 ts. of sea salt
2 ts. of baking powder (I use Hain brand for corn-free)
1 TB of ground cardamom
pinch of ground cinnamon
3/4 cup of date puree- This involves pouring 3/4 cup boiling water over 3/4 cup of pitted dates and letting it sit for 5-10 minutes and then blending in a high powered blender to whip up a creamy date-pudding like substance
1/4 cup of unsweetened applesauce
1/2 cup of coconut milk beverage (or other non-dairy milk)
with 1 TB of apple cider vinegar
1 TB fresh lemon or orange juice
1/4 cup of maple syrup
2 small fresh pears finely diced and stewed in a saucepan until soft and reduced with a drizzle of water and maple syrup (about 1/4 cup of each) Makes about 1 cup of stewed pears for muffins
Add in 1/2 cup or so of leftover cranberry sauce and use a tablespoon to spread some on top before baking.
Mix all the dry ingredients together in a large mixing bowl. Then add in the wet and whisk together well. Pour into 12 muffin tins, fill about 3/4 the way for a full muffin. Then spread some of the cranberry sauce (about 1 TB) on top and swirl around before baking.
Bake in a 350 degree oven for 25-28 minutes until stiff. Wiggle and check the middles to make sure there is no jiggle. Then let cool 5-10 minutes before serving. Store in a cool dry place to last longer.
Happy baking and happy December, friends xoxo
Thursday, November 30, 2017
Creamy Curry 'Leftover' Turkey Soup
You probably made your way through the Thanksgiving leftovers already, so this recipe may be coming a bit too late for you, but maybe you stuck some of that leftover turkey in the freezer or you are still planning on roasting that turkey this coming month. This recipe I have been putting together the week after Thanksgiving the past few years. Turkey soup with a touch of some new flavors, is just the excitement you need after a week of prepping for the big feast. Soup is the easy recovery meal that lasts and nourishes without all the kitchen clean-up. Which then nourishes you in more ways than one when you are needing a little space and time away from the kitchen to rest :)
I think my most favorite meals to make are the one-pot-meals. Ones that have all the veggies, proteins, grains and whatever nourishing roots and vitamins your body craves in one simple pot. It all comes together and to me represents love, family, togetherness. It fills me up in so many ways!
{gluten, dairy, egg, nut, seed, soy and refined-sugar-free}
2-3 TB of avocado or olive oil
1 large onion finely chopped
4-5 garlic cloves finely minced
1 TB of fresh grated turmeric
2 cups of finely chopped celery
hearty sprinkle of sea salt
sprinkle of fresh ground black pepper
2-3 cups of chopped carrots
1-2 cups of chopped parsnips
1 TB of Italian spice blend (rosemary, oregano, basil, marjoram, thyme)
Or use fresh herbs if you got them!
1 TB of curry powder
8 cups of turkey stock (or a chicken or vegetable works too!)
1 can of full fat coconut milk
2-3 cups of your leftover turkey (white and dark meat together make the best combo!)
make sure you cut into bite-sized pieces before adding in
1 cup of finely chopped fresh parsley
add in 1 cup of dry small rice pasta or already cooked rice for another added texture
add more sea salt or pepper to your taste
add in a little more water or broth if you want more of a brothy soup
In a large 10 quart pot, saute your onion, garlic, turmeric, celery in the oil for a few minutes. I usually salt and pepper here so to sweat out and cook down the flavors perfectly. Then after 5 ninutes or so when everything softens up I add in the carrots and parsnips and continue to cook for a few more minyes. Then when everything is looking a little softer and smells fabulous- I add in the spices, herbs and liquids. I first cook in the spices the curry and the dried herbs and you can instantly smell them as they are add in and start cooking. Then I add in the stock, coconut milk cream and leftover turkey. This will slow everything down with cooking, but keep the heat the same and let it come up to a boil. After cooking for 20-30 minutes and the veggies are extra soft, add in the fresh parsley and dry pasta. Or if you prefer to add in already cooked rice, that works too! Cook for another 10 minutes and the noodles will be aldente and ready to eat. Serve with a sprinkle of fresh herbs and with a side of bread or biscuits!
Creamy, full of flavor, comforting and nourishing. That is this soup. A bowl of goodness. A bowl of love and gratitude. So much to be thankful for this season, and one way I show my gratitude is cooking nourishing food for my family and sharing it with others. It is a gift that keeps on giving. Happy cooking and resting, friends xoxo
Saturday, November 18, 2017
Balsamic Butternut Squash with Sage & Thyme
Another SUPER SIMPLE, 4-ingredient, vegetable, colorful, tasty, savory and sweet, side to add to the list of Thanksgiving side dish ideas. This one is so simple it doesn't really need a recipe, and maybe you have tried this combo before, so this is just rocket science to me...BUT it deserves a recipe post of it's own!
I love every part of this one. The easy prep, roast and serve part, but also the very fresh herb, sweet and savory part too. It checks off all the boxes for a side that many people will love and ask, what did you do?!? And then you mention to your allergy- or healthy friends and family that NO BUTTER or dairy, or sugar was involved??? WHAT!? Yes, ma'am it's true!Don't be afraid of taking all the credit for the chopping and the roasting ;) This is a delicacy-dish! Don't reveal the secrets of how crazy simple and wonderful it is, well, until you can't help it and you love to share like I do :) You can't go wrong with squash and herbs in this season and when you are looking to add some to the feast... THIS. IS. IT!
Balsamic Butternut Squash with Fresh Sage and Thyme
{gluten, dairy, egg, seed, nut, soy and sugar-free}
1 large butternut squash peeled, and cubed into bite-sized pieces
(about 4 cups worth of cubed squash)
1/4 cup of avocado oil*
1/4 cup of NAPA VALLEY Raspberry Balsamic**
1/2 cup of FRESH finely chopped fresh herbs: sage and thyme
pinch of sea salt and sprinkle of fresh ground black pepper
*You can find the CHOSEN brand Avocado oil 32 ounce at Costco right now for under $10! A steal!
**You can use a regular balsamic as well, but Napa Valley has the BEST balsamic around and when it is infused with raspberry, fig or pomegranate it has the best results in salad dressings, or in this case, roasting butternut squash ;)
Toss all of the above together in a mixing bowl. Then spread out in a 9x13 Pyrex baking dish to bake, or use a 12x15 parchment covered baking sheet to get a more crispier results. Bake in a 375-400 degree oven for 25-30 minutes. And toss with a spoon and serve warm. You can easily DOUBLE and TRIPLE this recipe if you are cooking for a crowd too!
This is a melt-in-your-mouth kinda deliciousness! Try it out and you will want to have this more in your life than just for a Thanksgiving Feast :)
I hope you give this a try and ENJOY!
Much love and happy cooking xoxo
Monday, December 19, 2016
Cherry Chocolate Snow Cake
It's been a winter wonderland for the last 10 days here in Michigan- so much snow! We are not complaining (now)- just enjoying the cozyness and the excitement the snow brings as it ushers in more Christmas spirit. I'm sure when January rolls around we will be a little more whiney about the constant shoveling and delays that snow brings, but for now I am truly enjoying the quiet and still gorgeous beauty of the snow falling. There is something magical in watching the world be glittered with gentle white powder sprinkles from the sky. It stills the racing heart if you let it- something to sit and do amongst the crazy season of shopping, baking, wrapping and parties.
My kids saw this cake I was making and thought the sprinkle of powdered sugar on top looked like the beautiful snow and called it the snow cake :) Seems appropriate because we have been watching snow fall for so many days now. A cake is always needed to celebrate if you ask me and chocolate and cherries always help no matter what the season :)
This week also marks the Winter Solstice on Wednesday at 5:44 EST. So the "shortest" day of the year for us in the Northern Hemisphere with the darkest day and hours of sunlight you can count on your hands. Traditionally the Winter Solstice is a time to reflect in the darkness and to journey deep within to restore and nourish from the inside out. I think the body observes these cycles whether we are aware or not- this shift in our world is happening whether we are present in it or not. So, being aware allows us to dig deeper into our thoughts, hearts and soul. I can appreciate the space to do this, if I actually allow myself to slow down and live fully present in this gift of life.
So I hope you enjoy and have the merriest of Christmases with moments of hope, peace, joy and LOVE. You have been given the greatest gift of love and now it's our turn to share it too. Merry Christmas and much love and light to you xoxo
Cherry Chocolate Snow Cake Recipe
{free of gluten, dairy, soy, corn, nuts and seeds}
1 1/4 cup of gluten free oat flour
2/3 cup white rice flour
1/3 cup of tapioca flour
1/4 cup of potato starch
1/4 cup of coconut flour
3/4 cup of coconut palm sugar
1/2 cup of cocoa powder
2 ts. of baking powder (I use Hain brand)
1 ts. of baking soda
1 ts. of sea salt
1/3 cup of applesauce
1/3 cup of maple syrup
1 cup of date puree ***This involves pouring 1 cup boiling water over 1 cup of pitted dates and letting it sit for 5-10 minutes and then blending in a high powered blender to whip up a creamy date-pudding like substance.
1 ts. of pure vanilla
1 cup of warmed coconut oil
1 cup of coconut milk beverage (I use So Delicious)
2 TB of apple cider vinegar
2/3 cup of chocolate chips morsels (Enjoy life brand)
2 cups of frozen chopped pitted cherries, halved (I used ones from last summer pickings in our freezer, but any frozen cherry will do, tart or sweet)
First grind your GF oat flour and mix well with all the other dry ingredients. Then mix in the wet ingredients, date puree and lastly the warmed oil. Mix well and you will start to see the vinegar and baking powder do it's work and make the batter poof up a bit. Fold down and then mix in the chocolate chips, and then lastly the halved frozen cherries
Pour in a coconut-oil-lined baking pan. I baked mine in a bundt or angel food cake pan. But you could also make this in a 9x9 circle or square pan. Bake in a 350 degree oven for 45 minutes or until it is no longer wet and giggling. The cake should show a clean toothpick from the middle of the cake and firm, but soft. no wetness. Pull from the oven and let it cool completely.
When it is cool completely, you can use a sieve and sift powdered sugar over the top looking like snow falling on such a dark chocolate cake. I use about 1/4 cup of sugar, and I use the organic powdered sugar because it is processed with tapioca starch and no corn.
Set up with some fresh cherries, cranberries, or green grapes for a little red and green color with the cake. It is a rich cake, but some coconut ice cream or whipped topping is a nice touch too.
Hope you ENJOY! Happy Baking :)
My kids saw this cake I was making and thought the sprinkle of powdered sugar on top looked like the beautiful snow and called it the snow cake :) Seems appropriate because we have been watching snow fall for so many days now. A cake is always needed to celebrate if you ask me and chocolate and cherries always help no matter what the season :)
This week also marks the Winter Solstice on Wednesday at 5:44 EST. So the "shortest" day of the year for us in the Northern Hemisphere with the darkest day and hours of sunlight you can count on your hands. Traditionally the Winter Solstice is a time to reflect in the darkness and to journey deep within to restore and nourish from the inside out. I think the body observes these cycles whether we are aware or not- this shift in our world is happening whether we are present in it or not. So, being aware allows us to dig deeper into our thoughts, hearts and soul. I can appreciate the space to do this, if I actually allow myself to slow down and live fully present in this gift of life.
I have been enjoying my time in the kitchen this Christmas season. I know it may seems a little unreal or crazy that I do so much baking at my house.... but it is just a part of me. It may even be said to be "easy" for me to bake, cook, create. And it is most days- but I see it as my gift to share. That's what these recipes and blog is all about-it comes from a place in me that needs to be shared and given. I truly see what I have been given a gift- my life, my loved ones, my kids, and every detail of my little livelihood. But what brings me more hope, joy, purpose is when I can share what I have been given. The recipes are my gift to you. I hope they find you so that you can create them and share and enjoy them too. I know that it is not much when it comes to all that is hard and difficult in our world- but if it makes your home and life a little brighter- in the simplest of ways- then I know it was worth creating and sharing.
So I hope you enjoy and have the merriest of Christmases with moments of hope, peace, joy and LOVE. You have been given the greatest gift of love and now it's our turn to share it too. Merry Christmas and much love and light to you xoxo
{free of gluten, dairy, soy, corn, nuts and seeds}
1 1/4 cup of gluten free oat flour
2/3 cup white rice flour
1/3 cup of tapioca flour
1/4 cup of potato starch
1/4 cup of coconut flour
3/4 cup of coconut palm sugar
1/2 cup of cocoa powder
2 ts. of baking powder (I use Hain brand)
1 ts. of baking soda
1 ts. of sea salt
1/3 cup of applesauce
1/3 cup of maple syrup
1 cup of date puree ***This involves pouring 1 cup boiling water over 1 cup of pitted dates and letting it sit for 5-10 minutes and then blending in a high powered blender to whip up a creamy date-pudding like substance.
1 ts. of pure vanilla
1 cup of warmed coconut oil
1 cup of coconut milk beverage (I use So Delicious)
2 TB of apple cider vinegar
2/3 cup of chocolate chips morsels (Enjoy life brand)
First grind your GF oat flour and mix well with all the other dry ingredients. Then mix in the wet ingredients, date puree and lastly the warmed oil. Mix well and you will start to see the vinegar and baking powder do it's work and make the batter poof up a bit. Fold down and then mix in the chocolate chips, and then lastly the halved frozen cherries
Pour in a coconut-oil-lined baking pan. I baked mine in a bundt or angel food cake pan. But you could also make this in a 9x9 circle or square pan. Bake in a 350 degree oven for 45 minutes or until it is no longer wet and giggling. The cake should show a clean toothpick from the middle of the cake and firm, but soft. no wetness. Pull from the oven and let it cool completely.
When it is cool completely, you can use a sieve and sift powdered sugar over the top looking like snow falling on such a dark chocolate cake. I use about 1/4 cup of sugar, and I use the organic powdered sugar because it is processed with tapioca starch and no corn.
Set up with some fresh cherries, cranberries, or green grapes for a little red and green color with the cake. It is a rich cake, but some coconut ice cream or whipped topping is a nice touch too.
Hope you ENJOY! Happy Baking :)
Labels:
applesauce,
baking,
cake,
celebrate,
chocolate treat,
christmas,
comfort foods,
dates,
dessert,
egg free baking,
holiday recipes,
thankfulness,
vegan
Friday, December 16, 2016
Turkey Sausage, Kale and Cherry Stuffing
This has been my stuffing recipe for the past 4 years and I have never shared it with you. I've thought through why this hasn't happened and I guess it is just because it always gets eaten so fast after the holidays that I don't have time to take pictures and document it. Also things are always so busy in the kitchen around the holidays that it just hasn't been a recipe I have taken the time to write down and make into something to share. I know- it seems a bit complicated because of a few steps, but it is relatively easy after you bake and dry out the bread. And if you have made my bread before and have become a master at it yourself then you are more than half-way there. I think my bread is what makes it special. It's hearty and thick and gets all perfect with the other soaked flavors. I know Martha Stewart makes a versions of this type of stuffing with her own regular bread- so there's that- but, this one is special because of my bread. There are so many stuffing recipes out there and some have very passionate opinions when it comes to stuffing- but let me tell you- this recipe will forever change your mind about stuffing. And as I finally served it to some of my closest friends over last Thanksgiving- they declared it was their favorite dish I EVER made. That seems quite the exaggeration if you ask me :) Because we all know that I make a lot of food- and these friends have probably had 100's of my recipes- but they fell in love and when you fall in love- you say crazy things :)
{gluten, dairy, soy, nut, seed and refined sugar-free}
2 loaves of bread- this BREAD RECIPE doubled
after baking the bread, cooling it and letting dry-out- cut each loaf into slices and then cube up each slice to come up with a 11x15 baking sheet worth of bread cube crumbs.
Then bake and dry out in a 300 degree oven for 20-30 minutes and then check and toss through and then bake again for 20-30 minutes until the bread cubes are like croutons and hard and very crunchy. The timing on this may vary with each oven, but basically you have to keep checking on them to make sure they are getting dried how and crunchy and not burned.
2 pounds of raw turkey sausage
(I buy mine at a local farm at the farmer's market- it is actually a "breakfast" sausage blend, but it is just seasoned with paprika, herbs, sugar, and a little black pepper and salt. Any favorite turkey sausage or even pork sausage will do the trick- just make sure it is raw so you can ground it up with all the seasonings. I buy mine frozen, so I thaw it out for 12 hours and then toss in a large 8 quart pot and ground up and brown into chunks. Then pour our of the pot while you sauce up the rest of the veggies and then you can add in back in before you add the broth.
2 TB of olive oil for sautéing
1 large yellow onion, finely chopped
1 whole bunch of celery, finely chopped
6 garlic cloves finely chopped and minced
1/2-1 cup of chopped poultry blend fresh herbs (sage, thyme, rosemary)
1/2 cup of fresh chopped parsley
1 1/2 cups of finely chopped lacinato kale
Sauté on medium heat the above veggies and herbs for 5-10 minutes to get the onion and garlic soft, then add back the browned sausage, and then add the apples, cherries and broth.
1-2 small peeled and finely chopped apples
12 or 16 ounces of organic dried cherries
4 cups of organic chicken broth
Cook in the broth and let it come to a boil and then pour the bread cubes in the huge pot and turn off the heat. Toss and mix as quickly as you can so that the broth evenly distributes itself over all the bread cubes and then very quickly pour into a large 11x15 Pyrex dish, or even a 9x13 work for it to have it in a pile in the middle, or you can use a 9x9 to use up the rest of the mixture. Or if you have a special glass (oven OK dish) that would fit the whole mixture. Then use foil to cover it- let it sit in the fridge for at least 4 hours, but it can be over night. I have also froze it at this stage and pulled it our the day of the dinner. Then, the day of the meal, bake off in a 350 degree oven for 45-50 minutes. For the first 30 minutes with the foil on, and then the last 20 with the foil off to get some crispy tops of the bread pieces. If you don't like or what crispy edges, and prefer a more moist finish, then go ahead and keep the foil on. Make sure the middle is HOT before you totally pull from oven. Then let cool for a few minutes before serving with the rest of the feast and fixings.
This is a perfect Thanksgiving stuffing- but also has been eaten as a cozy comfort meal through out the winter months. It would pair well with a roast or ham as well for Christmas. There is no going back after you have tried it- so let it be known I have warned you :)
Much love xoxo
Wednesday, December 14, 2016
Gingerbread People Cookie
Why is it that gingerbread "men" cookies are just that... "men"? I guess it's because my cookie cutters have legs and not skirts? That seems a a bit crazy now that I think about it. Where are the women gingerbread cookies? And why do we think the leg gingerbread cookie cutter are only men? So, in effort to do my part in offering a more diverse world for the gingerbread cookies- I declare these cookies as gingerbread people! For the LOVE! And for everything good and beautiful!
It was time to make a new recipe for my gingerbread people anyways. So that's just what I did.
They are gingery and soft and a bit of a companion for your evening tea or morning coffee.
Just in time for some Christmas cookie baking with the littles or with your besties. My favorite part of this cookie is actually the fact that they are not overly sweet- and a good dose of ginger. It feels almost like the perfect dessert after a heavy winter or holiday meal. So I make these this time of year of many reason- but the most obviously reason is that they are just fun cookies to make :)
Gingerbread People Cookie Recipe
{gluten, dairy, egg, nut, seed and refined-sugar free}
1 1/4 cup of ground certified gluten-free oat flour
1 cup of white rice flour
1/2 cup of tapioca flour
1/3 cup of potato starch
1/4 cup of coconut flour
1/2 cup of coconut palm sugar
1/2 ts. of sea salt
1/2 ts. of baking soda
1/2 ts. of baking powder
2 1/2 ts. ground ginger
1/2 ts. ground cinnamon
1/3 cup of applesauce
1/3 cup of blackstrap molasses
1/4 cup of maple syrup
2/3 cup of soft coconut oil
1 ts. of apple cider vinegar
Mix all the dry ingredients together first in a large mixing bowl. Then add in the wet and lastly mix in the softened coconut oil. It may seem to resemble a biscuit recipe and will be a sticky mess. Use extra rice or tapioca flour to make it less sticky and knead the dough ball into a nice rounded ball and place back in the mixing bowl and in the fridge for 15-20 minutes. This will stiffen the dough and make it ready to cut in 2 or 4 pieces and roll out on a parchment paper to 1 inch thickness and then you can use your cookie cutters on them. This one I used the ginger-people cutter- but you could also just boycott the people and go straight to the stars and hearts :) I used Enjoy Life chocolate chips to decorate BEFORE baking and just pushed them into the cookie dough.
Bake on a parchment papered baking sheet in a 350 degree oven for 12-15 minutes until golden and crispy. Let cool for 15 minutes before moving to avoiding cracking and breaking of the cookies.
Hope you have fun baking. Much love xo
It was time to make a new recipe for my gingerbread people anyways. So that's just what I did.
They are gingery and soft and a bit of a companion for your evening tea or morning coffee.
Just in time for some Christmas cookie baking with the littles or with your besties. My favorite part of this cookie is actually the fact that they are not overly sweet- and a good dose of ginger. It feels almost like the perfect dessert after a heavy winter or holiday meal. So I make these this time of year of many reason- but the most obviously reason is that they are just fun cookies to make :)
Gingerbread People Cookie Recipe
{gluten, dairy, egg, nut, seed and refined-sugar free}
1 1/4 cup of ground certified gluten-free oat flour
1 cup of white rice flour
1/2 cup of tapioca flour
1/3 cup of potato starch
1/4 cup of coconut flour
1/2 cup of coconut palm sugar
1/2 ts. of sea salt
1/2 ts. of baking soda
1/2 ts. of baking powder
2 1/2 ts. ground ginger
1/2 ts. ground cinnamon
1/3 cup of applesauce
1/3 cup of blackstrap molasses
1/4 cup of maple syrup
2/3 cup of soft coconut oil
1 ts. of apple cider vinegar
Mix all the dry ingredients together first in a large mixing bowl. Then add in the wet and lastly mix in the softened coconut oil. It may seem to resemble a biscuit recipe and will be a sticky mess. Use extra rice or tapioca flour to make it less sticky and knead the dough ball into a nice rounded ball and place back in the mixing bowl and in the fridge for 15-20 minutes. This will stiffen the dough and make it ready to cut in 2 or 4 pieces and roll out on a parchment paper to 1 inch thickness and then you can use your cookie cutters on them. This one I used the ginger-people cutter- but you could also just boycott the people and go straight to the stars and hearts :) I used Enjoy Life chocolate chips to decorate BEFORE baking and just pushed them into the cookie dough.
Bake on a parchment papered baking sheet in a 350 degree oven for 12-15 minutes until golden and crispy. Let cool for 15 minutes before moving to avoiding cracking and breaking of the cookies.
Hope you have fun baking. Much love xo
Labels:
applesauce,
baking,
Bob's red mill flour,
christmas,
cookies,
dairy free,
dessert,
egg free baking
Monday, December 12, 2016
Apple Blueberry Cranberry Spice Crisp
If there was a "christmas crisp recipe" this would be it in my little corner of the world. Besides or maybe instead of the cinnamon rolls this would be another great Christmas morning treat for the whole family. It is a great make ahead and bake off or warm the morning of Christmas. Not only does the smells of spice, apple, and berries fill your Christmas-filled home, but the warmth of the dish brings out all the Christmas spirit feelings. Maybe better than any "christmas spirit" candle or essential oil, because you get to eat it after :)
I also think adding the spice to the fruit is the best, and no spice to the topping. Kinda like a biscuit topping and the surprise flavor is inside. Those are just some of my favorite tips to making a great fruit crisp. If you make enough crisps, you find the little secrets that you love most to make it special every time. This one is made special with the flavors of orange, cloves, nutmeg, and the berries with the apples. A great combo that I am so glad found its way to my home this snowy Christmas season!
Apple Blueberry Cranberry Spice Crisp Recipe
{gluten, dairy, egg, nut, seed and soy-free, vegan options}
4 heaping cups of finely chopped fresh apple pieces without skins
3 cups of frozen blueberries
1 cup of frozen or fresh cranberries
1 cup of unsweetened applesauce
1 organic orange to get 1/2 cup of fresh juice and 2 TB of fresh orange zest
1/4 cup of maple syrup
1/4 cup of pure honey (or more maple syrup to be vegan)
1/2 cup of water
2 TB of tapioca starch
pinch of sea salt
2 TB of pumpkin pie spice blend (cinnamon, nutmeg, ginger, cloves mix)
Mix all of the above ingredients in a large 9x13 glass pyrex pan very well with a spoon or with your hands. Press down if need be to fit the crisp crumble evenly on top.
2 cups of GF rolled oats
1/3 cup of tapioca starch
1/3 cup of potato starch
1/3 cup of rice flour
1/2 ts. of sea salt
3/4 cup of coconut palm sugar
1/4 cup of maple syrup
1/3 cup of organic coconut oil
1/3 cup of organic palm oil shortening
Mix the above ingredients together and you get a crumbly oat toping to sprinkle over top the fruit in the Pyrex pan. Try to evenly spread over the fruit and then put the pyrex pan on a baking sheet for extra coverage if there happens to be any juicy fruit drippage from the pan- it will not fall on your oven floor and start burning. Bake for 45-50 minutes in a 350 degree oven- or when the crust is golden brown and crispy and the fruit is bubbling and perfectly soft and sugary. Let it cool! Just for 10-15 minutes so that it is not scalding hot- it is best not scalding, but still very warm if you ask me. You can eat just as for breakfast, lunch, dinner or dessert, or add some coconut whip topping or ice-cream to get all fancy.
To be honest, I was kind of over fruit crisps for a while. It is such an easy GF dessert, so over the past decade I have had my fill of hundreds of delicious bubbling crisps. They are so easy to throw together with fresh or frozen fruit and you can make it a little special with some spice or some fresh zest or even herbs. But this one... I fell in love all over again. I didn't actually have a serving until the day after I baked it, and when I did... I just stopped and sat down and enjoyed it as breakfast with a good cup of tea. It really surprised me at it's warmth and comfort it offers on a cold winter day.
There are a few tricks to make a great crisp. One is to make sure the fruit going in if it is the same or a variety is that they are all cut in similar size, and I would say that bite-size or even smaller is best. So for this crisp I have frozen blueberries from last summer, cranberries from a few weeks ago and apples... So I cut the apples the same size of the large berries- so that all pieces are the same size and it melds and mixes well.I also think adding the spice to the fruit is the best, and no spice to the topping. Kinda like a biscuit topping and the surprise flavor is inside. Those are just some of my favorite tips to making a great fruit crisp. If you make enough crisps, you find the little secrets that you love most to make it special every time. This one is made special with the flavors of orange, cloves, nutmeg, and the berries with the apples. A great combo that I am so glad found its way to my home this snowy Christmas season!
Apple Blueberry Cranberry Spice Crisp Recipe
{gluten, dairy, egg, nut, seed and soy-free, vegan options}
4 heaping cups of finely chopped fresh apple pieces without skins
3 cups of frozen blueberries
1 cup of frozen or fresh cranberries
1 cup of unsweetened applesauce
1 organic orange to get 1/2 cup of fresh juice and 2 TB of fresh orange zest
1/4 cup of maple syrup
1/4 cup of pure honey (or more maple syrup to be vegan)
1/2 cup of water
2 TB of tapioca starch
pinch of sea salt
2 TB of pumpkin pie spice blend (cinnamon, nutmeg, ginger, cloves mix)
Mix all of the above ingredients in a large 9x13 glass pyrex pan very well with a spoon or with your hands. Press down if need be to fit the crisp crumble evenly on top.
2 cups of GF rolled oats
1/3 cup of tapioca starch
1/3 cup of potato starch
1/3 cup of rice flour
1/2 ts. of sea salt
3/4 cup of coconut palm sugar
1/4 cup of maple syrup
1/3 cup of organic coconut oil
1/3 cup of organic palm oil shortening
Mix the above ingredients together and you get a crumbly oat toping to sprinkle over top the fruit in the Pyrex pan. Try to evenly spread over the fruit and then put the pyrex pan on a baking sheet for extra coverage if there happens to be any juicy fruit drippage from the pan- it will not fall on your oven floor and start burning. Bake for 45-50 minutes in a 350 degree oven- or when the crust is golden brown and crispy and the fruit is bubbling and perfectly soft and sugary. Let it cool! Just for 10-15 minutes so that it is not scalding hot- it is best not scalding, but still very warm if you ask me. You can eat just as for breakfast, lunch, dinner or dessert, or add some coconut whip topping or ice-cream to get all fancy.
Hope you stay warm and enjoy!
Happy baking and much love, xoxo
Subscribe to:
Posts (Atom)