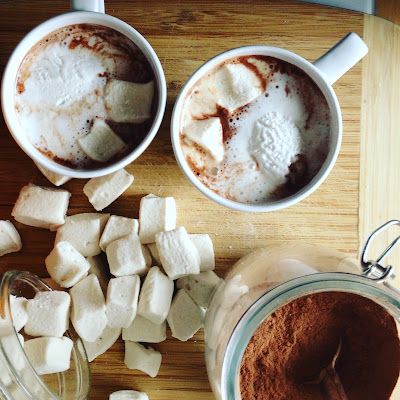
Here in Michigan it's cold this time of year, and it is only going to get colder and more grey for the next 3-4 months. And just today, a fresh new world of white greeted us because it has been snowing hard since breakfast. So basically the best day to have some homemade cocoa and marshmallows, and I was planning on this recipe post before I even knew the snow was coming ;)
Knowing you have a warm beverage treat at your finger tips really helps with the desire to keep carrying on...carrying on. Hot cocoa and marshmallows are essential tools for surviving winter if you ask me. I may just be a little obsessed though. And if you are a friend of mine on instagram, then you already know my love affair with hot beverages ;)
This combo is also a great gift. Whether you package it up in cute-sy jars and ribbons. Or whether you have it as an option for guests as they come in and warm themselves and share in holiday cheer. There's hot cocoa and marshmallows, and then there is... HOMEMADE cocoa and marshmallows. So, stop thinking about wanting to try these and make them already. Your life will never be the same.
Homemade Marshmallow Recipe
In a large mixing bowl, add the following ingredients and let the gelatin "bloom" and sit at the bottom on the bowl. You may need to whisk in the gelatin and water so that there are no clumps.
4 TB Great Lakes Gelatin (or the Knox gelatin brand works too)
2/3 cup of pure water
*sidenote* if you want to invest in buying the GMO-free gelatin I mentioned above. If you want to read more about the health benefits with adding gelatin to your diet, read more here.
Now,
In a medium saucepan, add the following ingredients on medium to high heat:
3/4 cup of pure honey
1/2 cup of maple syrup
1/2 cup of water
pinch of sea salt
1/2 cup of tapioca flour
For best results, buy yourself a candy thermometer so that you can tell when the honey syrup mixture reaches a scalding 245 degrees, or the "soft ball" stage to candy making. This process is long and can take around 15 minutes on medium heat. You do this until the mix is somewhat foamy. I have made this recipe a dozen times without a candy thermometer and just waited until it got to the foamy soft ball stage, but to have the best results- get a thermometer and get it to exactly 242-245 degrees. This could take anywhere from 10-12 minutes on the medium/high heat. When you reach this stage/temp it is time to mix the burning sweet mixture into the gelatin mixture in the big mixing bowl.
You will need to hand whisk the two mixtures together until mostly dissolved and it is amber brown color. Then, slowly use a hand held mixer and mix on slow until even more foamy, then raise the speed when it gets thicker to medium and then HIGH. You will start to notice the color changing to white-ish and thickening up. You may want to lick at this point. It is super yummy marshmallow fluff. Then when the marshmallow is stiff you pour the mixture into 9x13 pyrex pan dish that is first covered with parchment paper and then use 1/4 cup of tapioca flour to evenly cover the parchment. Then pour marshmallow fluff in the pan, spread evenly and try to make without too many lines. Then sprinkle another 1/4 cup of tapioca flour over the top- this does not get spread it- just sprinkle it over and then when it is time to spread after 4 hours you can. You have to let it sit alone for at least 4 hours and it stiffens right up. Then pull out the parchment from the pan, spread the tapioca all over and use a non-teeth knife and cut squares of marshmallow. Use the excess tapioca flour to help dust and keep each square less sticky. I stored my marshmallows in a quart/2qt ball jar on the counter for up to a week without problems. Let them sit out on the counter next to a jar of the following mix...
Homemade Cocoa Mix Recipe
{dairy and gluten-free, VEGAN}
2 cups of coconut palm sugar
1/2 -3/4 cup raw cacao powder
1/2-1 ts. sea salt
optional addition of cinnamon or cardamon or other favorite spice combo
In a Vitamix (or other high powered blender), mix and blend and grind up the above ingredients until its all mixed up. Dump in a jar with lid and let it sit on counter ready to mix 2 TB for every 12 ounces of HOT water.
My version of the BEST cup of hot cocoa will involve the dry mix (1-2 TB) with 10 ounces of boiling water, then 2 TB of cold coconut milk beverage to add in the mixing process, and then top with a few marshmallows and it doesn't get better!
It's the simple things, friends! These recipes can be found all over Pinterest and the internet if you go searching for them, but I still wanted to post "my versions" together and share what I have done because they have become a staple these past few weeks and have had many friends ask for the recipes. Also, as you can see from the pictures with my cinnamon rolls, another great addition to the cinnamon rolls for Christmas morning. I hope you invest in making these simple recipes and letting them sit on your counter for the Christmas season. They really are a gift- to yourself- to your friends and family coming over- and to the kids coming and going in and out through the snow.
Much love as always, and stay warm xoxo


Yummmmm! Thank you Stephanie! All of your recipes lately sound AMAZING! Can't wait to try them all.
ReplyDelete