Showing posts with label cookies. Show all posts

Wednesday, April 18, 2018

Happy Heart Citrus Cookies

What a spring we have had! Just this past weekend here in Michigan we had a ice storm, a snow day, and we are all scratching our heads thinking is this April or January?!? Personally, I kinda expect this kind of spring torture here in Michigan, but I have to admit this year has really got me going crazy with antsiness and low-grade depression! Let's get on with this weather and let's start to see the warmth, buds, flowers and green grass, already!!!
It efforts to bring a little more warmth and love into our homes this season I made some Happy Heart Cookies with the hint of lemon and orange to help uplift our spirits and perhaps remind our hearts of happiness, love, joy and the gifts of life all around us. These little cookies are a symbol of that. They are just a cookie, yes, but they also represent love and those citrus flavors have a reputation for uplifting the senses and heart to inspire. So we need all of the uplifting, and love and happiness we can get around these parts! So my friends, may you find love and peace in your day and carry on and spread it as best as you can! Sending love and whole-hearted living your way xoxo
Happy Heart Citrus Cookie Recipe
{gluten, dairy, egg, soy, nut, seed and refined-sugar free}

3/4 cup of certified gluten-free oat flour (+ 1 more cup for kneading and rolling out)
(I grind my own out of GF rolled oats)
3/4 cup of fresh ground buckwheat four
3/4 cup of rice flour
3/4 cup of tapioca flour
1/3 cup of coconut palm sugar
2 TB of potato starch
1 1/2 ts. of baking soda
1 ts. of sea salt
1 ts. baking powder
1 organic lemon for zest and juice
1 organic orange for 3-TB of fresh zest and 1/2 cup of fresh juice
1 TB of apple cider vinegar
1/4 cup of maple syrup
1/4 cup of pure honey
1 cup of oil: I use a mix of coconut oil and palm oil shortening
1/2 cup of date paste puree

plus 1/4-1/3 cup of sparkling sugar with 1/2 ts. of lemon flavoring oil or 1 ts. lemon juice

In a large bowl, mix together the flours and dry ingredients first, then add in the wet and oils, use a spatula to make sure the oils are evenly pressed through and the batter is soft.  You will need to add about ONE MORE CUP of GF oat flour for kneading, firming up and rolling out.

Let batter sit in the fridge to firm up just a bit, like 15 minutes. Then roll out and cut out the cookies with your favorite heart shaped cutters.  Sprinkle the lemon sparkling suagrs on top of the hearts before baking. You may need to press the suagrs into the cookies justa  bit.

Bake in a 350 degree oven for 15 minutes, until golden brown on the bottom. Let cool for at least 20 minutes from the oven before moving to help with less breakage.

There you have it- HAPPY HEART citrus cookies for the win! Hoping this recipe will share a little kindness your way, keep spreading it and let's keep going!

Tuesday, December 19, 2017

Peppermint Crunch Fudge

Are you a fudge lover? Peppermint lover? How about a combo for another Christmas cookie treat? I made this freezer fudge this summer and fell in love with an easy simple, not-too-much goodness, treat that you could make last minute or have for days. This one has a Christmas peppermint twist with some added candy cane goodness. Fudge isn't really photogenic if you ask me, or maybe were all just too excited to consume it so it doesn't last long enough to snap a photo, haha! 
But there is a lot more there on these ones than what a picture can show. Maybe if it was scratch and sniff you would get the real idea here :) Oh I will stop! Just do yourself a favor and make some and share some with all the Christmas cookie goodies this year!
Peppermint Crunch Freezer Fudge Recipe
{gluten, grain, dairy, egg, soy, nut, and seed-free, also vegan and paleo}

1 - 1 1/2 cup of date paste puree
1/2 cup of cacao or cocoa powder
1/2 cup of mini chocolate chips (Enjoy Life brand)
1/3 cup of organic virgin coconut oil
1/4 cup of maple syrup
1/2 ts. of quality sea salt
1 heaping teaspoon of all natural peppermint oil flavoring

optional add in: add in 1/2-1 cup of rice cereal to add some texture, or else you can keep that out and only add the crushed candy canes to the fudge mix and topping...

(2)- all natural peppermint candy canes crushed into extra small pieces for twirling and topping.

Put all of the above ingredients, (except peppermint and optional cereal) in a small saucepan and melt and whisk together. Then lastly add in the peppermint oil flavoring and taste to make sure you don't want more. Then if you want to add in 1/2-1 cup of rice crunch cereal and quickly pour into a parchment covered 9x9 pan or a 8x10 pan and spread smooth. Lastly mix or top the crushes candy canes before you put in the freezer to get hard. Put in the freezer for 2 hours and then cut into 2x2 squares. Keep in the fridge or freezer to stay fresh longer. 

Hope you are finishing all the run-around and busy-ness and starting to settle in and gather with those you love and are able to show your true self. That hope, joy, peace and LOVE abound. Much love to you all and ENJOY!

Thursday, December 14, 2017

Berry Chia Jam Thumbprint Cookies

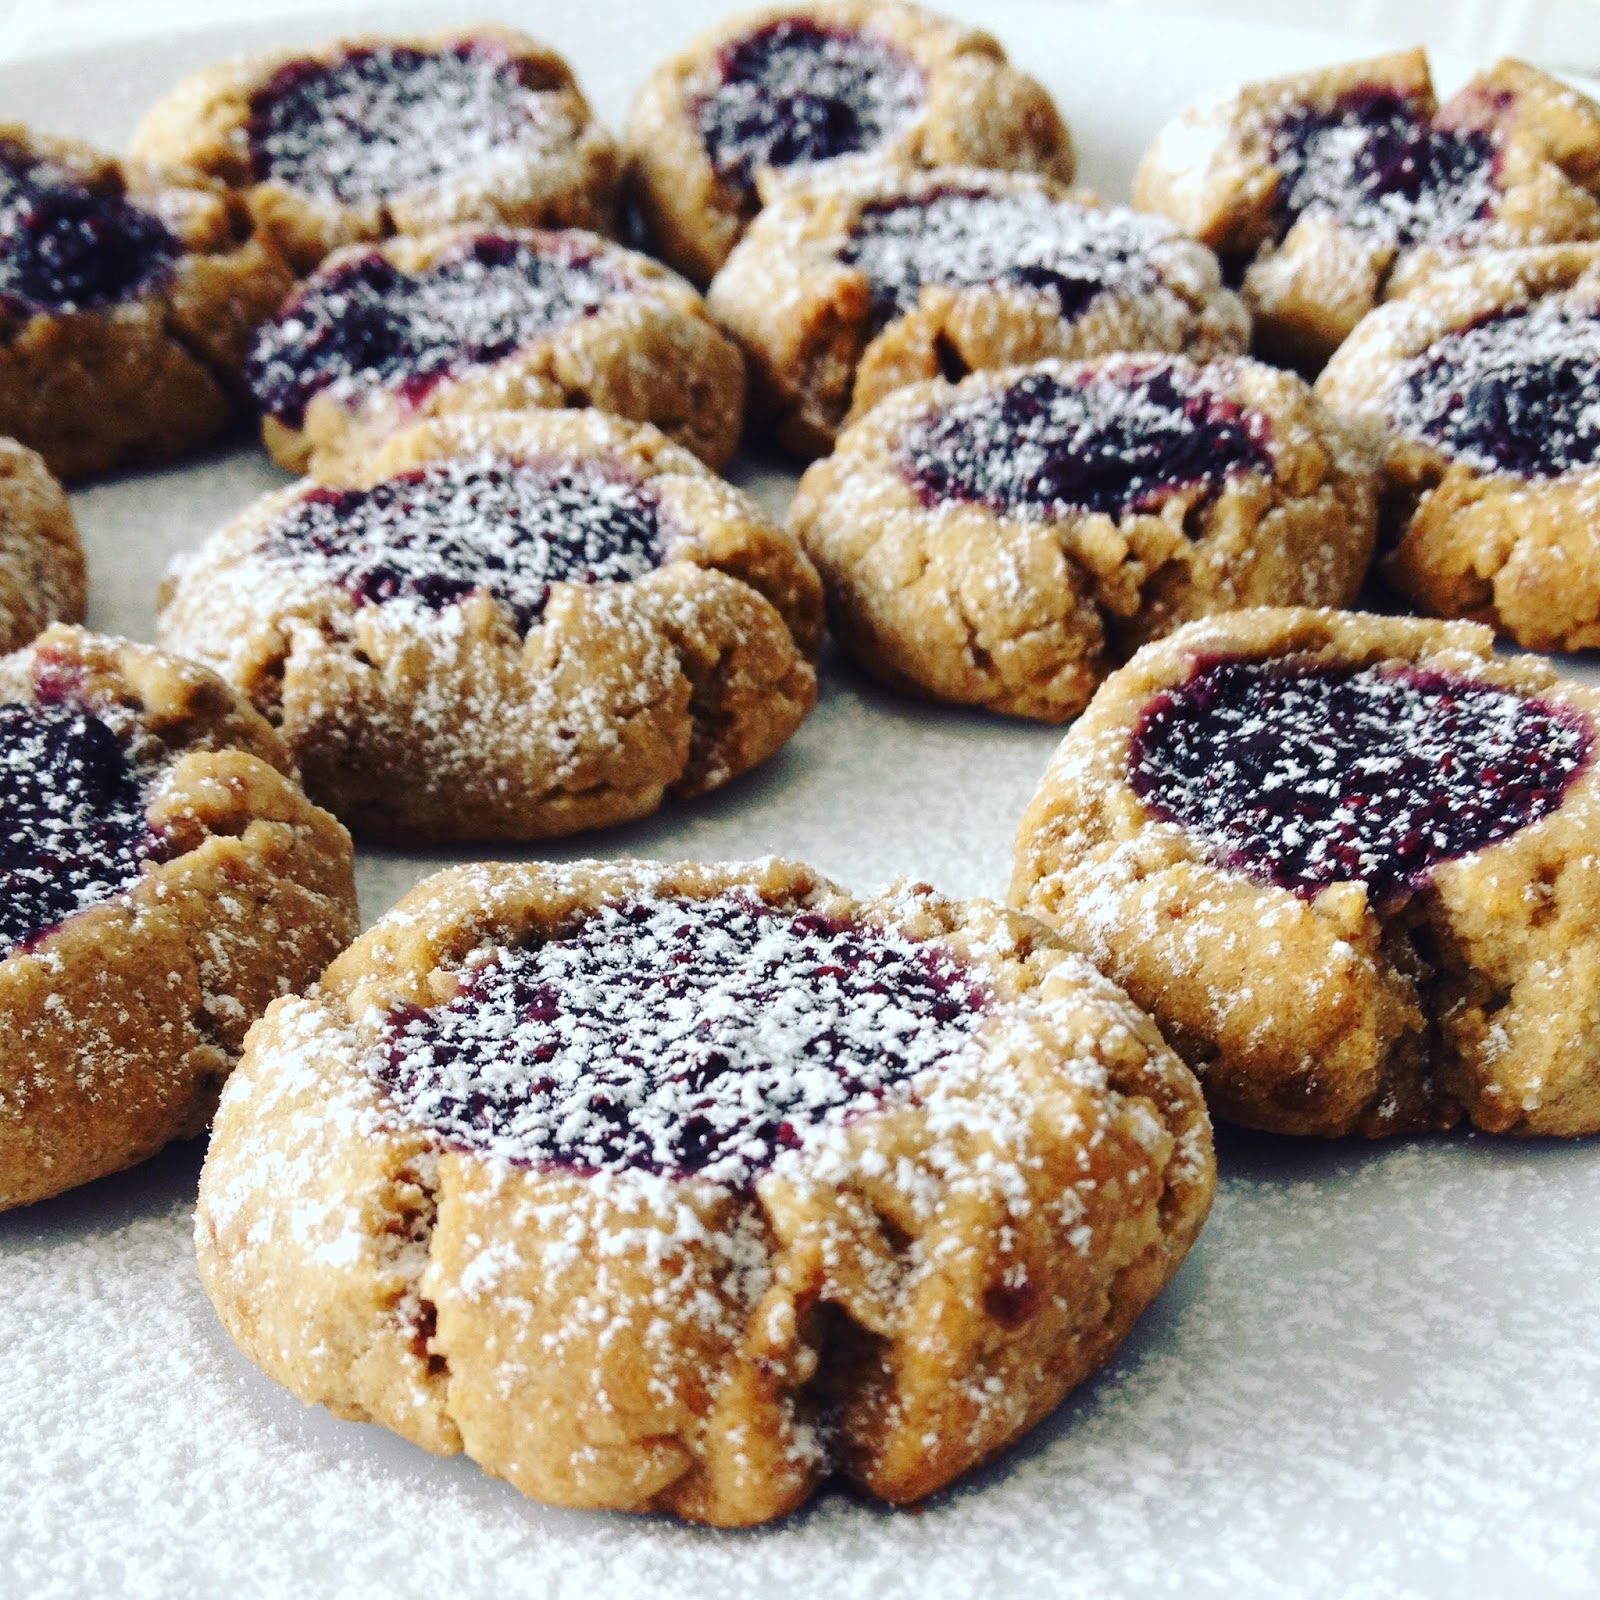
This is one feels like tradition to make around Christmas time. It must be because I grew up around an old family version with lots of butter and even cream cheese, but this one is allergy safe with no eggs, dairy or gluten, even can be without nuts or seeds too! I love how it is still soft and crispy and buttery and melts in your mouth. This version also uses my most favorite homemade jam- made with bluberries and chia seeds. It is just the perfect bite-sized piece of wonderfulness! The added sprinkling of powdered sugar matches the powdery stuff falling from the sky today. Warm, cozy and magical is the mood- these are a must to add to the holiday cookie platter- I promise!

Berry Chia Jam Thumbprint Cookie Recipe
{gluten, dairy, egg, soy, nut and seed-free options}

1 1/4 cup of finely ground gluten-free oat flour
3/4 cup of finely ground buckwheat flour
1 cup of white rice flour
1/2 cup of tapioca flour
2 TB of potato starch
1/2 cup of coconut palm sugar
1/2 ts. of baking powder
1 ts. of sea salt
1 ts. of baking soda
1 TB of apple cider vinegar
2 TB of maple syrup
1/2 cup of date paste puree

1 cup of oil: do a mix of either 1/2 cup coconut oil and palm oil shortening OR you could sub in 1/2 cup of your favorite nut or seed butter for the palm oil shortening. It adds a beloved flavor combo of PB and J kinda-touch.

I first blend up my own flours for the GF oats and buckwheat. Then in a large mixing bowl, add in all the dry ingredients first. Mix together well and then add in the wet and room temperature oils. Use a spatula to mix well, or your hands usually do the best trick at mixing equally. You want it to be soft but also all together so you can roll it into balls. It should leave a little oil to the touch on the hands. That is what makes it melt-in-your-mouth- buttery kind of texture too!

Once smoothly mixed, roll into a large ball and put in the fridge for 20 minutes to stiffen up Then pull out and roll large 1 TB-sized balls between your hands to make about 2 dozen cookie balls. Put onto a parchment covered baking sheet and then press your thumb firmly and evenly into each cookie ball. This will leave you a space to pour your jam into. Once 1 large spoonful of jam is entered into the thumb print space on the cookie- bake in a 350 degree oven for 12 minutes. Until golden and bottoms are browned- do not touch or move for another 15-20 minutes to help them from crumbling!
I used my favorite homemade berry jam as follows. If you want to make the full batch and have some more for bread and toast then YES make the full batch, but if you are looking to just make some for these cookies, half or cut the recipe by 2/3's so that you make 1/3 amount to top the cookies :) Here is the recipe for your enjoyment ;)

Immunity Boosting Berry Chia Jam Recipe

2 cups of frozen blueberries
2 cups of frozen cranberries or raspberries
2 cups of frozen strawberries
1 cup of very concentrated elderberry tea*
1/2 cup of juice (I used Antioxidant Force by Smart Juice) but you could use pomegranate or other no sugar fruit juice like cherry, berry mix, or grape. Or at the least you could use water as well.
2 TB of grated fresh ginger
1 organic orange grated for zest and squeezed for juice (could easily sub a lemon)
1/3 cup of pure raw honey
drizzle of maple syrup (or add 1/4 cup more of honey)
pinch of sea salt
pinch to 1 ts. of pumpkin pie spice blend
1/2 cup of whole chia seeds

*Soak 1/2 cup of dried elderberries in 1 quart jar of boiling water and let sit for overnight or longer and then drain the berries out and you have elderberry tea. You could also sub in some already made elderberry syrup if you used up your berries already making that and have it on hand- but you would only use 1/2 cup of the elderberry syrup and add 1/2 cup water. And since the honey is in the syrup as well you may decide to not add as much honey in the rest of the recipe. 

In a medium saucepan, pour in the 6 cups of frozen berries with the tea and the juice and let cook to defrost and get soft. Then add in the ginger and orange juice and zest and bring to a soft boil and bubble and cook from any where to 10-15 minutes until the berries are very hot, juicy and mushy. Then use an immersion blender to blend in half of the mixture to be more smooth and have less chunky fruit. After this it looks like a fruit soup. Then add in the honey and syrup and stir well while it softly bubbles and boils. Turn off the heat and then add in the chia seeds. Stir in well so not to be clumpy and then let it sit in the pan and cool and let the chia seeds soak up the moisture and turn into a thick jammy substance. When it cools for 10-15 minutes you can pour into jars to continue to cool and thicken in the fridge. This recipe makes 3 pint jars. You can half it if you are looking to make less or you can also freeze and then thaw out when needed.

Happy Christmas cookie baking (and jam making ;) I hope you are finding some space to enjoy the baking and make new memories and traditions with gluten-free versions of your favorites. 

Much love and light as always, xoxo

Wednesday, December 13, 2017

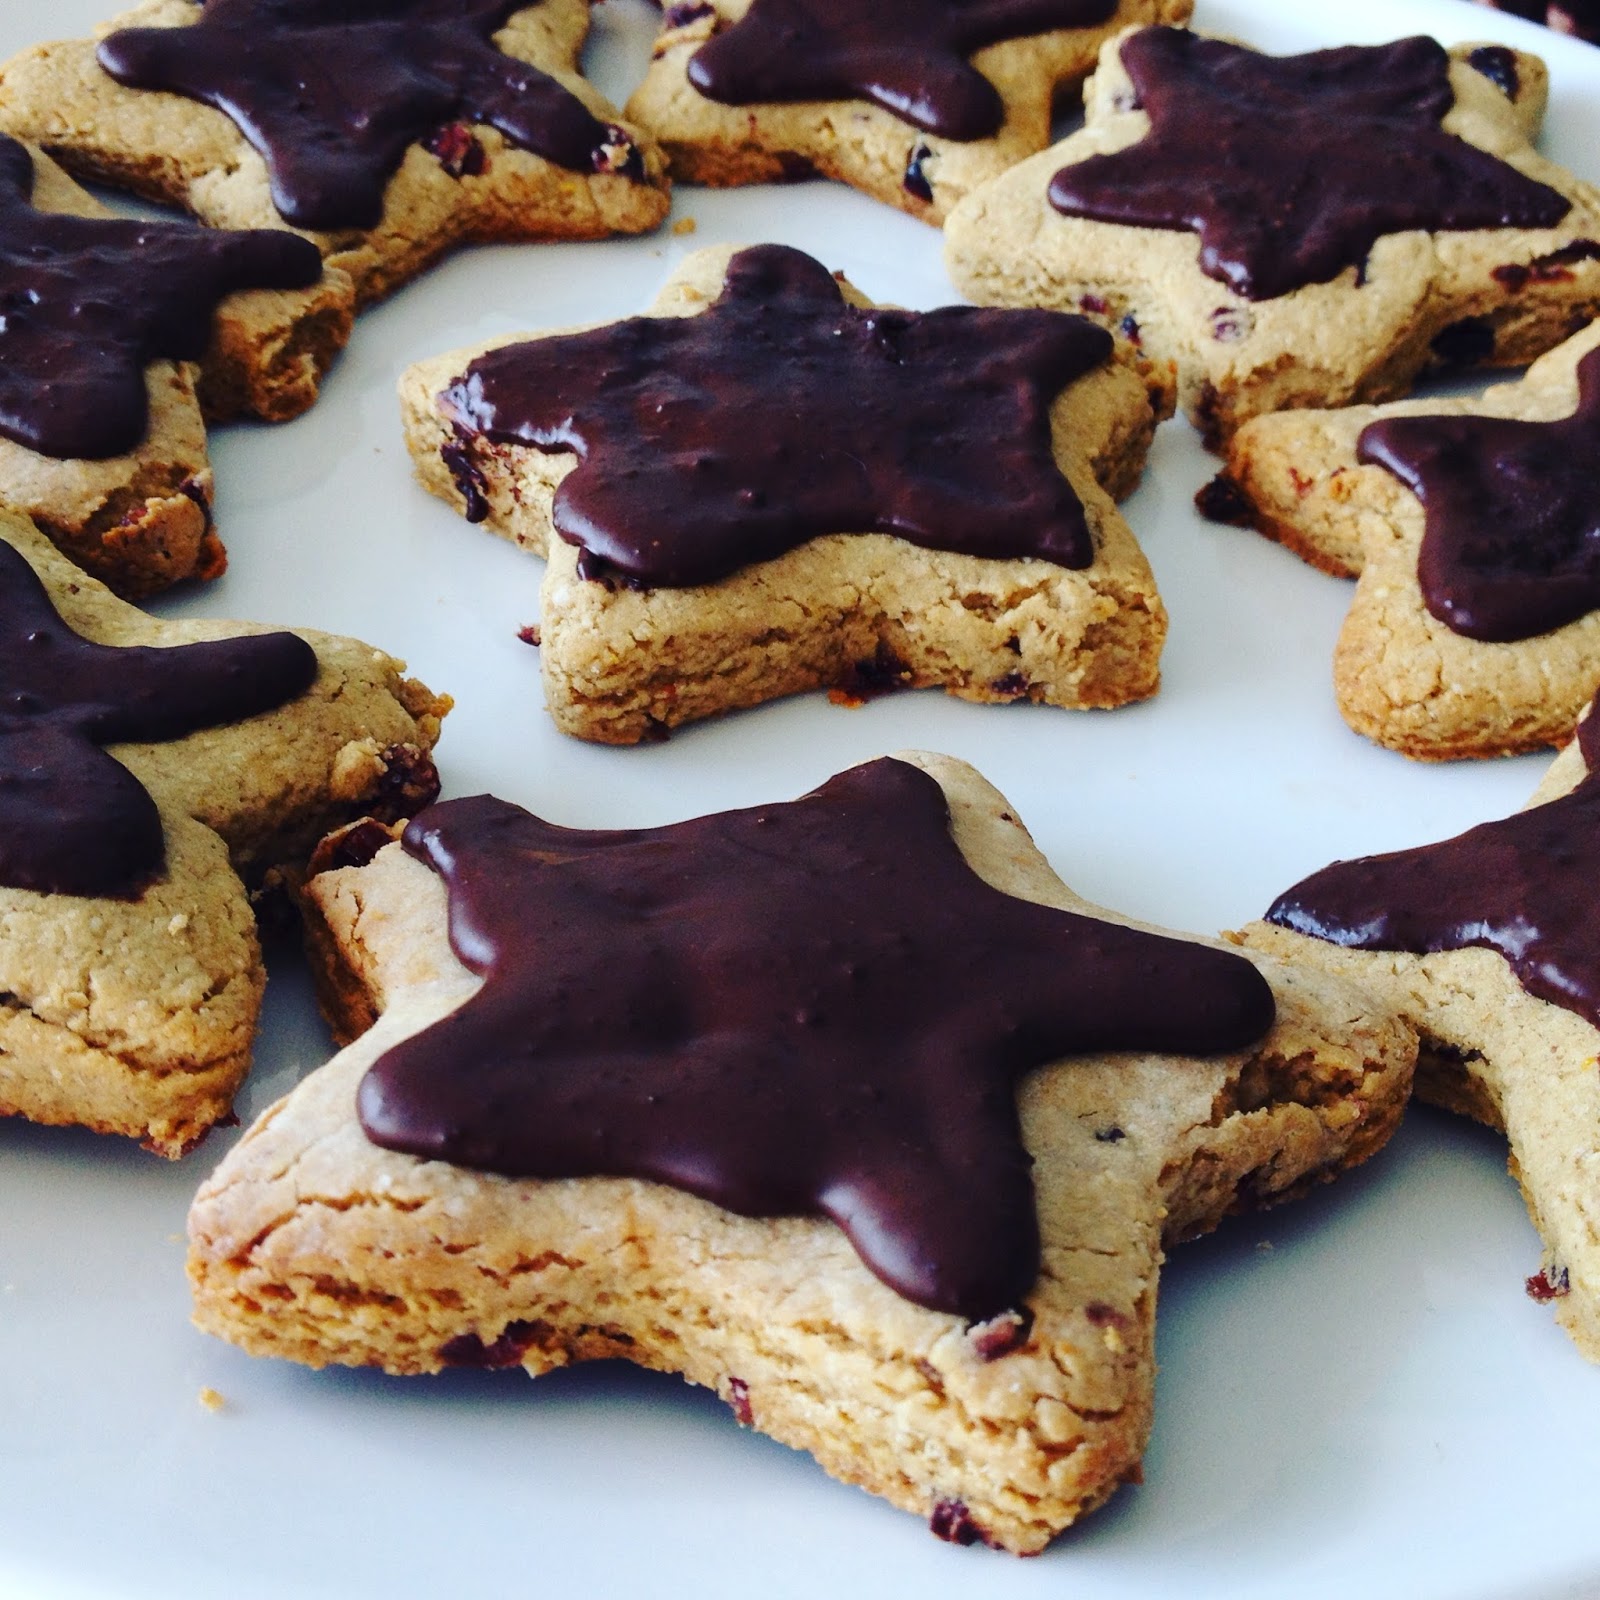
Cranberry Orange Shortbread Cookies

The past few Decembers, (8!) but who's counting ;) I have been blogging recipes about gluten and dairy-free Christmas cookies. And this month is no different- it's like once the Christmas tree is up and the snow starts falling all that I want to do is bake Christmas cookies and read stories by the hue of the magical lights. And these are just about the best of the best for that...
These perfect little cookies were born by chance at finding these lovely already diced and minced dried cranberries at my local market and at first sight it was love. I already dreamt up these cookies in my mind before I checked out of the store! I was thinking they would be the perfect flavors and colors for a Christmas cut-out cookie and goodness gracious- the result proved to be fabulous!

And then... I added some melted chocolate to some of them... whoa whoa whoa! Now the cookies are good and I feel like I could eat them with tea at just about any time of the day, but when you add that orange flavor infused chocolate- now that just feels fancy! A dessert really. Can a cookie be a dessert? Definitely at Christmas time ;) 
But mostly, I just love making the cookies, the varieties, the traditions, the flavors, the colors. It is all just magical and joyous! We have been talking alot about hope and joy at our house the past few weeks, and the kids and I agreed- that making Christmas cookies is one of the best ways to have and share the Christmas joy with others. I love teaching my littles that the beauty of Christmas is actually in the hope, joy, peace and love that we share. That is actually where the magic is, and these cookies are just a picture of that love that we share, and enjoy and give away. So... I hope you are enjoying some Christmas cookie making this December- get ready- I am about to share a few more in the next week ;) Happy baking and happy sharing joy!
Cranberry Orange Shortbread Cookie Recipe
{gluten, dairy, egg, soy, nut, seed and refined-sugar free}

3/4 cup of certified gluten-free oat flour
(I grind my own out of rolled oats)
3/4 cup of fresh ground buckwheat four
3/4 cup of rice flour
3/4 cup of tapioca flour
1/4 cup of coconut palm sugar
2 TB of potato starch
1 1/2 ts. of baking soda
1 ts. of sea salt
1 ts. baking powder
1 organic orange for 3-TB of fresh zest and 1/2 cup of fresh juice
1 TB of apple cider vinegar
1/3 cup of maple syrup or honey
1 cup of oil: I use a mix of coconut oil and palm oil shortening
1/2 cup of date paste puree

In a large bowl, mix together the flours and dry ingredients first, then add in the wet and oils, use a spatula to make sure the oils are evenly pressed through and the batter is soft. Then add in.. 

(PLUS ONE MORE CUP of GF oat flour added at the end for firming up and rolling out)
and 1 cup of finely chopped dried cranberries (you can use or more or less for preference!)

Roll all together and let sit in the fridge to firm up just a bit, like 15 minutes. Then roll out and cut out the cookies with your favorite cutters. Bake in a 350 degree oven for 15-18 minutes, until golden brown on the bottom. Let cool for at least 20 minutes from the oven before moving to help with less breakage.

They are also fun to use the cut-out cutters, but you could easily spread this batter out with a rolling pin in a 12x15 pan and pre-slice 3x3 or 3x2 cookie squares before baking for about 20-30 minutes at 350.  They are a play on Scottish or Irish shortbread squares. They would look a bit more simple, but the flavors and red popping out would make them just as wonderful. I might have tried that first if it wasn't December- and when I have little ones that want to use the Christmas shapes all day every day, you appease them.
You could also top with some melted chocolate that is infused with some orange flavoring, or some sweet orange essential oil that is made to eat. I melted 1 cup of bittersweet chocolate in a bowl over a pan of boiling water and then dropped a few drops of orange flavoring in it. It only amplifies the orange flavors! One of the most classic flavor combos- chocolate and orange- I can't resist!
You can use a special frosting pouch and decorator if you want to get even and fancy lines on the cookies, or you can do a rustic job as I did this go around and trace the shapes and fill in the middles. Once the chocolate dries- it will be stiff and hard like a chocolate bar. 


End result is fabulous! I love a little bitter sweet chocolate with a chewy cranberry crunch all smothered in a citrusy orange infusion! These cookies are also easy to make ahead of Christmas and freeze and pull out here and there for parties and gatherings. That is if you really want to make and wait to eat them ;) They are so yummy you will find yourself going back for more and then thinking about them in January when you decided to tighten up the sweets and goodies in your life ;)

But for NOW... ENJOY and happy baking friends, sending love, hope, joy and peace xoxo

Tuesday, November 28, 2017

Fresh Ginger Snap Cookies

I've had a serious obsession with fresh ginger over the last year and it hasn't worn off yet. I want to eat it every day and it only intensifies when the winds start blowing and the temperatures and weather is fickle. Today we can hear the wind howling and it also can make one feel a little uneasy or unstable as the seasons shift over the next few weeks. There has already been so much change throughout the past months with autumn, but now as we settle into the darker colder winter months- it is ginger and other roots that I turn to for grounding support and strength. A Fresh Golden Ginger Milk Latte is a good place to start. And these cookies should follow ;) If you haven't tried the Cranberry Ginger Pear Warm Smoothie- then you must soon! But if you have pounds of fresh grated ginger like me ready to use- then these little cookies will be calling your name. I hope you nestle in and enjoy these sweet little treats. Much love and happy baking, xoxo
Fresh Ginger Snap Cookie Recipe
{gluten, dairy, egg, soy, nut and seed-free}

1/3 cup of sorghum flour
1/3 cup of millet flour
1/3 cup of tapioca flour
1/3 cup of potato starch
1/2 cup of rice flour
1/2 cup of ground GF oat flour
2/3 cup of coconut palm sugar
1 ts. of baking soda
1 ts. of sea salt
1/2 ts. of baking powder

1/3 cup of avocado oil (or if you prefer a softened coconut oil that works too)
1/3 cup of molasses
1/3 cup of date puree paste (applesauce is a good sub here)
1/4 cup of maple syrup

1-2 TB of finely grated fresh ginger

In a large mixing bowl, combine all the dry ingredients and mix well together. Then add in the wet ingredients and it will be a sticky batter. A little different than other cookie batters- it is meant to be a bit stickier and you can even put in the fridge for 30 minutes before baking to help it firm up just a bit. Then use a TB-spoon to scoop out the batter and drop on a parchment papered baking sheet. I can fit 12-15 cookies on a sheet and this recipe will make about 2 dozen to 30 cookies. Bake in a 350 degree oven for 15-18 minutes depending on if you like a chewy cookie, or if you want it a bit more crunchy and a "snap" to the cookie bake until it is darker brown and about 18 minutes. Pull from the oven and let it cool and crisp up on the baking sheet. If you move too quickly they will be too hot and crumble. Then ENJOY!

Monday, November 13, 2017

Tahini Ginger Chocolate Chip Cookies

This pic was snapped as I was running with a plate of cookies to share and when the plate came back- they were gone ;) So I guess this picture will have to do and the recipe is as quick and simple as follows too...

These cookies do contain seeds and eggs, so I couldn't make them for my little family because of the severity of my daughters allergies, but still a super simple cookie recipe for the rest of us GF/DF friends looking for a quick cookie fix with pantry items. I once posted a chocolate chip cookie recipe about this kind of simplicity, and I must say it was the first GF cookie recipe I made and will always remember how easy and lovely it was as a NEWBIE to the gluten-free world of baking over 10 years ago now. So if that is you, here you go!

So happy baking friends, and don't give up on enjoying and baking up new gluten free goodies for you and your loved ones. You are brave and you are persistent! Much love as always, xoxo

Tahini Ginger Chocolate Chip Cookie Recipe
{gluten, dairy, and nut-free}

1 16 ounce jar of tahini (sesame seed butter)
Yes, you can use any nut/seed butter in this recipe :)
2 farm fresh eggs
1 cup of coconut palm sugar
1/4 cup of maple syrup
1 ts. of pure vanilla extract
1 ts. of sea salt
1 ts. of baking soda
1 ts. of baking powder
1 ts of ground ginger
1/2-1 cup of dairy-free chocolate chips

optional: add in 1/4-1/2 cup of rice or GF oat flour for a more crispy cookie 

In a large mixing bowl, fold in and mix all of the above ingredients, and then add in the chcoclate chips last. Fold in and scoop out a 2 TB- sized ball and roll it and press it into a baking sheet pan that has been lined with parchment. This recipe will make about 2 dozen cookies. Bake in a 350 degree oven for 18-20 minutes depending on your level of crispy and chewy you like. ENJOY!

Saturday, August 19, 2017

Trailmix Cookies

These little cuties are another one of those cookies I have made for years but haven't actually posted or shared. They are based off of the same oatmeal cookie base that I make for all my favorite cookies... It's pretty simple, but can be made with a whatever fillings you got or want. These specific trail mix cookies can be easily made with your already pre-made or bought trail mix, or you can whip up a little mix of your own to add in. They are perfect this time of year for all those end of summer trips and adventures. They are good for breakfast lunch and dinner (and dessert ;) But the key factor is that you MUST make them to enjoy them :)

Make a big batch and freeze them. They are super easy to pull out and take on the go. When I make these I feel like you can pack in so many flavors and nutrients that you forget it started out as a cookie base- but I like to think of all my cookies as a little love from heaven. So just sharing that love with you xoxo Much love and HAPPY baking!
 Trail Mix Oatmeal Cookie Recipe
{gluten, dairy, egg and soy-free, VEGAN}

1 cup certified GF rolled oats
1 cup of certified GF oat flour
1/3 cup of tapioca flour
1/3 cup rice flour
1/3 cup of potato starch
1 ts. of sea salt
1/4 ts. of baking powder
1 1/2 ts. of baking soda
1 cup of coconut palm sugar
1/3 cup of date puree paste (or applesauce)
1-2 TB  of maple syrup
1/2 cup room temperature or very soft/warm coconut oil OR you can sub in
Organic Palm Oil Shortening or use a mix of both to make 1/2 cup

add last: 1 heaping cup of your favorite trail mix combo or....
1/4 cup of shredded coconut
1/2 cup of raisins, dried cranberries or dried chopped dates
1/2 cup of mixed pumpkin seeds, sunflower seeds, possible nuts
optional....add in a sprinkle of some dark chooclate chips ;)

Mix all the dry ingredients together first, then add the wet and mix well and add the oil and mix into a sticky dough. Use a TB to spoon the dough into balls onto a baking sheet. For best results one your baking sheet with parchment paper. Bake in a 350 degree oven for 15-18 minutes or until your desired crispy cookie liking. Let the cookies cool for at least 15 minutes before moving to platter because they will start to crumble if they are still warm. Store in a dry place or in the fridge for an extended period of time. ENJOY!

Much love as always xoxo

Thursday, July 27, 2017

Cherry Blueberry Crumble

People ask me all the time what I do with all the fresh fruit I pick. When you eat gluten-free and have a handful of other allergies in the house, a crisp or crumble, is an easy and crowd-pleasing dessert. So much of our frozen berries and cherries end up in smoothies and muffins over the winter months, but making a crisp with the berries is one of the best ways to enjoy all those berries and cherries! 
The oozing juices and crispy crumble topping...it's best from the oven warm with a little vegan ice cream but also a great cooled off or leftover breakfast too. I make these fruit crumbles in my sleep. This crumble specifically has the fruit made into a jelled juicy filling and the crumble is like a cookie batter...
Ohhhh the smells I wish you could get through the screen...but I guess the colors are gorgeous too. So hopefully you are inspired to make a dessert for yourself and all your people :) 
This specific crumble my husband announced was his favorite. And that is a compliment to me since he alone knows how many versions of fruit crumbles I have made over the years. The additions of coconut flour add a crunchy component and the shortening also makes it more crumbly in my opinion. I love trying a few new ingredients to my usual to find out it's fabulous. I guess practicing and experience do pay off- so get started today and start baking and making a celebration of the fresh fruit season. This is a dessert you can say YES too and share with ALL!
Cherry Blueberry Crumble Recipe
{gluten, dairy, egg, soy, seed, nut, and corn-free}

In a saucepan, stir the following on low to medium heat for about 5 minutes...

5 cups of fresh or frozen fruit
(I used 3 cups of pitted cherries with 2 cups blueberries)
1 fresh lemon squeezed for about 2 TB of juice
2 TB of honey
2 TB of maple syrup
test your sweetness level and if you want more add in 2 TB of coconut palm sugar
sprinkle of sea salt
1 ts of ground cinnamon
pinch of nutmeg 

In a small cup or pyrex, whisk the following and then pour into the fruit pan and let heat for another few minutes for it to get thickened....

2 TB of tapioca starch in 1/3 cup of water whisked until creamy and no clumps

After the sauce has thickened turn off the heat and pour into a 9x9 Pyrex pan and let cool off a bit more.
Then in a separate bowl, mix together the following...

Crumble Topping
1 1/2 cup of quick cooking GF oats
1/2 cup of white rice flour
1 TB of potato starch
1 TB of tapioca starch
1 TB of coconut flour
1/3-1/2 cup of coconut palm sugar
pinch of sea salt
pinch of nutmeg
pinch of cinnamon
1/4-1/3  cup of maple syrup
2 TB of palm oil shortening
2 TB of coconut oil
Mix all the above ingredients together with a spatula or your hands. It should feel like a cookie batter in your hands. A bit sticky and clumpy. I made estimates for the sweetener because I estimate every time depending on what tastes good and what I want... the point is that you can add more or less depending on your preferences. Then sprinkle the crumble batter over the fruit in the Pyrex. Then put into a 350 degree oven for 30-35 minutes when the fruit will be bubbling and smell fabulous!
Let cool for at least 20 minutes before you serve so that you don't burn your tongue. But this is served wonderfully warm but also is a great cooled off treat too. I think because the fruit is jelled a bit it is a bit easier to serve and take along with to gatherings because it is less soupy. 

SIDENOTE: If I am making for a crowd besides just my family, I will make this recipe in a 9x13 Pyrex pan and add 2 more cups of fruit, and 1 TB more of each of the sweeteners in the fruit gel and in the crumble you can eaither leave the recipe the same and spread more thin over the fruit, or add 1/2 more of oats and flour and 1 TB more of oils to make enough crumble to spread over all the fruit. This recipe is VERY flexible with the sweeteners and with making a 9x9 or a 9x13 pan.

I hope you have found ways to connect to this berry season enjoy its bounty and find gratitude and thankfulness for it's gifts. If you are feeling discouraged and sad because of a limited diet I encourage you to try a recipe like this very soon. This will fill you with so much nourishment and happiness for all the foods you CAN enjoy. Much love and light to you xoxo

Friday, March 31, 2017

Snickerdoodle Cookies

My kids have been loving these Enjoy Life cookies the past few months- I think because I love to bake so many GF treats that their version of a 'treat' is actually something coming from a crinkle wrapper or box. Which I guess I understand- and these cookies are some of the best out there for allergy-free treats. But even still I thought maybe if me and the kids tried to make our own version of the 'snikerdoodle cookie' that maybe we could like that one too and not have the begging for boxed treats every time we go to the store together. I know- that is a pretty tall expectation- but I thought we could at least give it a try.
They turned out pretty good...very simple ingredients and flavors, but still a yummy treat or easy take-along goody for travels and snack times. Our homemade cookies were much more crispy and crunchy with a cinnamon coated crunch than the soft boxed version. So it was a bit different but still loved by all. They almost reminded me of cinnamon coated graham crackers- the ones that you would want to dip in your kid-sized milk cup or as an adult maybe a nice cup of tea. The pictures of these cookies may not be that appealing, but don't let that stop you if you get the urge for some cinnamon sugar crunch goodness. Happy baking and ENJOY! Much love, xoxo
Snickerdoodle Cookie Recipe
{gluten, dairy, nut, soy, seed, egg and refined-sugars-free}
1 cup of finely ground GF certified oat flour or buckwheat flour
(or if you prefer you could use a mix of both above flours)
1/3 cup of white rice flour
1/3 cup of tapioca flour
1/3 cup of potato starch
1/3 cup of coconut palm sugar
1 ts. of baking soda
1/2 ts. of sea salt
1/4 ts. of baking powder
1/4 cup of pure maple syrup
1/4 cup of unsweetened applesauce
1/2 cup of softened coconut oil

In a small blender mix 1/4 cup of each coconut sugar, tapioca starch, and ground cinnamon. This will make a cinnamon sugar powder to roll each cookie in.

In a medium mixing bowl, mix all of the dry ingreidnets, and then add in the wet and mix together well. It should be a slightly sticky dough and then you take a TB sized ball and roll it out and then roll it in the cinnamon sugar powder. Then place the cookie balls on the cookie baking sheet and press down with your palm or with the bottom of a glass jar or cup. This recipe will make about 2 dozen TB sized cookies. Bake in a 350 degree oven for 12-14 minutes depending on your oven and desired cookie crunch. Pull from oven and let cool for 15-20 minutes to avoid cookie crumbling while still super hot. Store in container or cookie jar on the counter and ENJOY!
I love how sometimes loving certain store-bought-goodies bring out your own cooking and baking creations. That is what these cookies were for us in our kitchen and hope that you give then a whirl or do some kitchen experimenting on your own. Much love and happy baking as always, xoxo

Monday, March 13, 2017

"YES" Cookies

The kids were helping me the other day in the kitchen. We decided to bake a batch of cookies to share. I asked... "Should we add chocolate chips? Should we add raisins? Should we make them chocolatey? Or what about molasses cookies?"... and the answers kept being "Yes! Yes! Yes!" So these are the cookies where everything was thrown in and it actually turned out kid-approved-amazing. They are a mix of just a plain oatmeal chocolate chip cookie with added chopped dates and sweet raisins. Also some how a little molasses into the dough added a whole new level of taste and now I'm so glad the kids said "yes!" Sometimes it's the curious creativity of kids that reminds us that there needs to be more YES's and less NO's in life.
We made these from my base Oatmeal Chocolate Chip Cookie recipe idea and added in some extras with what we had in the pantry. I used up some date paste and added some chopped dates as well- so the cookies have the sweet and soft caramelly taste weaved throughout the rest of the crunchy chewy goodness. Dates are a new favorite combo with chocolate chip cookies.... it's a sweet and salty component that can't be beat!
They remind me almost of a trail mix granola bar type treat because of all the crunchy and sweetness of the dried fruit. I bet you could make a big batch of these before the hike, camping trip, or long-drive adventure and your people will thank you for it. Seriously- I know if we are going on a little adventure my people seem to stay happier longer if I have little treats to keep us going. Not to mention.... nourished! These little babies are packed with protein, minerals and vitamins- also all things my kids can say "yes" to without really knowing it while chomping on a cookie ;)
"YES" Cookies Recipe
{gluten, dairy, egg, soy, nut, seed and refined sugar-free}

2 cups of rolled gluten-free oats
2 cups of finely ground certified GF oat flour (I grind my own out of rolled oats)
1/3 cup of cocoa/cacao powder
1/3 cup of tapioca flour (or arrowroot)
1/3 cup of potato starch
1/3 cup of rice flour

2/3-3/4 cup of coconut palm sugar
1/2 ts. of baking powder
1 1/2 ts. of baking soda
1 ts. of sea salt
pinch of cinnamon
pinch of ginger

1/2 cup of date puree paste (I make this out of pitted dates soaked in boiling water and blending in high powered blender until you get a pudding like substance- same amount of dates per water, in this recipe that would mean 1/2 cup of each but you can make a few cups at a time and store in the fridge for further use)

1/4 cup of maple syrup
1/4 cup of blackstrap molasses
3/4 cup of soft or melted coconut oil

1/2 cup of chopped dates
1/2 cup of raisins
1/2 cup of dairy-free chocolate chips

Mix all the dry ingredients together first, then add the wet and mix well and add the oil and mix into a sticky dough. Use a TB to spoon the dough into balls onto a baking sheet. For best results one your baking sheet with parchment paper. Bake in a 350 degree oven for 12-14 minutes or until your desired crispy cookie liking. Let the cookies cool for at least 15 minutes before moving to avoid cookie breakage. This recipe made about 2 dozen medium/lg sized cookies....but you could make 3 dozen small ones I bet.

I hope you can say "yes" to this cookie recipe and make some for yourself. Happy baking!!!!

Much love, xoxo

Tuesday, February 21, 2017

Sweet and Salty Caramel Date Candy Bars

I better post this recipe before the chance escapes me. I have been making this 'candy bar' combo in pie form for a few years, but this time around I decided to make them into bars in a 9x13 pan and I loved it even more. Something about the flavors and the shape. It kind feels like you really just did serve up a real candy bar, but with the best possible ingredients of course! It is the best kind of sweet and salty combo--- with delectable dates as 'the caramel', a little bit of course sea salt and...creamy chocolate- it meets all those tastes you could ever wish for in a little dessert. Perhaps thats why candy bars were invented originally ;)
These are super simple to make and super simple to serve up and not to mention get better as time passes from making them. My kind of treat! I love to share goodies and this one is now at the top of my list! You must try this combo- it truly is a surprising and desirable treat! Totally addicting....
Sweet and Salty Caramel Date Candy Bar Recipe
{gluten, dairy, nut, seed, and soy-free, vegan}

Crust:
3/4 cup of oat flour
1/2 cup of tapioca flour
2/3 cup of coconut flakes
pinch of sea salt (1/2 ts.)
1/4 cup of coconut sugar
2 TB of maple syrup
1/2 cup of softened organic coconut oil

Mix the above ingredients well together and press into a parchment covered 9x13 pan. Press in evenly and then bake in a 350 degree oven for 15 minutes. Then let it cool before adding the next 2 layers.

Date Cream:
2 cups of date puree
1/3 cup of canned coconut cream
pinch of sea salt

First, date puree can be made by pouring boiling water (about 1 cup or more to cover the dates) over 2 cups of pitted dates and letting them soak for 15 minute or even overnight. Then blend the dates when soft to make a creamy pudding like cream. After its made you can use in your required recipe or store in an airtight container in the fridge to add to recipes or dishes in place of sweetener.  But for this recipe.....Put the above ingredients in a small saucepan and warm but don't boil. I used a full-fat canned coconut milk, chilled so that the coconut cream is separate from water and use half of the can's cream in the date mixture and save the rest for the following chocolate topping....

Warm enough for the coconut cream to melt into the date paste and whisk together to get a creamy pudding like mixture. Then pour over and spread evenly over the cooled crust. 

Chocolate Topping:
1 heaping cup of dairy-free chocolate chips
1/3 cup of canned coconut cream
additional: course seas salt for last sprinkle on top

Then in a small glass bowl, melt the chocolate chips and leftover coconut cream over a boiling water pan to get a creamy chocolate ganache. When smooth and creamy and only warmed not too hot- pour over the date mixture evenly and spread as smooth as possible- being careful not to overly spread or mix the layers. Then put in the fridge in a safe, even location for 1 hour. Then you can sprinkle the course sea salt on it so that it will not melt into the warmed chocolate. Then you continue to refrigerate for 4-6 hours and then pull from the fridge, pull out the parchment from the pan and use a knife to put your bars. You can cut small or large. I can get 24 or 16 bar with ease. Keep bars refrigerated for best shelf-life. 

additional options:
This totally satisfies the "candy bar" craving without cuts or seeds...but if for some reason you want to add some of that real flavor in you can add a little nut or seed butter to the date cream.... or you can sprinkle some crushed nuts (peanuts or almonds over the date cream before you spread out the chocolate topping. 

I hope you have fun, experiment and find new ways to make new treats in the kitchen. Changing your outlook on your time and efforts in the kitchen is not easy if you are down and sad about loosing your favorite treats. But I must tell you that it is worth the effort- in time you will be able to find more joy in your relationship with food because you are no longer afraid, guilty or in actual physical pain. This does not happen over night- like any relationship- it takes time to cultivate this relationship and space to explore food without fear and loss.

Hope you are well and sending much love to you, xoxo

Sunday, February 12, 2017

Valentine Heart Shortbread Cookies

Trying to get festive over here... making some valentine's treats and goodies for the kids while we decorate the house in hearts and make little notes for school friends and loved ones. Once February rolls around,  I am sooooooo ready to add some pink and red hearts to our home to add some color and 'LOVE'. It is usually pretty grey and blah outside this time of year so it helps to feel warm and cozy and full of so much love on the inside. I guess I am a lover for Valentine's Day then... I know it can be a touchy day of love or hate or something in-between. But seriously- why not embrace all of the love, chocolate and flowers you can... sometimes my hubs gets mad at me because I occasionally even buy them for myself ;) I do.... no shame or guilt!
I made this shortbread recipe just out of the flours I had a lot of in the pantry, and they turned out pretty wonderful. But you could also use one of the below Shortbread/Cut Out Cookies Recipes if you have those flours on hand as well.


Or maybe you are looking some something a little more chocolaty and indulgent :) I get it. I do. Here are a few more chocolate goodies I made in the past for valentine's treats... and HERE is my archive of CHOCOLATE recipes.... 


Gluten-Free Vegan Cut Out Shortbread Cookie Recipe
{nut-free, seed-free, gluten-free, vegan}

1 cup of coconut flour
1 cup of sprouted brown rice flour
1 cup of millet flour
1 cup of tapioca flour
1 ts. of baking soda
1 ts. of baking powder
1 ts. of sea salt
1/2 cup of unsweetened applesauce
1/2 cup of avocado oil
1/2 cup of maple syrup
1/2 cup of softened coconut oil

In a large mixing bowl, mix together your dry ingredients first...then add the applesauce, maple syrup, and oils. Mix well with a fork or to be honest, your hands and fingers do the job best. Knead the lump of cookie dough in your hands for a few minutes until you get a perfectly mixed ball of cookie dough. If your dough is a touch sticky, then sprinkle some more tapioca flour to stiffen it right up.

Roll out the ball of dough on a parchment paper. Try and keep the thickness around 1/2 inch and roll out as evenly as possible. Then start cutting with heart cut out or whatever cutouts you prefer. Put the cookies in a preheated 350 degree oven for 12-14 minutes. I like my cookies a bit crispier, so I stay around 14 minutes baking time. This recipe should make about 2 dozen cookies but really depends on the size of your cutters and how big and small you want your cookies to be.

The icing I used was just a mixture of palm oil shortening(1/3 cup), maple syrup (1/4 cup), organic powdered sugar (1/4 cup), and a pinch of sea salt and plant based food dye. I used red for these hearts and it came out a nice pink ;) I whisk with a hand blender and pour into an icing bag and then you can write, trace or do whatever you like. You can also just spread on with a knife. I also have just melted Enjoy Life chocolate chips before and just drizzled melted chocolate over the cookies and let them cool too. So do whatever sounds good!

Well I hope you find some time to make a few treats in the kitchen so that you do not have to feel like your diet is so limited that you cannot have a little fun and enjoyment too. You deserve it!

And now I leave you with...

Love and kindness does not equal weakness...and LOVE starts within and for yourself...

"...stop acting so small...you are the universe in ecstatic motion...your task is not to seek for love, but merely to seek and find all the barriers within yourself that you have built against it."
---wise words from Rumi---

So dear one, find the love and care you ache for within yourself. How are you to give and receive love if you are not showing it to yourself ?!

Much LOVE to YOU, as always xoxo

Saturday, February 4, 2017

Chocolate Chip Date Cookie Bars

A little dark chocolate, a little course sea salt, and all the sweet and salty goodness one could ask for in a little dessert. These cookie bars have been experimented on more than a few times now and I am finally posting the best recipe version I came up with. Just in time for Super Bowl Sunday tomorrow, of course ;) 

 
The delectable dates offer once again some moisture, some texture and most of all a rich caramel-like flavor that stays with you. And a little square is all you might need to satisfy that after dinner craving for a little sweet and salty. Some say you don't need dessert while trying to live a healthy life. Obviously I beg to differ with the need to have balance and a healthy relationship with such good ingredients like dark chocolate and dates. You can have an opinion of your own of course ;) But I would maybe wait until you give this one a try...haha :)
This recipe is super easy too. Just whip up the batter and then pour in your parchment 9x13, bake, wait and enjoy. I am almost sure you could roll out eat cookie from the dough as well, but when you can spread it out and cut into each chewy bite like this, I would say make it easy on yourself, friend... Seriously. Why take on any extra stress these days, amiright?!? I hope you give it a whirl and ENJOY!
Chocolate Chip Date Cookie Bars Recipe
{gluten, dairy, egg, soy, nut, and seed free}

3/4 cup of rice or millet flour
3/4 cup of GF certified oat or buckwheat flour (I grind my own out of whole groats)
1/2 cup of tapioca flour
1/3 cup of potato starch flour
2 TB of coconut flour
3/4 cup of coconut palm sugar
1 ts. of baking powder
1 ts. of baking soda
1 ts. of sea salt
1/4 cup of maple syrup
1/2 cup of coconut oil (or sub avocado oil here or half of each)
1/2 cup of date puree (or sub 1/4 cup for applesauce)
1/2-3/4 cup of dairy-free chocolate chips

Mix all the dry ingredients together first in a large mixing bowl, then add in the oil and blend it well and then mix in the wet date paste and syrup and it becomes a carmel-ly color and that is when you can fold in the chocolate chips. I usually add 1/2 cup chips to the batter and sprinkle a few more on top after it is spread out in the pan. You can cut and place a piece of parchment in a 9x13 pan and then pour in the batter and spread even. It is like a brownie/blondie batter and use a spatula to evenly smooth through the pan. Bake in a 350 degree oven for 25  minutes and then sprinkle very course sea salt on top for a finishing touch. If you are not a fan of that flavor with dark chocolate then I would omit. Let cool for 3-4 hours before you cut into! This is very important to avoid crumbling and a messy finish. I know it will be hard to do this (yep, I cheated here ;) But it will bring out a better final product to serve in the end. 

I love how easy these are to mix up and serve. You can lift out the parchment after fully cooled and use a chef knife and cut into even squares. I get 24 bars out of the pan usually. 

Serve and ENJOY!

Lots of love and light to you....xoxo

Wednesday, January 11, 2017

Pumpkin Oatmeal Raisin Cookies

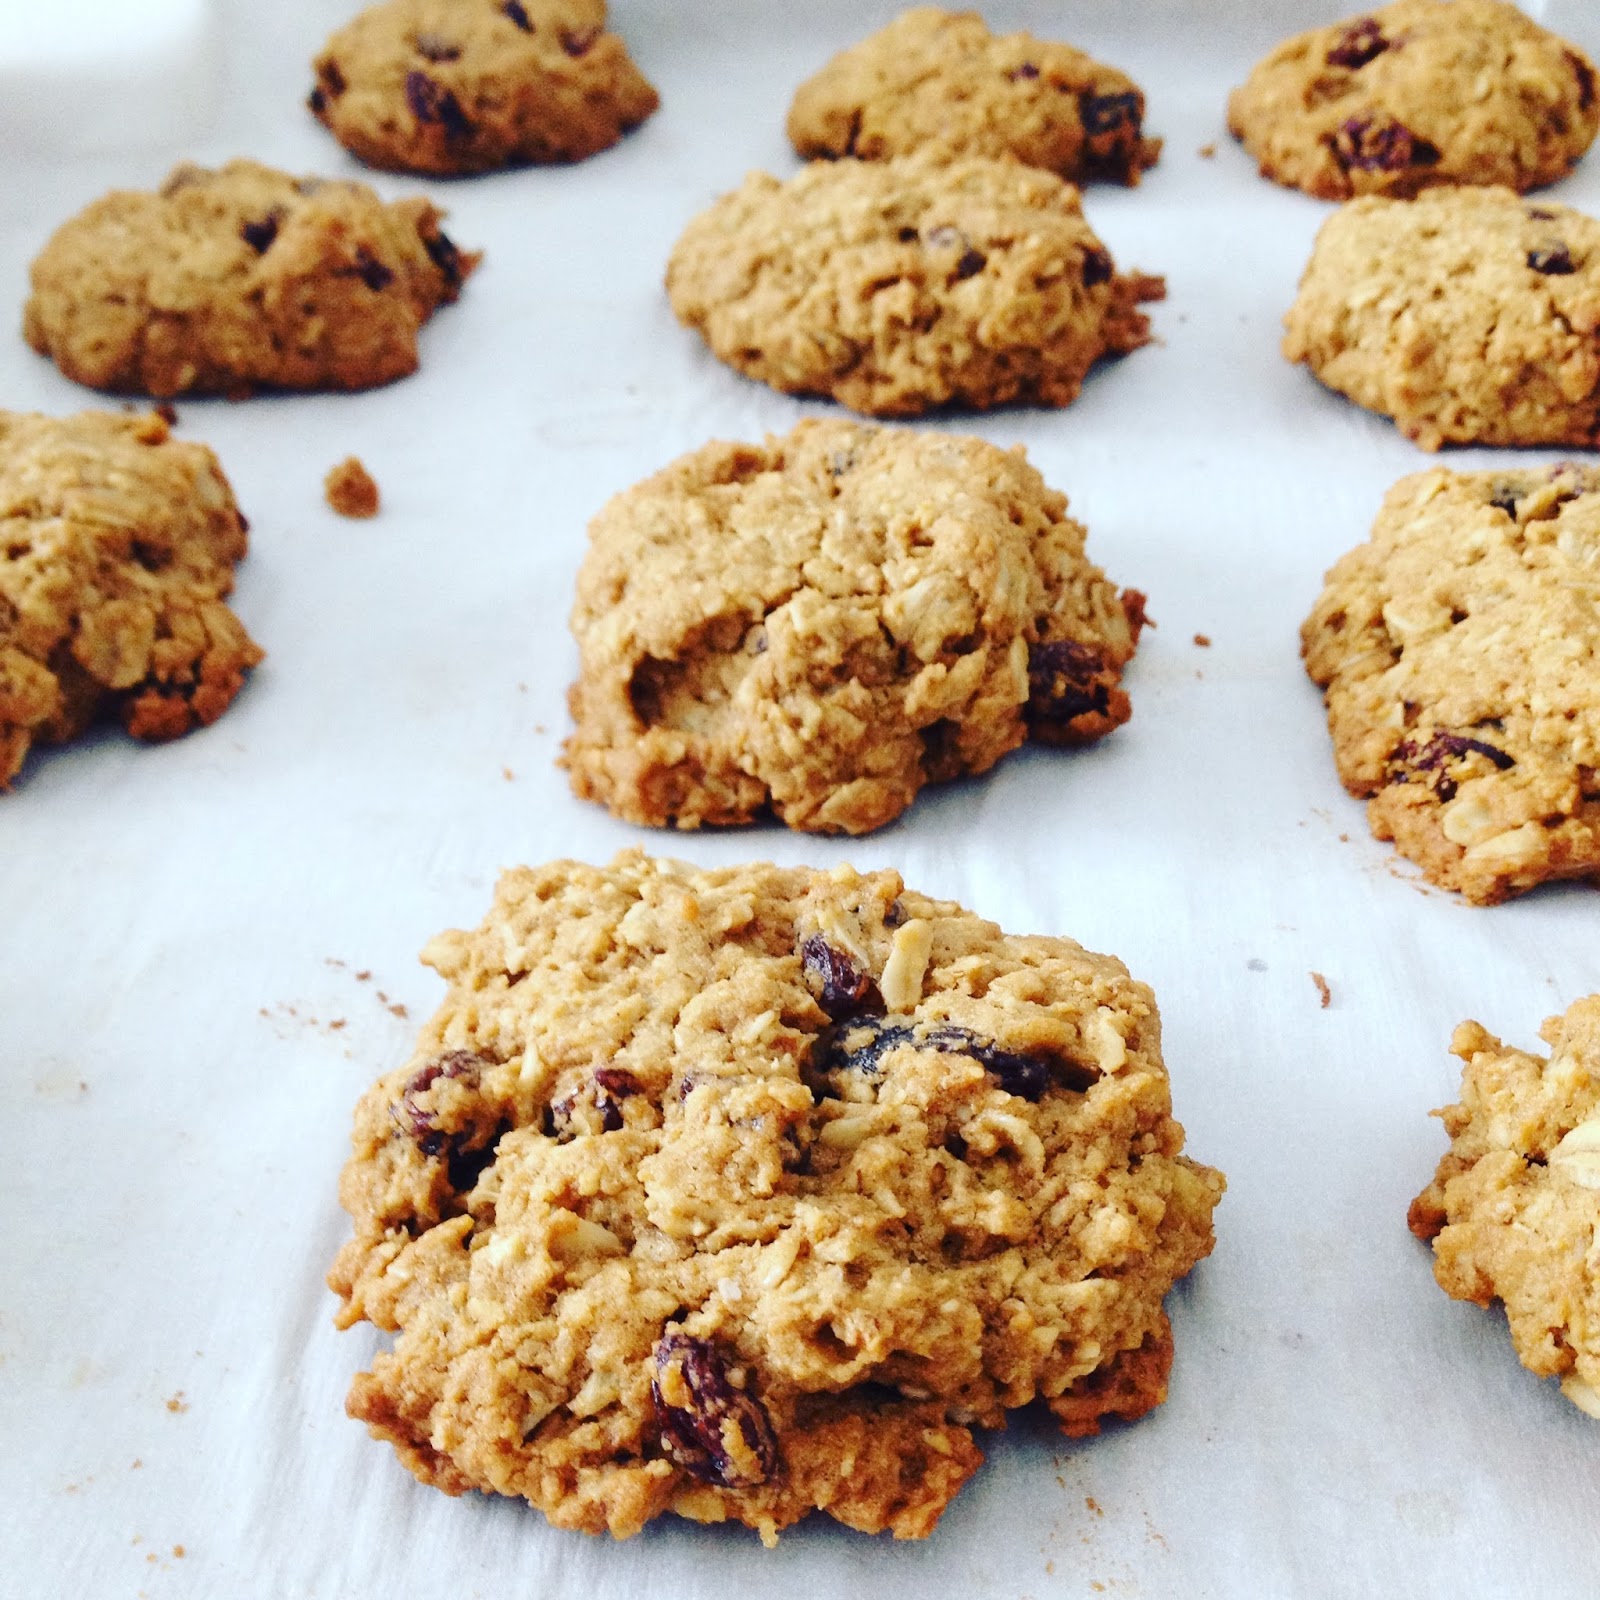
Everyone needs a good balanced "treat" recipe. And this one is a spin on the classic oatmeal raisin cookie with some nourishing ingredients. Yes, there is the chocolate treats, and cakes and such, but sometimes you are trying to eat a little less indulgence after the holidays and focus on eating more whole foods- I get it! These cookies might as well be a granola bar in my opinion, but then once you form it into a cookie you celebrate like it's a treat. And maybe you do, but it can really also just be a great snack and goodie-to-go for yourself and the kids.
This cookie is pure goodness. Yet, somehow paired with tea time it does seem like a celebration.
I made these yummies with some leftover pumpkin puree. Then I added some few pinches of pumpkin spice blend and it was a magical addition to any oatmeal raisin goodness.
Pumpkin Oatmeal Raisin Cookie Recipe
{gluten, dairy, soy, egg, nut, seed and refined sugar-free}
2 cups of rolled GF oats
3/4 cup of GF oat flour
1/2 cup of rice flour
1/3 cup of tapioca flour
1/2 ts. of baking soda
1/2 ts. of sea salt
1/2 ts. of pumpkin pie spice
1/4 cup of pumpkin puree
1/4 cup of applesauce
1/3 cup of pure maple syrup
2/3 cup of coconut palm sugar
1/3 cup of avocado oil
1/4 cup of softened coconut oil
3/4 cup of organic raisins

Mix all the dry ingredients together in a bowl first, then add in the wet and mix well with a spatula until it is a sticky ball. Then fold in the raisins last. Let batter sit for 10 minutes in the fridge and then you are ready to scoop out 1 TB sized pieces of dough and roll and spread out on the baking sheet. I was able to bake 15 on a parchment-covered baking 12x15 baking sheet. This recipe will make about 30 cookies. Bake in a 350 degree oven for 12-14 minutes. 

Much love and light, xoxo