Showing posts with label local fruit. Show all posts

Wednesday, February 28, 2018

Strawberry Milk

"Momma, can you make me pink milk??...or maybe a strawberry smoothie, or wait, how about strawberry milk!" 

Hmmm, I barely EVER say NO when my kids ask me for good food...Yep, that's alway a YES for sure! 

I have to admit, strawberries and creamy milk sounded divine to me too, and with the last bag of frozen strawberries from last summer it was even more special. How many more weeks till strawberry picking?!? The special-ness of those last berries were not lost on us- we made sure to really savor them. And this was a sweet and fabulous way to enjoy summer goodness months after. And even now, enjoying them gives us that last push to make it to spring!

This recipe is super simple and basic, but I added a few things to make sure that it was nutritious and protein packed as well. So because we are a strict dairy-free house because of severe allergies this milk is most definitely not cow milk, instead we added full-fat coconut milk for the fats, nutrition and creaminess! Also, an added scoop or two of gelatin makes this milk still full of protein, a 12 grams per TB is what gelatin offers, also countless amounts of goodness. So whip this one up, impress your kids, or heck, bring back your inner-child for just a moment and sit and enjoy yourself some pink strawberry milk!

Strawberry Milk Recipe
{gluten, dairy, egg, soy, nut, seed and sugar-free}

2 cups of frozen or thawed strawberries [can be chopped or wholes]
1/2 cup of juice [or water] of choice
1-2 TB of fresh lime juice
sprinkle of quality sea salt
1/4 cup of maple syrup drizzled (more or less depending on tastes, can sub in dates too!]

1/2 cup of plant-based milk beverage (coconut, rice, ect...)
2 TB of pure gelatin


In a small pan, warm up the strawberries in the liquid and let it simmer and bubble and release it's colors and sweetness. Then turn off heat. In a small bowl whisk together milk and gelatin until bloomed. Then in your blender add the whole can of coconut milk, strawberries from pan, and the bloomed gelatin. Blend on high and then when its all creamy and frothy, pour into glasses and and instantly enjoy! It will be warm from the strawberries if you consume right away and...

...you can chill it too and also it will become a panna cotta type treat if you have in the fridge for more than 30-60 minutes. It will start to turn into a yogurt-like subsatnce as the gelitan cools down. So you may even enjoy it as it cools more. 

Top with thawed or fresh strawberrie pieces for extra goodness and texture :)

ENJOY and much love!!!

Saturday, January 20, 2018

Cinnamon Raisin Swirl Rolls

Saturday morning sweetness. This time with cinnamon rolls incredibly without any sweetness except from fruit. I know! The cinnamon filling is made with a raisin paste and cinnamon and the dough is my easy no-yeast- no-rise bread recipe that I morph into dough for these sweet swirl rolls. I promise you that if you have been deprived from sweets, sugar, or anything decadent for a while because of health and digestive issues that you will have a shouted "hallelujah" with these sweeties :) They are such a gift of love and sweetness for any weary soul. And then I topped one with some only-fruit berry chia jam and that's when I heard the magic glitter sparkles snap.
I was recently told by a friend of another friend making something like these rolls from my recipe because of her own journey with leaving regular table sugar behind and even all of the other typical sweet alternatives. So of course I had to try it myself! Fruit is nature's best way to share sweetness in our lives. If you are one of my recipe followers, then you already know I only use sugar alternatives like honey, maple syrup, coconut palm sugar...but even still it is incredible how our bodies get addicted to even these sugars. It has been kinda of a reset for me over the past few weeks to try and eat only fruit for sweetness in my life. This is definitely a challenge for me.
I will be honest with you. I hate restrictions and rules. I basically see a rule and think how on earth can I avoid that one. I used to think that I don't intentionally try to break rules, but really I see myself now as being one of those people that just HATES having restricted boundaries...mostly because I feel trapped. Trapped by feelings that make me feel like I am stuck in a certain way of living or thinking or fill-in-the-blank... This is why I started this blog and baking GF and sharing my recipes. Because I wanted to say that if you have to eat a certain way that sometimes feels small, deprived and trapped that there are people like me out there trying to make things that can give you life, nourish you inside and out, AND will break through the boundaries of what it looks like to have to eat a certain way. Thinking bigger and outside-of-the-lines inspires me and keeps me going. So that was a little of a rant, but basically these little rolls remind me that having restrictions for the diet [for a small or forever time] doesn't have to be a sentence of misery. It can actually bring hope, joy and so much love. Happy baking friends and may you find doses of sweetness in your life that don't involve addicting qualities ;)

Cinnamon Raisin Swirl Rolls Recipe
{gluten, dairy, egg, yeast, soy, nut, seed and SUGAR-free}

3 TB of psyllium husk powder
1 cup of coconut milk beverage (I use So Delicious unsweetened)
1 cup of water
1/4 cup of apple cider vinegar
1/4 cup of unsweetened applesauce
2 TB of olive oil

Whisk all the above ingredients together very well in a large mixing bowl. It will turn into a pudding-like substance. Then you can add the dry ingredients...

1 1/2 cups of certified GF oat flour *I grind my own from GF rolled oats*
1 1/4 cup of rice flour
1/2 cup of tapioca flour
1/4 cup of potato starch
1 TB of corn-free baking powder
1 ts of baking soda
1 ts. of sea salt

*1/2 cup of extra flour (oat or rice/tapioca or a mix) for rolling out and kneading if need be

After you add in all the dry ingredients you will roll together, knead together and start to form a log or bad and you may need to extra flour (oat, rice, tapioca) in the kneading or rolling out process if your dough is extra sticky. So form a lump or log and start to roll out a flat dough piece on parchment paper. You want to roll out a 12-15 x 15x18 inch dough rectangle. Let it sit while you mix up the filling...
Raisin Cinnamon Paste Filling
1 cup of soft organic raisins
2 TB of ground cinnamon
1-2 TB of coconut oil
1-2 TB of hot water

In a food processor or blender put all of the above ingredients in and blend until a creamy cinnamon paste. Then spread all over the 12x18 inch rolled out piece of dough. You can leave 1-2 inches without the filling at the end closest to your body. Then, at the end farthest from your body start to pinch the first few inches of the dough pieces into a roll. You want to evenly roll the whole 18 inches of dough into a roll towards you. There is a lot of technique here, but basically you want to stretch-then roll-stretch-then roll, and you will eventually get a TIGHT roll of dough swirled with cinnamon filling. Pinch the endings of dough on each side and at the end of the dough roll. This will help the dough stick together. Then take a bread knife and cut 1 inch cuts along the roll and separate each inched roll and place it on a parchment papered baking sheet. A 15x18 baking sheet works best, or 2 12x9 baking sheets would work too. Spread out 1/2 inch apart so they bake together but they will expand a little. Bake in a 350 degree oven for 25-30 minutes until bubbling and golden brown. Let the rolls sit and cool for 15 minutes and they are ready to eat!

This recipe can make 24 mini rolls or about 18 larger rolls. It just depends on how long you roll out your cinnamon log and how large you slice off the rolls from the log. If you have ever made homemade cinnamon rolls before you can use all the same techniques here with this recipe, but this dough is free of  sugar, yeast, so no rising time, and free of the pesky allergens. They turn out fabulous though!
These could be wonderfully topped with the jam I mentioned, or you could top with ghee, nut/seed apple or any other "butters", bananas, seeds, nuts, or whatever to add more flavor. You could toast them or dunk them, or even un-swirl them and eat them like a spaghetti noodle (that is done by one of my littles LOL). The options are endless ;) Or at least it is fun to think that way and imagine all the possibilites out there in the world to ENJOY food and life that you CAN enjoy!

Hope you find hope and peace today, friends! Much love xoxo

Friday, January 5, 2018

Raisin Bread with Berry-Chia Jam

January is for snuggling, hygge-ing, and bread making :) It is for me at least. I told you I have challenged myself to a plant-based diet for a few weeks and no sweets except those in fruit. Well for breakfast I have been enjoying Buckwheat-Date Porridge or some GF quick cooking oatmeal topped with blueberries, pumpkin seeds, coconut flakes and chia seeds...BUT when it comes to breakfast, I still love a piece of whole grain toast smothered in a seed butter and jam ;)
This bread recipe is a combination of [this oat and this buckwheat-quinoa-millet] beloved bread favorites and my favorite homemade jam [from all those frozen blueberries] that I make weekly, but this time I threw in a few new twists so as to avoid sweeteners other than fruit and add in a few other parts to get the most I could out a having bread and jam for breakfast. The raisins were added in to help bring out some natural sweetness and honestly I LOVE a breakfast bread with a little dried fruit. I am already thinking up some future bread recipes... ones with cranberry, orange and seeds, or a molasses and raisin one. I cracked open a multitude of ideas... some of those have been tucked back there for a while. But for now- it is raisins, lightly sweetened with applesauce and cinnamon, and the love is ever great and nourishing.
Raisin Bread Recipe
{gluten, dairy, egg, yeast, nut, seed, and sugar-free}

3 TB of psyllium husk powder (must be powder, not seed or husk)
2 cups of pure water or non-dairy milk (or a combination of both)
3 TB of apple cider vinegar
3 TB of unsweetened apple sauce
2 TB of olive oil
1/2-1 cup of organic raisins

1 TB of cinnamon
1 cup of finely ground fresh GF oat flour
(grind 1 cup GF rolled oats in high powered blender)
1/2 cup of quinoa flour
1/2 cup of buckwheat flour
1/2 cup of millet flour
1/2 cup of rice flour

1 ts. of sea salt
2 ts. aluminum free baking powder
1 ts. of baking soda

sprinkle up to 1/2 cup extra oat flour for kneading 


In a large mixing bowl, whisk the psyllium husk powder, water, milk and apple cider vinegar together. It will turn into a thickened blob in a few minutes, then whisk in the oil and applesauce in together. Lastly mix in the raisins and let them get wet before mixing in the dry...

Then, add all of the dry ingredients, flours, cinnamon and salts, and mix with a spatula or wooden spoon until all of the flour is blended, but be careful to not over mix and make it too sticky. Then use your hands with a sprinkle of extra flour if needed to knead and roll our the dough until it starts to get a skin and no longer sticky. Once you got a nice skin on the dough and have rolled around you will have less cracks and stickiness. This is where I roll out to a long oval-shaped loaf and tuck all the spots under the loaf that have cracks or whatever. It doesn't have to look perfect because the skin will turn into a thick crunchy crust after baking. 

No need to proof or prove or whatever you normally do with bread because there is NO YEAST!! So just after rolling out a loaf, put on a parchment papered baking sheet and bake in a 350 degree oven for 1 hour. Let cool for 20-30 minutes before cutting into. Serve warm, which is my favorite! But also let it cool and slice out the loaf and save in a bread container for the rest of the week. It does a great job at keep at room temperature but you may find that you still like to toast it to warm it up a bit. 

Berry Chia Jam Recipe
2 cups of frozen blueberries or a mix of whatever berries you have
1/2 cup of juice (I used Antioxidant Force by Smart Juice) but you could use pomegranate or other no sugar fruit juice like cherry, berry mix, or grape
1/2 cup of pear or apple juices for sweetness too
also, you can use elderberry tea as in sub from the juice (as in my other chia-jam recipe)
1 TB of grated fresh ginger
1 organic orange grated for zest and squeezed for juice
pinch of sea salt

1/4 cup of whole chia seeds

In a medium saucepan, pour in the 2 cups of frozen berries with the tea and the juice and let cook to defrost and get soft. Then add in the ginger and orange juice and zest and bring to a soft boil and bubble and cook from any where to 10-15 minutes until the berries are very hot, juicy and mushy. You can use an immersion blender to blend in half of the mixture to be more smooth and have less chunky fruit if you want a smoother jam. After this it looks like a fruit soup. Turn off the heat and then add in the chia seeds. Stir in well so not to be clumpy and then let it sit in the pan and cool and let the chia seeds soak up the moisture and turn into a thick jammy substance. When it cools for 10-15 minutes you can pour into a pint jar to continue to cool and thicken in the fridge. It will be best after at least 4 hours in the fridge. This recipe makes 1 pint jar and will keep up to 2 weeks. 

There you have it, my most favorite recipes adapted to have NO sweetener but fruit. I hope you give them a try regardless and ENJOY! It is a great way to start off the new year trying to love and nourish the body with ways that it cannot hide behind sugar, caffeine and crappy processed foods to feel numb and yucky. Feed your body LOVE, friends!

Much love as always, xoxo

Thursday, August 31, 2017

Fresh Peach Pie

Ok, one last sweet peach recipe to say farwell to summer and hello to Labor Day weekend and the kickoff to the new school year and fall schedules. This one feels a bit over the top because it is so fresh and fabulous but let me tell you- it is actual a quite simple recipe.
Yep, the star of the show is peaches again. So using fresh, juicy and full of flavor peaches is a must! I don't think I would even attempt this recipe if I couldn't get my hands on the best local fresh peaches. I like to make recipes liek this as a celebration for the season. Its like like I would make this in the winter- it is truly an end-of-summer-kind of deliciousness.
It's also the best kind of dessert to make for a crowd. I don't think you could eat this pie alone ;) well maybe you could, but that's another story all together. Truly though- this pie is a beaut and deserves to be shared and loved by all. I love to top it with some fresh coconut cream whip and it's a party! I hope you have plans to savor these last few gifts to this summer season. I hope you take deep long breaths and enjoy the slowness of this weekend. I hope you don't feel the anxiety of what's next creeping in and I hope you can find joy in the simple rooting of good food with those you love. Happy baking and happy weekend!!!
Fresh Peach Pie Recipe 
(gluten, dairy, soy, seed, egg and nut-free)
This recipe is very similar and inspired by my My Fresh Strawberry Pie Recipe

Crust:
1/2 cup gluten-free oats
1/2 cup of shredded unsweetened coconut
1 1/4 cup of gluten-free oat flour ground 
(1 cup of oats in ground in high power blender to make 1 1/4 cup of flour)
2 TB of maple syrup
dash of sea salt
1/3 cup of organic extra virgin coconut oil

In a mixing bowl, mix the oats, coconut, salt and flour all together well and then add the syrup and coconut oil and mix with a fork. You should get a sticking pie crust batter that you will use your hands to press into a 9 inch glass pie pan. You will have to pressed firmly up to the tops of the pan and press firmly along the bottom. It doesn't have to be perfect looking, but do try and make the crust spread evenly over the pan. Then bake the crust in a preheated 350 degree oven for 16-18 minutes until golden brown. You may need to press a fork up to the sides again after you pull from the oven while it is still hot if the crust slide down a touch while baking. Then, let the crust cool on the counter until it is cold.
Fresh Peach Filling:
6 large fresh juicy ripe peaches (about 5-6 cups of slices), boil, blanch, to remove skins, and then slice up and mix in a bowl with 1/4 cup of fresh lemon juice and 1 TB of maple syrup, then spread out in an arranged fashion in the cooled pie crust from above...

Then in a small saucepan, finely chop up 2 MORE cups of fresh peaches with lemon juice, maple syrup, honey and pinch of sea salt and spice ...

2 cup of chopped fresh peaches
2 TB of water
2 TB of fresh squeezed lemon juice
pinch of lemon zest
1/3-1/2 cup of local honey or maple syrup or a mix of both
pinch of sea salt
1 ts. of cinnamon
1 ts. of nutmeg
pinch of cloves
pinch of ginger
pinch of cardamon 

In a separate bowl...
1/3 cup of water

When you crust is cooled, the you can place the 6 sliced peaches in the crust. Then set aside in the fridge or freezer to make the liquid sauce to pour over the peach slices...

First, put your chopped peaches and lemon juice in the pan and let cook down for a few minutes on low heat, then add your sweetener and water and keep simmering. Lastly add in the bloomed gelatin  and stir quickly to keep from clumping. Turn off the heat and let it cool down just a bit before you pour over the sliced peaches in the pie crust. 

Lastly pour the warm peach sauce over the fresh sliced peaches already in the pie crust. Use a spoon or brush to coat all the tops of the peaches and makes ure it is evening distributed. Then place in the fridge and chill for 3 hours before serving. 

When set, cut out pie slices, and then top with some whipped cream topping. A favorite easy option is using So Delicious's CocoWhip kinda like a cool-whip option. And then there is the homemade coconut cream whipping from a can ....
Homemade Coconut Whipped Topping:
1 can of full fat coconut milk (use the cream only)
2-3 TB of pure maple syrup

Chill the can of coconut milk for at least a few hours or speed up the process in the freezer. Then right before serving, open the can and scoop out the separated coconut cream on the top and pour all of the remaining coconut water in a separate container to keep and use for other baked goods or smoothies. After putting the coconut cream in a bowl with syrup, use an electric mixer and whip up the cream for at least 3 minutes until you get peaks and a thicker cream. Then you can top the pie with this cream however you like. I scooped the cream into a Wilton's pipping bag with a star tip and squeezed out some cream stars over the pie. But you can top however you like- it will taste superb no matter how you top it :)

You can sub 1-2 TB of honey for the maple syrup. And if you want, prefer or like dairy you can use just regular whipping cream whipped up to perfection. 

Well, that's a wrap on fresh peach pie! Much love and light to you as always, xoxo

Sunday, August 20, 2017

Summer Peach Crisp

The key to this peach crisp is simplicity. But that's usually what I say when it comes to any fruit crisps. I love the flavor of the fruit to shine and the crispy bits to be a little like a cookie topping. And that's just how this one was... well is...? Well not anymore... I took a few pictures and by the end of the day it was gone ;) Yep, that's usually how these babies go...very quickly.
I picked up a bushel of these gorgeous gems last week from a local farmer. I go to him every year when it's peach season. These are Red Havens, one of my favs, because they are not horribly sweet and just the right texture and color for baked goodies and basically just to gawk at.
They kinda look like a gorgeous sunset this time of year, appropriate since we have been talking so much about the sun this month with the solar eclipse tomorrow and all the gorgeous August sunsets that I have witnessed this month. So much beauty and little reflections of summer.
The day I pick up a bushel is celebration crisp day! I also plan to try and make some peach butter and store some in a honey based syrup as well. We'll see how that goes :) But for now... let's make crisp and watch another fleeting summer sunset, shall we?!? 
Summer Peach Crisp Recipe
{gluten, dairy, nut, seed, soy, egg and refined-sugars-free}

6 cups of fresh pealed and sliced fresh and juicy peaches
1 lemon squeezed and zested
1 TB of sprinkled tapioca flour
3 TB of maple syrup (or a mix of honey)
pinch to 1 ts. of ground cinnamon
pinch to 1 ts. of ground nutmeg
pinch of cardamon
pinch of cloves

Put all of the above ingredients in a saucepan on medium heat and let the peach juices break down and the tapioca thicken the juice. Leave on medium to low heat for 7-10 minutes and then it is ready to pour into a 9x9 Pyrex pie pan or square dish.
In a small bowl mix together...
1/2 cup of quick cooking GF oats
1/2 cup of finely ground certified GF oat flour
1/2 cup of coconut palm sugar
2 TB of potato starch
2 TB of tapioca flour
pinch of sea salt
1/3 cup of Spectrum's palm oil shortening or extra virgin coconut oil 
drizzle of pure maple syrup

The above mixture will turn into a sticky cookie-like-batter and will be easy to sprinkle over the peaches. Then bake in a 350 degree oven for 30 minutes until there is bubbling peach juices coming from the sides.  Pull from the oven and let cool for 20 minutes before serving up warm. Which is the best way to serve in my opinion. 
This is the kind of recipe that is completely inspired and made possible by gorgeous fresh peaches. SO if you have fresh peaches available to you-then this little summer delight is a MUST! It is fabulous with a dollop of your favorite vanilla ice cream or whipped topping. But is also just fabulous as is :)
Hope you are hanging on to the best of what's left of summer and enjoying your people, nature and some gorgrous delicious food! Much love and happy baking, friends! xoxo

Thursday, August 17, 2017

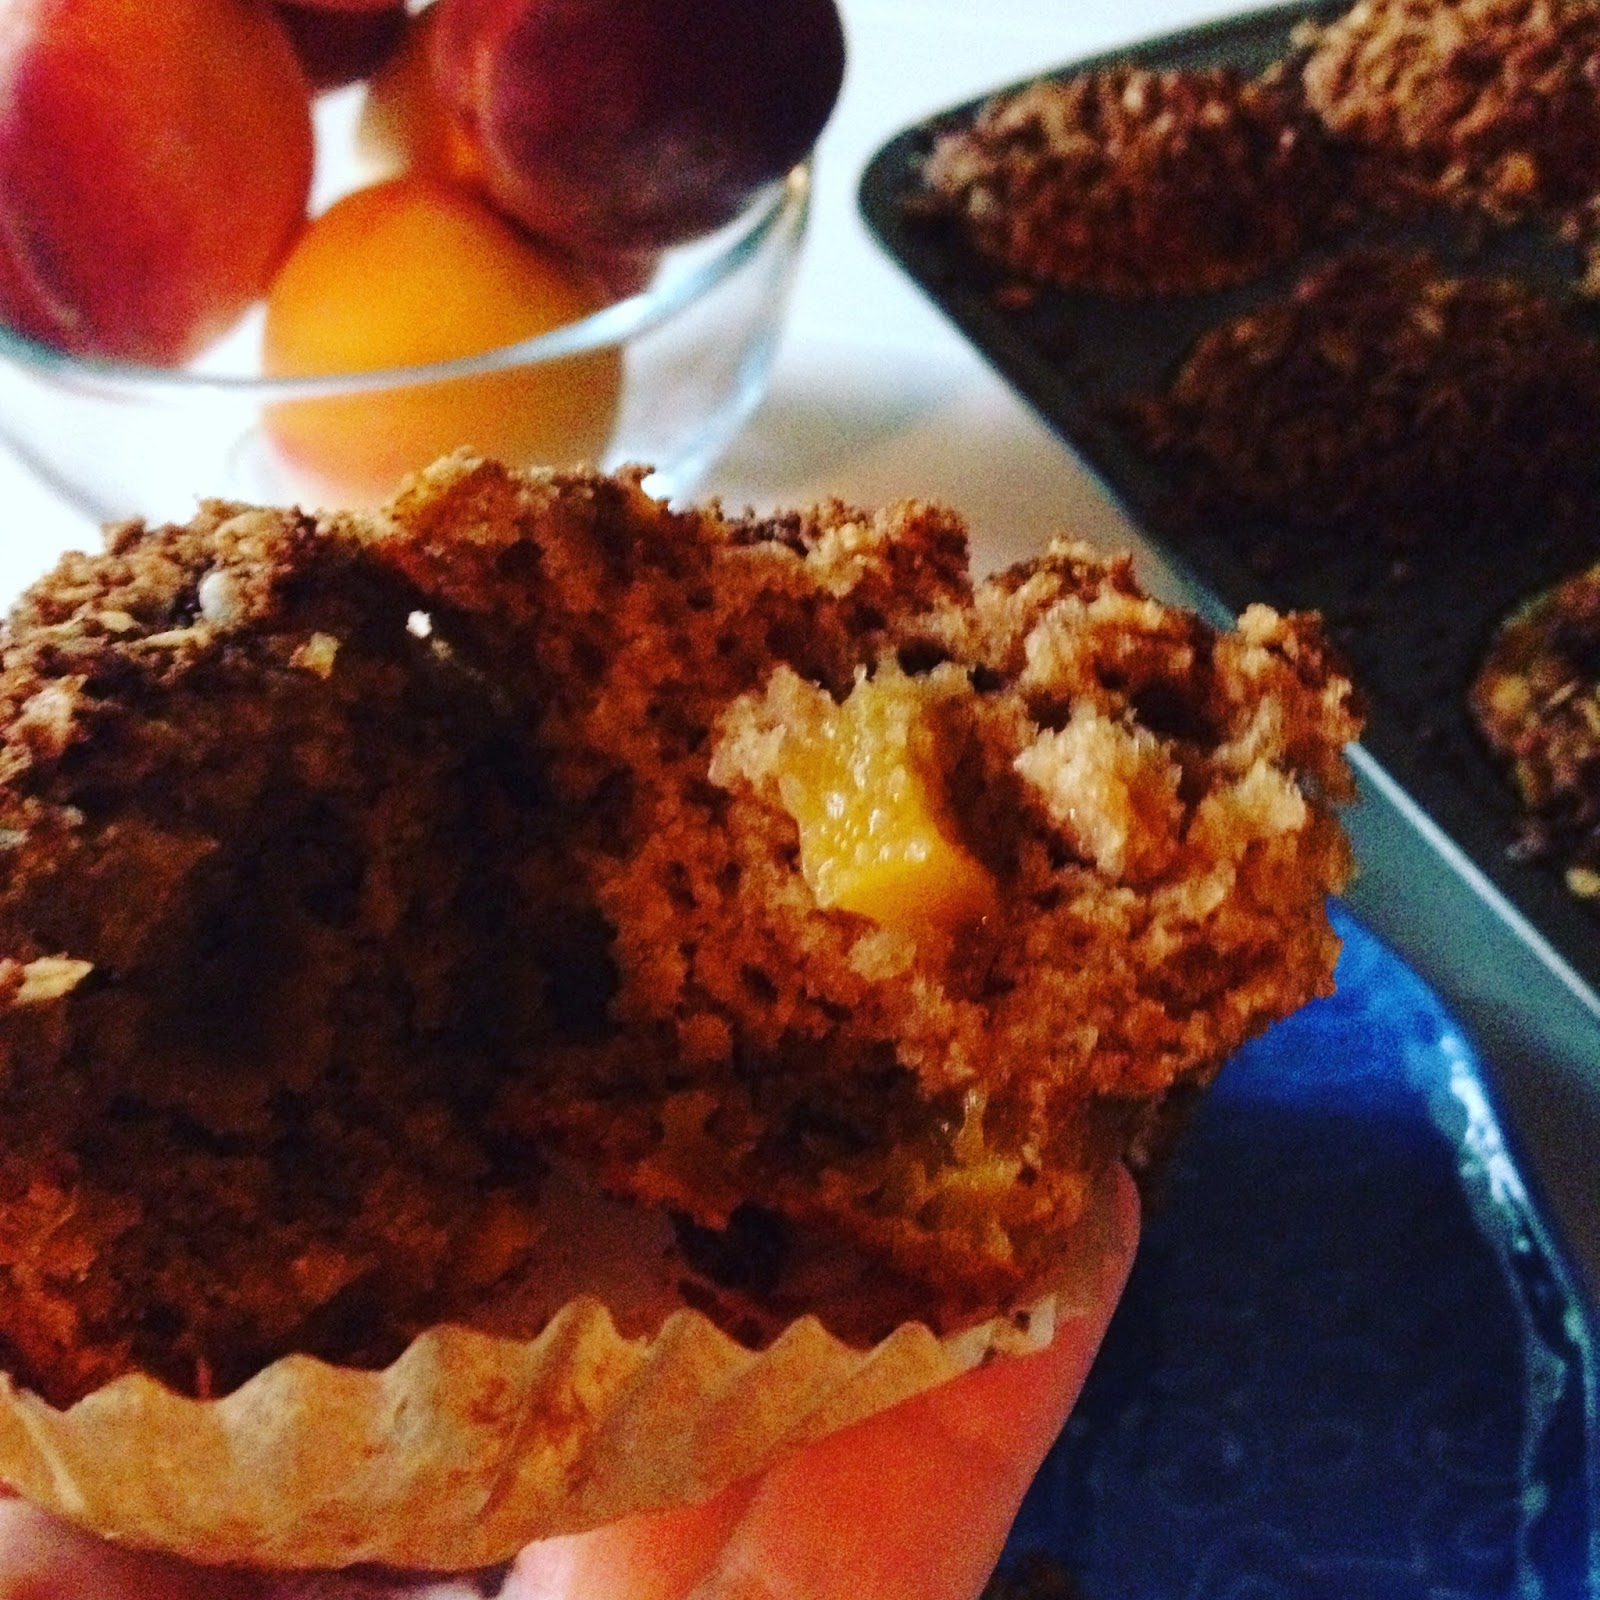
Peach Crumble Muffins

You guys- the Great British Baking Show on Netflix has taken over my life recently. Have you seen this show?! It might bring up some sorrow because there is so much to be missed from glutinous baking. Like pastry. Oh my! But the other night I found myself crying through the season 3 finally because of some of the words the winner said about herself. Ones that she would not set up boundaries for herself anymore. Ones that she would believe that anything is possible for herself. I love this show for so many reasons. First one starting with all the UK accents (I LOVE THEM!) but also all of the creative, art, science, beauty, determination, and perfection that can come out of baking. It is something I can resonate with, and even enjoy, though there is past grief that there is so much because of Celiacs Disease I cannot enjoy anymore. But in the same vein- we can not limit ourselves and loose heart- we must have determination to keep going and not give up on finding joy out of all areas of life. For life is a gift!
And I think we know this even more than the next guy because of the art and science and experience it takes to actually produce and love GF baked goods. I had that on my mind as I whipped up these muffins this morning. It was a perfect morning to bake as it is raining here and staying inside in a cozy kitchen was just the right thing for today. I felt like maybe speaking with my own British accent and making comments about my bake would almost have me imagining I was in the white tent myself ;)
The fresh amazingly sweet peaches were my subject of creativity today. I was hoping to make a slightly spicy, but sweet tart muffin. Trying to get a crumble topping as if you were biting into a warm piece of peach crumble or pie. If you've got peaches- give this a try and happy baking, friends!
Peach Crumble Muffin Recipe
{gluten, dairy, soy, egg, nut, seed, and refined-sugars-free}

1 1/4 cup of finely ground certified GF oat flour
1/2 cup of white rice flour
1/3 cup of tapioca flour
1/4 cup of potato flour
1/4 cup of coconut flour
2/3 cup of coconut palm sugar
2 ts. of baking powder (I use corn-free Hain brand)
1 ts. of sea salt
1 ts. of baking soda
1 ts. of ground cinnamon
1 ts. of ground nutmeg
1 ts. of ground cardamon

3/4 cup of date puree paste
1/3 cup of maple syrup
1/3 cup of coconut milk
2 TB of apple cider vinegar
1 fresh organic lemon zested and juiced
1/2 cup of softened coconut oil or avocado oil

1 1/2 cup of cubed and slightly stewed peaches*
I cut up 3 peaches and warmed them on the stove and cooked them down for 5 minutes with a drizzle of maple syrup and lemon juice, then cooled them down and added them to the recipe last to fold in- there may be a little liquid with cooked down peaches, and that is ok.

In a large mixing bowl, whisk all the dry ingredients together first and then add in the wet and fold in together well, you will notice the baking soda/powders doing their job with the apple cider vinegar right away. Fold in the stewed peaches last and then scoop 1/3 cup of the batter into each muffin tin. This recipe should make 12-15 muffins. Then before you bake off sprinkle with the following crumble topping...

Crumble Topping:
1 TB of coconut oil
1 TB of rice flour
1 TB of potato starch
1/4 cup of coconut palm sugar
1/4 cup of quick cooking GF oats
1 TB of cinnamon or 1 ts of each:cinnamon, cardamon, nutmeg
pinch of sea salt

Mix all of the above in a small bowl and sprinkle over each pre-baked muffin in the tins right before you put in the oven. Bake in a 350 degree oven for about 25 minutes. Let cool for another 15-20 minutes before serving or moving for best results.
 I hope you give these little sweet and spicy treats a try. The peaches are just about perfect right now. I am hoping to have a few more peach recipes in the next few days as I am finding so much love and inspiration for them this season. Much love as always and happy baking, xoxo

Sunday, August 13, 2017

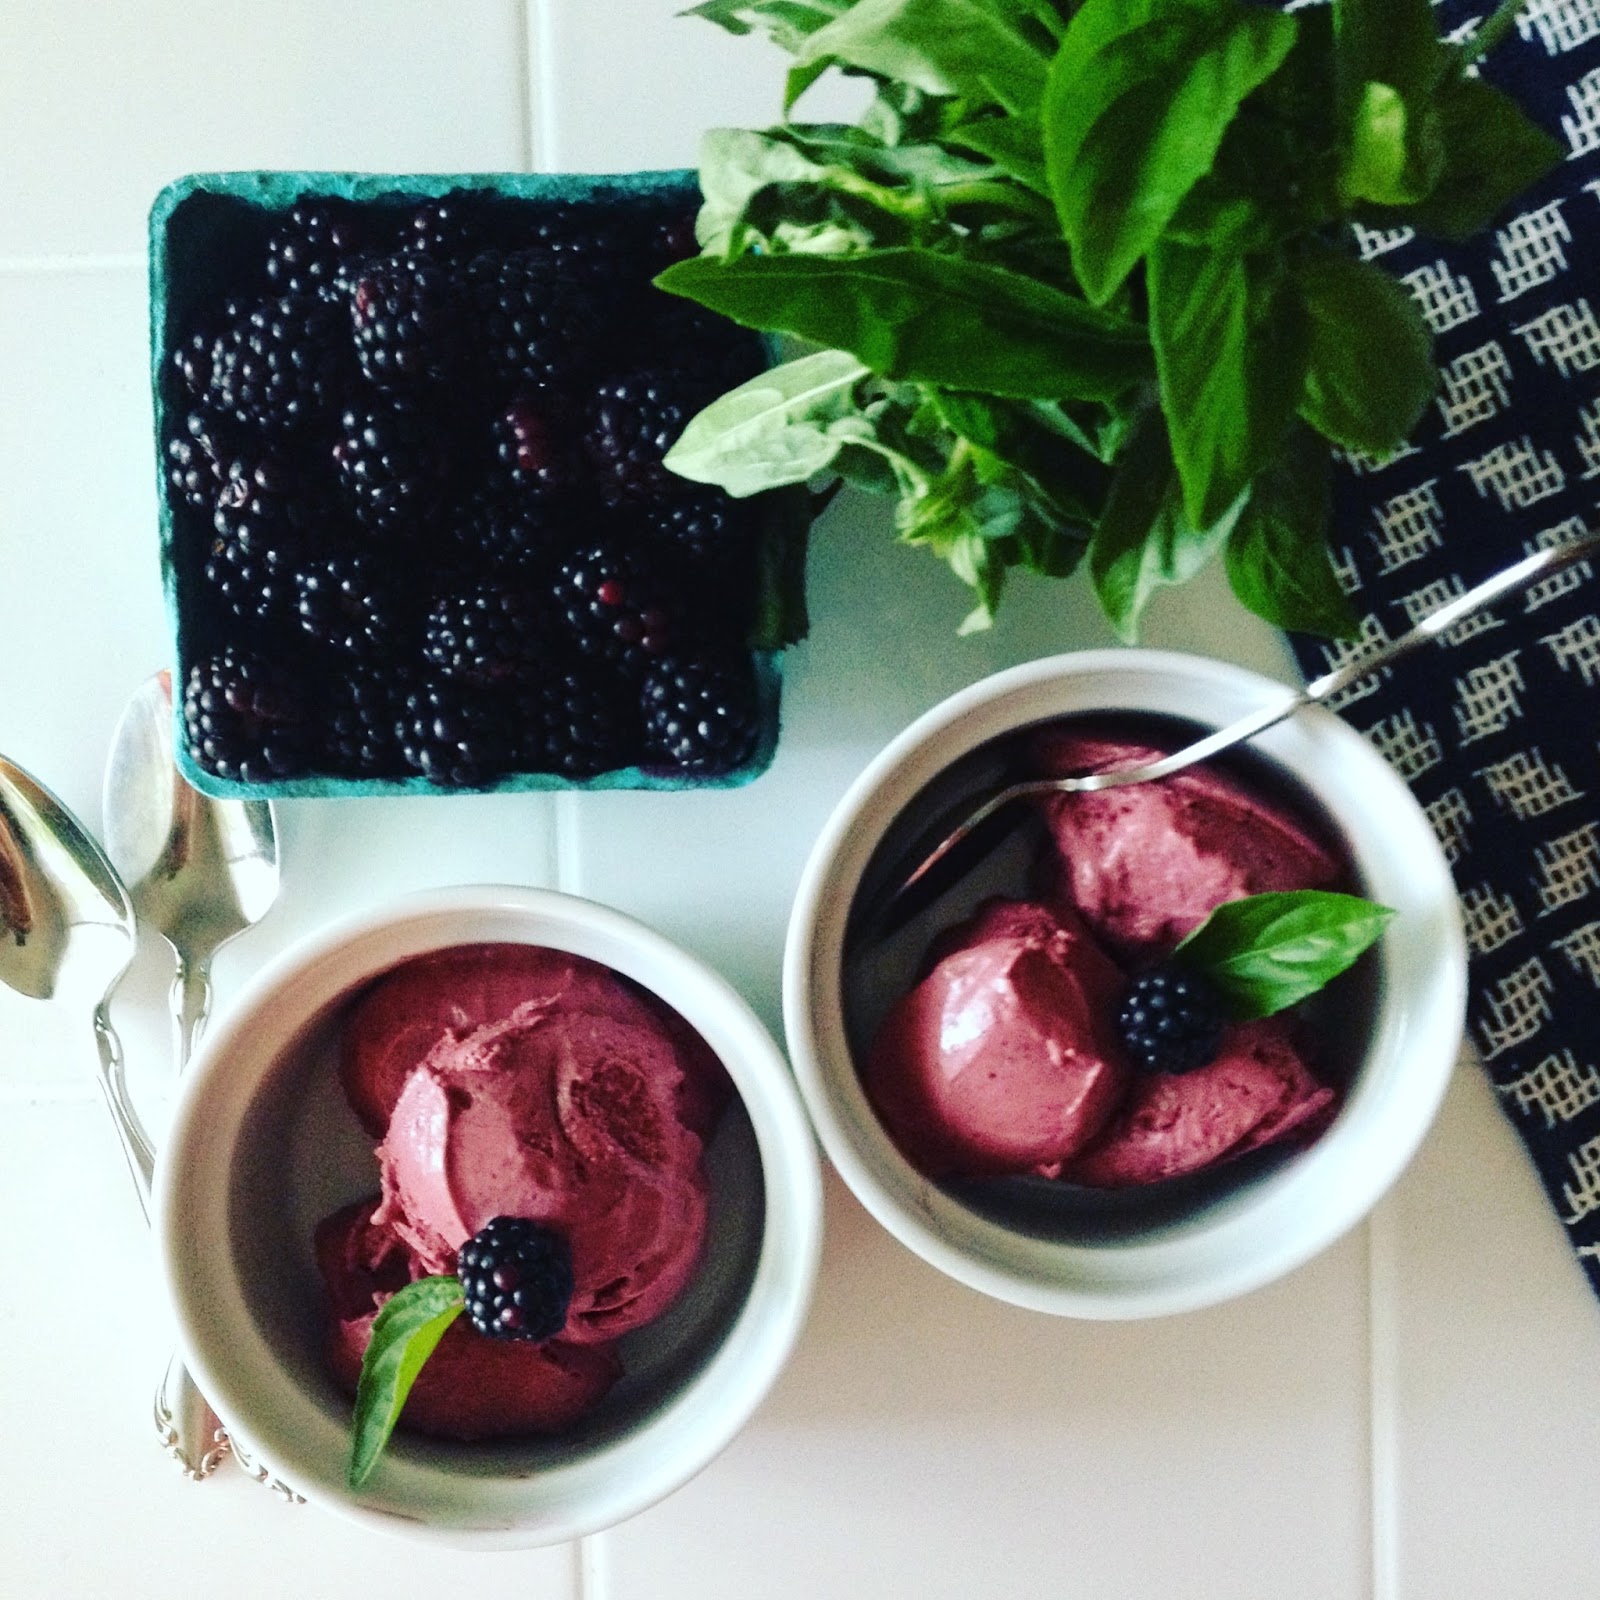
Blackberry Basil Coconut Ice Cream

Yessss, it's another vegan ice cream experiment!  Over the weekend, I was inspired by the plump gorgeous blackberries at the farmer's market and the strong aroma of fresh basil. My husband has been loving basil this season almost as much as me :) so it's also motivating to use it in just about every dish ;) 
Yes even in ice cream. Somehow that flavor of basil, almost liquorice-like, that adds just the right match to the sweet-tart of berries. I have added it to berry crisps before but to the coconut cream ice cream it is just about the perfect subtle touch. I didn't even add the leaves into the blend... just let them soak and simmer into the coconut milk before it's blended. Sooooo good!!! Be inspired by fresh colorful amazing food and let yourself be nourished and ENJOY!
Blackberry Basil Coconut Ice Cream Recipe
{gluten, dairy, egg, soy, nut, and seed-free}

2 cans of coconut cream (14 ounce cans, just scrap out the cream and discard/reuse water)
1 TB of tapioca starch
1 lemon squeezed
1/2 cup of maple syrup
1/4 cup of coconut palm sugar
pinch of sea salt
1 handful of fresh basil tied with twine

1 pint of fresh blackberries

In a saucepan, put the coconut milk cream on low heat and let it get soft and liquid. Then sprinkle in the tapioca flour and put in the rest of the ingredients. Keep the basil in the twine because it is just soaking in the cream and not being blended in. In a seperate saucepan, cook and mash blackberries until soft and juicy. Then pour over a micro-sieve and use all of the flesh and juices but omit the blackberries seeds to have a creamier ice cream finish. If you liek the texture of seeds then just add the berries right into the milk mixture. 

Take out the basil and cool down the coconut milk mixture and then add to the high powered blender with the berry mix and blend on high until creamy and smooth. Then pour into a container to cool down more if it is still warm, and if you need to refrigerate for a while that's fine. When room temp or cooled down, add to a ice cream maker and let it do it's job for 20 minutes or so and then spread into a container to sit in the freezer for 1 hour or more. Then you can pull out and use a regular ice cream scoop to serve up perfectly. Serve with fresh fruit or with or however you like ice cream best!


If you have not invested in the Cuisinart Ice Cream Maker- then you might want to in time for this summer. I got this as a birthday gift last year and have enjoyed using it. The instructions before you make the ice cream is to deep freeze the mixture container. It must be super cold! Then once you do that you can hook up the container and follow the instructions- which for this ice cream includes just pouring in the mixture while it has already started spinning. This will take anywhere from 20-30 minutes to thicken up the ice cream. It is like soft serve and ready to top or eat, but if you want a more scoop-able ice cream then let the machine run for the allotted time and then pour into a container and put in the freezer and within 30 minutes it will be a perfect scoop!

ENJOY and much love as always xoxo

Thursday, July 27, 2017

Cherry Blueberry Crumble

People ask me all the time what I do with all the fresh fruit I pick. When you eat gluten-free and have a handful of other allergies in the house, a crisp or crumble, is an easy and crowd-pleasing dessert. So much of our frozen berries and cherries end up in smoothies and muffins over the winter months, but making a crisp with the berries is one of the best ways to enjoy all those berries and cherries! 
The oozing juices and crispy crumble topping...it's best from the oven warm with a little vegan ice cream but also a great cooled off or leftover breakfast too. I make these fruit crumbles in my sleep. This crumble specifically has the fruit made into a jelled juicy filling and the crumble is like a cookie batter...
Ohhhh the smells I wish you could get through the screen...but I guess the colors are gorgeous too. So hopefully you are inspired to make a dessert for yourself and all your people :) 
This specific crumble my husband announced was his favorite. And that is a compliment to me since he alone knows how many versions of fruit crumbles I have made over the years. The additions of coconut flour add a crunchy component and the shortening also makes it more crumbly in my opinion. I love trying a few new ingredients to my usual to find out it's fabulous. I guess practicing and experience do pay off- so get started today and start baking and making a celebration of the fresh fruit season. This is a dessert you can say YES too and share with ALL!
Cherry Blueberry Crumble Recipe
{gluten, dairy, egg, soy, seed, nut, and corn-free}

In a saucepan, stir the following on low to medium heat for about 5 minutes...

5 cups of fresh or frozen fruit
(I used 3 cups of pitted cherries with 2 cups blueberries)
1 fresh lemon squeezed for about 2 TB of juice
2 TB of honey
2 TB of maple syrup
test your sweetness level and if you want more add in 2 TB of coconut palm sugar
sprinkle of sea salt
1 ts of ground cinnamon
pinch of nutmeg 

In a small cup or pyrex, whisk the following and then pour into the fruit pan and let heat for another few minutes for it to get thickened....

2 TB of tapioca starch in 1/3 cup of water whisked until creamy and no clumps

After the sauce has thickened turn off the heat and pour into a 9x9 Pyrex pan and let cool off a bit more.
Then in a separate bowl, mix together the following...

Crumble Topping
1 1/2 cup of quick cooking GF oats
1/2 cup of white rice flour
1 TB of potato starch
1 TB of tapioca starch
1 TB of coconut flour
1/3-1/2 cup of coconut palm sugar
pinch of sea salt
pinch of nutmeg
pinch of cinnamon
1/4-1/3  cup of maple syrup
2 TB of palm oil shortening
2 TB of coconut oil
Mix all the above ingredients together with a spatula or your hands. It should feel like a cookie batter in your hands. A bit sticky and clumpy. I made estimates for the sweetener because I estimate every time depending on what tastes good and what I want... the point is that you can add more or less depending on your preferences. Then sprinkle the crumble batter over the fruit in the Pyrex. Then put into a 350 degree oven for 30-35 minutes when the fruit will be bubbling and smell fabulous!
Let cool for at least 20 minutes before you serve so that you don't burn your tongue. But this is served wonderfully warm but also is a great cooled off treat too. I think because the fruit is jelled a bit it is a bit easier to serve and take along with to gatherings because it is less soupy. 

SIDENOTE: If I am making for a crowd besides just my family, I will make this recipe in a 9x13 Pyrex pan and add 2 more cups of fruit, and 1 TB more of each of the sweeteners in the fruit gel and in the crumble you can eaither leave the recipe the same and spread more thin over the fruit, or add 1/2 more of oats and flour and 1 TB more of oils to make enough crumble to spread over all the fruit. This recipe is VERY flexible with the sweeteners and with making a 9x9 or a 9x13 pan.

I hope you have found ways to connect to this berry season enjoy its bounty and find gratitude and thankfulness for it's gifts. If you are feeling discouraged and sad because of a limited diet I encourage you to try a recipe like this very soon. This will fill you with so much nourishment and happiness for all the foods you CAN enjoy. Much love and light to you xoxo

Tuesday, July 18, 2017

Cinnamon Crunch Granola Cereal

This has got to be one of my most favorite ways to enjoy fresh blueberry season here in Michigan. Waking up to fresh plump berries over some cinnamon cereal granola and add in some coconut milk or yogurt. It is good both ways! It is so simple and fresh and perfect for breakfast this time of year. Yes you could arrange your bowl with color and flash... maybe some special slices of cherries or peaches or banana too :) You could add in nuts, seeds, chia, hemp, and whatever you like and got. You just go crazy with it. But this. This simple and plain good ol' way to start your day has me saying extra thanks for this season.
I've had a few other favorite granola and cereal recipes over the years. But this one has me all love-struck because of it's simplicity and ability to just be as it is and if you want or can add in the seeds and nuts and such then by all means. But for me and my allergy sensitive house this one is just about perfect! Plus you can add in all the fresh or dried fruit you love along side or however you like. Easy to pack up and easy to enjoy... I hope you give it a try!
Cinnamon Crunch Granola Cereal Recipe
{gluten, dairy, nut, seed, egg, and soy-free and VEGAN}

2 cups of rolled certified gluten free oats
2 cups of rice puff cereal
1/3 cup of date paste puree
1/3 cup of maple syrup
1/3 cup of melted coconut oil
2 TB of molasses 
pinch of sea salt
and a sprinkle of cinnamon 

Mix all of the above ingredients in a large mixing bowl with your hands and then spread thin on a parchment covered 11x15 baking sheet and bake at 350 for 25 minutes until crispy golden brown. Pull from the oven and let cool and dry for another 30 minutes and then your cereal is ready for crunchy, tasting, and packing up in a jar for the pantry and ready to pull out for breakfast. 

It is so easy to half the recipe or double the recipe. It is just super basic, but I love it dearly for that. It is just about perfect for your summer fruit breakfast routine and why not add it on a smoothie bowl or chia breakfast pudding too :) It is my favorite!
I hope you have these pantry items by now after reading my recipes. The date paste and GF oats are major pantry items for my family and my recipes. This one should be easy to give a try too and match with all those gorgeous berries. Happy breakfast and much love as always...xoxo

Saturday, July 15, 2017

Cherry Chocolate Chunk Coconut Ice Cream

Remember all those cherries I picked a few weeks ago- well they are showing up once again with their partner in crime....chocolate. This time in a cool melty treat, but now that I htink about it, could be a nice topping to my latest brownies too ;) 
Cherries are such a treat by themselves. You can make them a meal and dessert just by washing them off and making them the centerpiece to the kitchen table. But this creation was just a fun treat we had this last week. My kids and I decided that we can never have too much cherry ice cream. It's been our dessert of choice lately and I'm not sad about it one bit!
One bite at a time. You don't need much to feel satisfied with such a delacacy. A little bit goes a LONG way and once you start making your own dairy-free ice cream- it's hard to go back and it's easy to imagine and want to create a 100 new combinations.  
This is a pretty standard combo and since we have all those fresh cherries to use up this was a no brainer. I would usea bit more maple syrup that my vanilla version since it helps sweeten the cherries just the right amount. I also think if almonds or amaretto don't bother you that they would be an ammazing addition as well. Here's my simple combo and hope you give it a try xo

Cherry Chocolate Chip Ice Cream Recipe
{gluten, dairy, soy, egg, nut, seed, and refined sugar-free, VEGAN}

2 cans of full fat coconut milk cream - should amount to 2 cups of cream
(scoop out the cream and save/discard the water in the can)
1/2 vanilla bean pod scraped
1/2 lemon squeezed (1 large TB of juice)
1/3 cup of pure maple syrup or a mixture of honey/maple syrup if you are not vegan
hearty pinch of sea salt
1 TB of tapioca starch (this ingredient helps the ice cream to be so much easier to scoop from the freezer and even I think allows it to be creamier and melt just the right way instead of it being too hard or icy- you can omit it too, but from my experiments I like it better added!)

1 1/2 cup of finely chopped cherries (fresh or frozen)

1/2 cup of dark chcolate chunks or use mini chips by ENJOY LIFE

In a small saucepan, warm up the coconut cream with the rest of the ingredients, make sure to whisk in the tapioca starch well and as the milk warms under the flame it will slowly thicken the cream. DO NOT warm too much to a boil. Just warm enough for the starch to thicken and turn off the heat and let it cool off. 

Then use an immersion or regular blender and blend the mixture to get a bit frothy and bubbly. 

You can stir cherries into already mixed cream mixture or blend together with cream when you blend it all together. I usually add in half of the cherries before blending and then have half of the mixture just stirred in last. 

Pour into a container and let full cool off in the fridge for 2 hours- overnight, or in the freezer for 30 minutes. After the cream has cooled down a bit you can add the chocolate chunks or chips right before you process together in the ice cream maker. 

Then if you have not invested in the Cuisinart Ice Cream Maker- then you might want to in time for this summer. I got this as a birthday gift last year and have enjoyed using it. The instructions before you make the ice cream is to deep freeze the mixture container. It must be super cold! Then once you do that you can hook up the container and follow the instructions- which for this ice cream includes just pouring in the mixture while it has already started spinning. This will take anywhere from 20-30 minutes to thicken up the ice cream. It is like soft serve and ready to top or eat, but if you want a more scoop-able ice cream then let the machine run for the allotted time and then pour into a container and put in the fridge and within 30 minutes it will be a perfect scoop!

Hope you are enjoying summer for all it's fresh and warm gifts! Much love as always xoxo