Tuesday, August 31, 2010

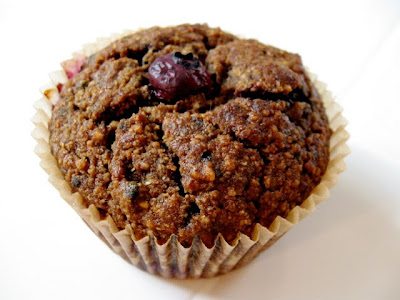
Millet Oat Breakfast Bars

Looking for an easy-to-pack snack that you can make at home and send with kids to school next week? Or possibly an easy snack to take to work on a busy day? Here is something so easy I came up with this week with some leftover ingredients in the kitchen. I had a large bag of puffed millet cereal for some reason and it wasn't going anywhere fast. So I had to find a way to use it up and make it tasty, so why not a little treat. I guess that is why I call these breakfast bars...because of the cereal ingredients, but really, this could be for a snack, a treat, or whatever. And, you could make this with a variety of puffed cereals, not just millet. That is my little schpeal on how these little babies came into existence. Not to mention... In 92 degree weather the past 3 days... who wants to turn on the oven. Not me! These bars can be created with a few stove-top minutes and then viola you have a refrigerated treat. Maybe I will just get to the recipe so you can enjoy it yourself...:)
Millet Oat Breakfast Bar Recipe

In a small saucepan, warm up the following ingredients on medium heat...

3 TB of raw honey or agave nectar
3 TB of sucanat or other powdered sweetener
1 TB of coconut oil
1 ts. of pure vanilla
1/2 cup of almond butter
2 heaping TB's of 100% cacao powder ( or baking cocoa)

Let all those ingredients get warm together and mix well for just about 2-3 minutes. Then pour the warm mixture into a mixing bowl with the following ingredients...

1/4 cup of flax meal (grind whole flax seeds in your coffee grinder if need be)
1 cup of millet puffed cereal (or other gluten-free puff cereal like rice, or flax)
1/3 cup of raw sunflower seeds
1/2 ts. of sea salt

Mix all of the "wet" and dry ingredients well together with a spoon ( or with your hands :) and then pour into an 8x8 pan, either glass or tin. Then press with the back of a spoon or spatula all of the mix till it is hard in the pan. Then put in the fridge for as long as you like, but at least for 30 minutes before cutting into little squares. You can get about 9-12 squares from this pan size. If you want to do a 9x13 pan you will have to double or at the least play with the measurements. After you cut the squares you will want to either keep them in the fridge if it is warm outside and in your kitchen to stay well intact, or possibly on the counter will be fine as well.
They are a perfect pick-me-up treat with lots of fiber, even protein and no refined sugars. And that little chocolate taste doesn't hurt either. If you are allergic to almonds or nuts, try sunflower seed butter, and if you want to keep it vegan then avoid the raw honey and go with the agave nectar. I have to say, with being pregnant and looking for smaller snacks throughout the day to keep my sugars balanced and my energy up, this is the perfect snack. I do love my cold watermelon snacks, and cold apples with almond butter, but this treat is a little more interesting. Another great thing about this recipe is that you can avoid dairy, gluten, and still have a hearty bar-like snack. Sometimes I get so annoyed at the prices of outrageous gluten-free snacks. It just seems like you have to be working a part time job to support your gluten-free needs. This recipe is not too pricey and you get to make it at home and control the ingredients. My kind of treat. So friends, I hope you try it out and enjoy!

Much love to you today!

xoxo

Stephanie

Sunday, August 29, 2010

Walnut Pesto Sauce with Pasta

Have you noticed that pine nuts have sky-rocketed in price over the last year? Well, they have where I live. They went from an average 18 dollars a pound to about 35 dollars a pound. So, sadly, I have not been making pesto sauce as much because I just can't justify the price for the pine nuts. Although, pine nuts are one of my favorite toppings to many pasta dishes, you just have to get creative without them once in a while. So, I made some pesto sauce with walnuts, and since we are going with a little less traditional here I also added some kale and spinach to green it up.

I truly love fresh herbs. They are a must-have-ingredient when you are on the dairy-free gluten-free diet. They just add so much fresh flavor and beauty to each dish that you won't even be missing Parmesan cheese. Not only are they beautiful and tasty, they are full of vitamins, minerals and "green-goodness". My favorites that I plant every year are basil, thyme, sage, rosemary, parsley, and mint. Those are my staple herbs at least. You will be surprised on how if you have them on hand and fresh in a pot you will use them more. I crave them in the winter and occasionally buy some in their little packages for an outrageous price. But in the summer, don't even think about buying them in those packages. Just get a few dollar herb plant in a pot and plant it in your backyard or in a larger sized pot. And within no time it will growing like crazy and you will have fresh herbs coming out your ears. You have to make sure that you water them, and give them full sunlight along with picking the tops pretty faithfully to ensure them a plentifully season. My herbs this year went through a little of a drought with all the heat (and me forgetting to water for a few days), but thankfully they are back to their fruitful self that last few weeks. I can use and keep them outdoors until the frost, and after that either let them dry out or clean up shop and wait for spring. It's a fun little hobby I think.... and like I said before, they are beautiful and tasty in everything.

Anyways, I say all this because I just made another batch of pesto sauce with some of my freshest basil along with...walnuts instead of pine nuts. It turns out just as wonderful and much easier on the budget that's for sure. Here is my favorite recipe to use...

Walnut Pesto Sauce Recipe
1 heaping cup of fresh basil leaves
1 heaping cup of spinach leaves
1 heaping cup of chopped kale leaves
3 chopped cloves of garlic
1 TB of lemon juice
1 ts or more of ground black pepper
1 ts. or more of sea salt
1 TB of agave nectar
2/3 cup or so of raw walnut pieces
1/4-1/3 cup of extra virgin olive oil

Add all of the above ingredients to a blender, food processor, or magic bullet and start blending on full speed. If you need to add a touch more of oil, water or lemon juice to get it moving better or blending then by all means. Just make sure you add only like a spoonful of liquid at a time to make sure you don't over-do it. Blend for a minute or so until smooth and add to some freshly boiled favorite gluten-free pasta. Mine of course that I always mention is, Tinkyada Brown Rice pasta, but really any will do. This recipe is similar to my spring pesto pasta sauce that I have a recipe for, except I am using the walnuts as a substitute.
You could add other fresh veggies (green beans, broccoli, mushrooms or carrots) to the pasta, or some more topped walnuts or pine nuts and make it a pasta salad for a party. This sauce is great for so many things... topping a flat bread or pizza, a dressing, a dip, a sauce... really it is what you decide to make of it. It is always best tossed on some warm pasta and enjoyed pronto. If you want to add cheese, then go for it, but really you won't be missing it too terribly if you must be dairy-free.

I hope you try this out before the end of summer and enjoy! Much love to you today!

xoxo

Stephanie

Wednesday, August 25, 2010

Quinoa Carob Blueberry Muffins

Why are photos of fresh food and unique recipes so enticing? Why do I find myself spending hours upon hours of my life keeping up with my favorite food blogs? There is something about beautiful food, not to mention fresh food, and healthy recipes. It's a hobby I guess, but really it's more like daily inspiration. I think it is a sense of support, or community. When you can check up on new recipes, and create ones of your own... you are participating in a greater audience than yourself. I would encourage anyone that is taking the gluten-free jump to investigate recipes from food bloggers and experiment with new foods. It will give you a sense of support and have you coming back for more. And probably you will learn a lot of how to cook, bake and eat gluten-free with real flavor and healing nutrients...
Kinda like quinoa, carob, blueberry muffins. Yeah, these muffins may be a huge stretch for the conventional American eater. I mean, who knows what quinoa is until you are interested in gluten-free, or vegetarian menus. And carob... what is that anyways. Eating real food may be a learning curve for a while, and you may need months, or years to learn new habits in the kitchen, but I bet you won't regret it. So don't be afraid to learn, ask questions, and you may need to make google your best friend to research new ingredients.

These muffins were created out of what I had left in the cupboard one day. Some quinoa, some carob and then some fresh berries in the fridge. That is the kind of baker I guess I am...I like to use up the ingredients I have on hand and be resourceful with what I have available and what is in season. So, a yummy nutritious muffin made it's way to the mixing bowl....yum! I like to think they are beautiful as well... the blueberries are so perfectly blue and delicious looking. Almost like gumdrops on top of a cupcake.
Quinoa Carob Blueberry Muffin Recipe
3/4 cup quinoa flour (or grind the whole quinoa in a coffee grinder or small food processor)
3/4 cup of almond meal flour (or if you can't do nuts then try, GF oat flour )
1/2 cup of white rice flour
1 1/2 ts. of baking powder
1/4 cup of carob powder
1/2 cup of sucanat
1/2 cup of applesauce
1 TB. fresh lemon juice
1/4 cup light olive oil
1/2 cup of So Delicious coconut milk beverage (add more if you need a tad more liquid)
2 farm fresh eggs
1 1/2 cup of fresh or frozen blueberries

Mix all of the dry ingredients in a large mixing bowl. You can use whole almonds and whole quinoa, just grind them in a coffee grinder or small food processor to get a flour like consistency. Or if you have almond meal flour on hand, or quinoa flour on hand... those will obviously work as well. If you are trying to avoid nuts in this recipe, then substitute the almond meal for GF oats or millet flour. Then mix in the wet ingredients and mix well before adding the blueberries. I added 1 cup of berries to the batter, and saved about 1/2 cup to decorate the tops of the muffins before baking. This recipe will make about 12 large muffins. Bake in a pre-heated oven of 350 degrees for about 22-25 minutes. Check to see if the muffins have been baked all the way through with a pic.
Then enjoy warm, or freeze half of them (I froze half to start storing up some GF goodies in the freezer for after my baby is born). I know... crazy that I am thinking ahead... but I do love how easy it is to pull out a nutritious gluten-free baked good from the freezer to enjoy on a weekly basis. These would be a perfect breakfast or snack and who doesn't like a hearty healthy muffin to start their day?! I hope you enjoy and find your experimental spirit in the kitchen today.

Much love to you!

xoxo
Stephanie


Saturday, August 21, 2010

Peanut-Free Tahini Vegetable Noodle Stirfry

Peanuts can be a wonderful food, protein and flavor, until you find out you have digestive issues or food allergies. Peanuts, even though you may not be "allergic", can cause digestive distress time and time again. It is mainly because they can carry a fungus that will cause issues in your gut if you have an overgrowth of fungus in your gut already or you are sensitive to yeast or gluten. It is a highly allergenic food even though it does have a good source of protein. This is because it is technically a legume, and not a nut. That is why it has been called an earth nut or ground nut because it is a "nut" that grows in the ground like beans. I, myself, love peanuts, but have noticed that when my digestive system is in a very sensitive state I will react to peanuts in ways I didn't think possible.

That is why it may be recommended to you to avoid peanuts for a while not because you are fully allergic to them, but because if you take a break from eating them you may be able to repair your gut and have more balance in your intestinal bacteria. A good test to see if you are reacting negatively to peanuts or other high allergen foods is to take note after you eat them if your eyes itch right in the corner of your eye by your nose, or if you have a scratchy throat, or if you have itchy skin. Then you may notice more severe symptoms in the gut hours later, but that initial reaction may be noticed in your eyes, throat or skin. Something to pay attention to if you are trying to figure out some of the foods that may be causing you issues.
So why so much about peanuts? Well, this dish is traditionally more of the Thai based flavor that is always made with peanut sauce or crushed peanuts. Which by the way I LOVE. But, if you are trying to stay away from peanuts for a while, you may need to avoid the Thai restaurant and make some tahini veggie noodles at home. Tahini is made out of sesame seeds. It is a crushed sesame paste that should contain its natural occurring oils in the jar you buy and have a similar constancy to a nut-like butter. It works as a perfect substitute in this "peanut-noodle-veggie" dish. I made this dish the other night with lots of fresh veggies from the market. It turned out wonderfully and the best part is that you can control what you decide to put in it and what level of spice you want to enjoy as well. Lately I have been toning the spice down a bit to avoid more heartburn and discomfort. So here's the base of the recipe I used...Peanut-Free Tahini Vegetable Noodle Stirfry Recipe
2 TB of frying oil: olive oil or sesame oil
2 small-medium chopped green peppers
3 cloves of garlic diced
1 pound of green beans (about 1 1/2 cups)
1/2 pound (1 cup or so) of chopped carrots
other optional additions: 1 cup of chopped celery, green onion, or napa cabbage or other favorite veggie

Saute on medium heat in a large frying pan or wok: the chopped garlic and veggies in the oil for 5-7 minutes until they soften just a bit. Then add the following ingredients to create the sauce for the veggies to continue cooking in.

1-2 TB of apple cider vinegar
1 lemon or lime squeezed for fresh juice
1 TB of ground ginger

After adding the above ingredients continue cooking on a lower heat until you have a creamy consistency to the sauce and the veggies are perfectly crunchy and cooked to your liking. You may need to add more tahini or coconut milk to get more saucy texture if you added more veggies or if the tahini you used was more stiff and less oily. Play with the amounts to get the consistency you are desiring.

Other main ingredient to find at a local Asian Market:
In the meantime, soak the Thai rice noodles in a separate pot of boiling water for 3-5 minutes for them to soften and ready for mixing with the sauce and veggies...

Then add the soften rice noodles to the wok to soak in the sauce and veggies for just a minute to mix up the flavors and sauce. Add a handful of fresh Thai basil chopped and added last to the dish to add flavor if you have some on hand or so desire.

Then toss and serve, and it is ready for eating. I hope you enjoy and find rest and peace in your kitchen and in your life. Much love to you.

xoxo

Stephanie

Wednesday, August 18, 2010

Carob Cherry Oat Cookies (vegan)

A cookie a day keeps the doctor away. That's how I feel about THESE cookies at least. A healthy dose of goodness and no guilt if you have two. I love to have a little treat. Just something as big, or as little, as a cookie. Just a little bit of sweetness and something to truly savor. YUM!
Change is upon us. Summer is coming to a close, school will be starting in the next few weeks, and new adventures are coming our way. I feel this way even though I am not returning to school this fall. Yet, this time of year always brings about a time to reflection of a "new year" upon us. The summer was fabulous, but yet it must come to an end... and this fall is different that any other in the past. The new big thing happening has never happened to me before... a baby is coming. Change is a brewin'. Who knows what this will mean for me and my family. We will have a little person soon living with us and new adventures to behold. Diapers, feedings, and more....what to expect, not really sure. But change is the theme for sure.

Making gluten-free changes can seem this way at times. A new thing, or adventure and not really sure where it will take you. Anxiety about your health, chronic pain, or unanswered symptoms may have thrown you in this place of eating gluten-free or making other drastic food changes. It can be scary, especially if you have no one to support you. It can be a continuous challenge that you are just waiting to see results with, and the change may seem like something you are ready to give up on. I know. It's hard. It may even seem impossible.

I want to encourage you. Especially to RELAX! Sometimes stress can cause just as much pain as eating the toxic food, so first of all chill out! It is always surprising to me how many people I talk to about a healthier gluten-free diet, but their biggest health issues come from being over-stressed and not getting good rest in their life. It is a disease: the fast paced life of toxic stress. So maybe meditation, yoga, or relaxing therapies will be more beneficial than a new diet...something to think about alongside a possible gluten-free change.

Gluten-free living can be a new adventure to embrace. This may be the "time of year" to start fresh with a new diet plan. Eating gluten-free is not just for the one that is allergic or who has a disease. It could be for anyone. It could be a way to restart your gut health and get you to a healthier state of your whole body. Many people have reported that eating gluten-free for a season helps with concentration, sleep disorders, skin issues, anxiety, mood disorders, and of course gut health. So, why not try a new adventure that may result in a healthier place? If you are up for the challenge, then embrace the change and start something new.

But if you do, do it for you. Many people think I eat gluten-free because it is trendy, or maybe they think the same when I talk about vegan-ism... that is is just a "cool" trend to become a part of and will eventually fizzle out. Well, my response to that is... " I eat gluten-free because I have to!" I get sick if I don't. It's not about being cool or trendy or on top of the latest health craze for me. I eat this way because I know without a doubt that I can be at my best health if I am not sick with gluten and even dairy in my system. If I know what is hurting my body, why wouldn't I avoid it, right?! Right! Once you get started you may feel the same way, its hard to go back to bad habits of eating when you know how crappy you will feel after you go there. Feeling at your personal best is the BEST motivation for healthier living for sure.

All of that said, eating gluten-free doesn't mean you have to give up your life. Just find new ways to embrace the changes and make baby steps to a healthier you. And maybe make some cookies...

Yes, cookies for sure. These cookies are a good example. A chewy yummy cookie that will leave you asking," what change?!" These cookies are perfectly yummy in every way. I hope you find new ways to freshen up your life this fall, whether than be health commitments, finding time to relax or learning something new. May you find peace and rest in this crazy world!
Carob Cherry Oat Cookies Recipe
1/2 cup of white rice flour
1/2 cup of almond meal (or 1/4 cup of coconut flour or other GF flour if you want to avoid nuts)
2 TB of chia seed meal or flaxmeal
1/3 cup of carob powder (or pure cacao if you ant to include chocolate)
1 1/2 cup of cooking gluten-free oats
1 1/2 ts of baking powder
1 ts of baking soda
1/2 ts. of sea salt
1/2 cup of raw agave nectar, or pure maple syrup
1/2 cup of dried cherries

Mix all of the dry ingredients in a large mixing bowl, then add the wet... and mix well. Add the cherries last and then roll into small little TB sized balls and flatten on a baking sheet. This recipe will make about 2 dozen cookies. If you want them large you can do that. They do not expand too much in the baking process so make sure you press them down on the sheet, or make them larger if you desire. Bake in a pre-heated oven at 350 degrees for 12-15 minutes. Make sure to let cool for a few minutes from the oven so that they stay together. Make sure not to over bake because they will loose their chewiness if they are cooked too long.

Hope you enjoy! Much love to you!

xoxo

Stephanie

Thursday, August 12, 2010

Fresh Fruit Almond Cookie Bars (vegan)

It's hot outside. It doesn't end! I probably don't need to tell you that...I am sure you are experiencing the same. Sorry for stating the obvious, but I just thought it should be said again. Maybe, just maybe, the cool perfect weather of fall will show its face earlier than October this year!

I keep thinking of the snow here in Michigan and how people start to complain about end of January and February that they just can't take it anymore... and spring is really just weeks around the corner... it seems like this August feels like February for me. Just waiting for it to end... for it to cool off. And praying it comes sooner than later. I mean I am not the one to want to complain, but seriously! Does being pregnant mean I can complain a little?! Well, either way, it's been a really hot summer this year and the harvest of fruit and veggies has been different because of it...The cherry season in Michigan was so short because it has been so hot, and the same is going for the apricots, peaches, and now blueberries. Most summers I am still able to pick my biggest bunch of blueberries over Labor Day weekend, but this year is different. It looks like this coming weekend will be the last of the season after just a few weeks of picking. So, I guess that is another reason to make me feel better about not being able to pick my usual 60 pounds.

Something to think about during this hot season is how every season of life brings new challenges and new learning experiences. I think that is why I love eating seasonally so much. Because it isn't about doing the same healthy option every day of the week for the rest of your life...sometimes changes, or the seasons can help us switch it up a bit and really appreciate what is in front of us and living fully present. The challenge is to keep things interesting and not let yourself get discouraged or in a rut.
I have been savoring the fresh fruit we have had... so cooling and delicious after a hot day. So, this dessert still needs to be put in the oven, but after it cools it is perfect with a scoop of coconut ice cream. A summer treat at it's best. I will probably be putting my feet up as well, but first a recipe...
Fresh Fruit Almond Cookie Bars Recipe

Crust Recipe:
1 1/3 cup of almond meal
1/3 cup of white rice flour
1/3 cup of buckwheat flour
2 ts of ground ginger
1/2 ts of sea salt
3-4 TB of sucanat (or powdered sweetener: cane, palm or coconut)
1/2 cup of Spectrum Organic Palm Oil Shortening
1/4 cup of apple juice

Mix all of the above ingredients well and fold with a fork like you would a pie crust. Then with your hands, roll out in a 9x13 pan to press to the bottom of the whole pan. If you want to use a roller, or add a little bit of a crust that is up to you. Then sprinkle the following fruit on top the crust...

Fresh Fruit Sprinkle:
1/2 cup of fresh apricot pieces
1/2 cup of fresh raspberries
1/2 cup of fresh blueberries

Then, drizzle a few TB's of agave nectar or honey and then put in a pre-heated 350 degree oven for 25 minutes. When the fruit is bubbling a bit and baked into the cookie crust, then it is done. Let it cool on the stove so that you don't break the berries up too much when they are super hot. Then after some time of cooling cut the bars into about 12-15 pieces and pull out of the pan. Serve with whipping cream, coconut ice cream, or any other non dairy or fresh dairy ice cream.
It's kinda like a cookie, it's kinda like pie. It's a happy medium summer treat without too many ingredients and too much effort. I hope you enjoy and stay cool over the next few days!

Enjoy!
xoxo

Stephanie

Monday, August 9, 2010

Apricot Chai Bread

Apricots have made their appearance into my kitchen. I found a bunch of them for a bargain price and they were perfectly ready for eating, cooking and...baking of course. So a recipe and a story for today...

Apricots have a special place in my heart because of the first apartment me and my husband moved into after we were married. We moved to the country of Israel just a few weeks after our wedding. We were living there for educational purposes and everything we encountered was a learning experience. The landlord of our apartment got all excited to tell us about the new apartment and she kept talking about the "meesh-meesh" and because we were still learning the language, we were catching maybe like 10% of what she was talking about. Which if you have ever been in that kind of lost-in-translation situation you know it can be interesting. Who really knows whether either side of the conversation is being understood, but hey, we signed a lease and felt like we could make this our home away from home for a while. I noticed we did have some kind of fruit tree right outside our door, but just wasn't sure what to think about it, or if it was ok to eat. It wasn't until a few weeks later when I was going through some vocab words to help me at the market that it finally all made sense about the "meesh-meesh" conversation. She was talking about apricots! Apricots in Hebrew are called meesh-meesh, and are some of the best fruit you have ever tasted. Once I discovered it was apricots growing on our patio I was very excited. It must have been an older tree because it was giving off a ton of fruit and most of them were falling to the ground before they could even be picked or gathered. It was a fun experience to have dibs on the fruit tree, and obvious marks a time of life I will never forget. And that is why "meesh-meesh" have a special place in my heart.
Apricots have a great source of beta carotene, iron and calcium, so they are used commonly for skin and digestive issues. Many ancient skin remedies are made with the kernel of the apricot, and also the apricot juices. When apricot oils are applied topically they heal the irritation of rashes, eczema, and has been said to add longevity to your skin. Then, when apricots are digested before a meal it is said to help ease digestive issues and pain by bringing an alkaline balance to your gut so that nutrients are more easily digested. And because of the high amounts of calcium and iron, they are great for your mood and bones. Really apricots are a good fruit to add to your diet, especially when in season to get the best flavor and nutrients.
Plus, they are so cute and easy to cut up. So, tasty and juicy...yum!
1/4 cup of white rice flour
1/4 cup of millet flour
1/2 cup of buckwheat flour
1/2 cup of brown rice flour
1/4 cup of chia seed meal (ground up in grinder) Or flaxseed meal would work too
1 1/2 ts of baking powder
1 ts of ground nutmeg
1 ts. of ground cinnamon
1/2 ts. of ground cardamon
1 ts. ground ginger
3/4 cup of sucanat (or other sugar alternative)
2 farm fresh eggs
1/3 cup of light olive oil
3/4 cup of coconut milk beverage (or other non-dairy milk) with 1 TB of apple cider vinegar
1 ts of vanilla

1 1/2 cup of diced apricot pieces

Mix all the dry ingredients together first, and then add the wet ingredients last. Mix well and add the fresh apricot pieces last. Then pour into a greased bread pan, or 8x8 glass pan. I used a circle 8x8 glass baking pan and got 8 large sliced out of it. Bake at 350 degrees for 45-50 minutes, or until it is well cooked and no longer gooey in the middle of the pan. If you are baking in a bread pan, you may have to cook up to an hour because the depth of the pan is more and it will take longer to cook all the way through. The chia seed mixture adds firmness and the buckwheat adds a hearty whole grain component. It is a hearty, moist loaf of fruit bread, most likely to be eat for breakfast or snacking, not really sandwiches.
Then, slice into the loaf and have a bite. It's a happy way to celebrate the day, and you will be getting a great dose of nutrients: protein, vitamins, and iron. The chai spices will add a little step to your day, but if you want to avoid them, the bread can go without as well.
Enjoy, friends!

xoxo
Stephanie


Thursday, August 5, 2010

Garden Fresh Pasta Salad

I bet you have some garden fresh tomatoes, zucchini and peppers laying around on your counter or fridge. I know I do, and to top it off, I still end up buying more at the farmer's market because they are so cheap and perfectly ripe right now. But the question becomes what to do with them to really enjoy the season and make something simply delicious. Why not a quick fix pasta salad? It is an inexpensive, seasonal delite.

Gluten-free Tinkyada pasta is my favorite GF pasta for sure. It is perfect cooked al-dente and it doesn't get gummy or broken down. It keeps it's posture and the flavor is hearty and rich. It's almost as if you haven't given up gluten at all. Which is a bonus for the pasta lover like me. Yeah, you can't go to the local romantic Italian bistro to find this, but make it at home and set the ambiance yourself. It's so worth it!

I am re-reading the book, "Eat Pray Love" by Elizabeth Gilbert just because... ok it is because the film with Julia Roberts based on the book is coming out next week, but still... a easy read that I am welcoming right now for sure. Anyways, when the author Liz speaks of the food if Italy I am always stunned of how in America we Americanize Italian favorites. And that if we really ate like the Italians we would probably be very healthy people. They eat their own local seafood and grow their own olives and make their own cheeses. This is the way of the old world I guess. It makes me wonder if half of our country's issues with food is because we are so disconnected from it, like not knowing where it comes from and how it is made. So, it is always a good reminder to eat real food, but also to be more a part of the process... being connected to your local farmer for meat and cheeses, and doing your own little part of planting and growing some of your own food. I feel like that would be a baby step for us in our very industrialized food world to make a difference and see a difference in our own lives and diet.

So this recipe isn't a purely Italian dish or anything, but it does represent eating fresh, local and simply. With some fresh veggies, and some gluten-free pasta you basically have a meal. You can avoid all of the major allergens in this meal and not even realize you are doing it.
Garden Fresh Gluten-Free Pasta Salad Recipe

This recipe has a few steps going on...so here we go:

In a large sauce or frying pan:
1/4 cup of extra virgin olive oil
3 large cloves of garlic minced
1 large zucchini chopped (just over 1 heaping cup-full)
1- 1 1/2 cups of cherry tomatoes diced
1 green pepper diced (should be a heaping cup-full)
salt and pepper to taste (like 1 ts of each is good for me or more to serve)
Lastly add 1/2 cup of finely chopped fresh basil leaves in the last minute of cooking.

Saute the above ingredients, start with the oil and garlic and then add the zucchini, then the tomatoes and peppers together. Saute/cook on a lower heat for 15 minutes until everything is soft and the tomatoes have broken down a bit. The tomatoes and juices with the oil will make a little bit of sauce to the dish...make sure not to burn. Add the salt and pepper in the later stages of cooking, but make sure you add just a bit to spice it up... take off the heat after the basil is wilted, then get ready to pour into the cooked pasta...

In the meantime in a medium pot of boiling water:
Cook 12 ounces of your favorite gluten-free pasta. Tinkyada Brown Rice is my absolute favorite! I cooked the Penne, al-dente, and it made the recipe perfect! Cook along side the cooking veggies to have it ready and al-dente when veggies are done.

Then...In a small blender or food processor:
1 cup of fresh basil leaves
grip-full of fresh oregano or thyme..
1/4 cup of olive oil
1 TB of balsamic vinegar

Blend the above ingredients to make a pesto like, saucy thick substance to mix everything together. So blend, then then pour over the cooked pasta and then add the veggies and mix well all together either in the large pot when the pasta was cooked, and then move to a serving bowl, or mix well in a large mixing bowl and serve. Top with some fresh basil, or a squeeze of lemon, cracked pepper or even some goat cheese or Parmesan if that is your fancy. Let cool a bit before serving if you want it to be a chilled pasta salad. I personally loved it a little warm, and then cold the next day. It is a very simple and versatile pasta salad. I hope you enjoy!
Well, friends... that's my simple fresh recipe for the day. I hope you try it out with all your fresh veggies and enjoy! I know I will be making this simple salad again, and sharing with those I love. It is a perfect summer dish. What better way to savor summer while it lasts? Enjoy!

Tuesday, August 3, 2010

Nut and Corn-Free Gluten-Free Granola

Believe it or not some people can't have granola because of nuts. How sad. I gave up granola until I discovered gluten-free oats, but then many store bought gluten-free granola is made with nuts or corn flakes. So this recipe is for the ones out there that need a nut-free, corn-free, and sugar-free granola option. Hopefully knowing you can make your own homemade wonderful granola without nuts is possible....not hard at all really. Just need a nice combo of seeds and dried fruit. Here is my latest combo that we have been enjoying...

Nut-Free Corn-Free Gluten-Free Granola Recipe
3 cups of gluten-free oats (I used Bob's Red Mill rolled oats)
1 cup of dried cherries (sweetened with fruit juice is best)
1 cup of pumpkin seeds
1/3 cup of chia seeds
1/3 cup of chopped dates pieces
1/3 cup of light olive oil, or coconut oil
1/3 cup of So Delicious coconut milk beverage (or other non-dairy milk option)
1/4 cup of apple juice
1/3 cup of agave nectar
1 TB of vanilla (optional)
1 ts or more of ground nutmeg or apple pie spice blend

Mix all of the above ingredients in a large mixing bowl, and let sit for 30 minutes or so for the liquid to be soaked up well into the oats. This will make the oats softer and also take on the flavor of the ingredients. After soaking, spread out on a large baking sheet with parchment paper if desired. Spread about 1 inch think over pan and then bake in a pre-heated oven of 350 degrees for 30-40 minutes depending on how brown and crispy you like it. You can also slow cook at 300 degrees for about an hour...this dehydrates it better if that is something you would prefer. Then pull from the oven and make sure you let cool in the pan on the counter or stove top for at least an hour before moving to a saving container or bag.
Granola is a staple for us in the summer because it is so easy to bring with you when you are going on a hike, a picnic or anywhere outdoors to enjoy the weather. It is also nice in the morning with a bowl of non-dairy milk or yogurt. It is a summer-version of oatmeal. It can get pretty expensive when buying large amounts at the store, but if you make a batch of your own it will last you a while and you can be creative with what your fav flavors or fruit may be. I love nuts and personally no not have an issue with them, but my husband is detoxing from allergens right now and so this granola was for him. It turned out wonderfully without added sugars as well. So, there you have it. Make some nut-free granola for the nut sensitive person. And if you like nuts and can eat them, check out some of my other granola recipes or others online... making granola is a fun and wonderfully delicious way to bake and start the day!

Much love to you!