Showing posts with label comfort foods. Show all posts

Wednesday, February 13, 2019

Chocolate Orange Mousse


Just in time for Valentines! I haven't been posting much because I have taken on some other work with my food creating. I am also working on putting together a cookbook. YES! FINALLY- it's happening. I will be putting together all of my loved and favorite recipes with a little extra writing and stories to the mix but I am hoping to get that into hands by next year. But this past weekend I found myself busy cooking and loving at another wellness retreat and served these beauties as a little after meal treat. They are just that- a little treat- a few bites of chocolate goodness to savor those last moments around the table and in laughter. I hope you surround yourself with LOVE this week and always and remember to love well you have to start with loving yourself xoxo

Chocolate Orange Mousse Cups Recipe
{gluten, dairy, egg, soy, and nut-free}

1 1/2 cup of dairy-free chocolate chips
2 cans of full-fat coconut milk
1 organic orange zested (1 TB) and squeezed (1/3 cup of juice)
1/4-1/3 cup of maple syrup
pinch of sea salt
drizzle of pure vanilla
1/4 cup of cocoa powder

In a sauce pan, melt all of the above ingredients until melted and smooth and whisked all together. You MUST make sure not to get too hot or to burn, so heat must be on low to melt the chocolate and coconut milk but when that happens, turn off the heat and whisk more together. 

In a small bowl whisk the following:

1 TB of pure plain gelatin (I use Great Lakes brand)
1/2 cup of coconut milk beverage or water works too

Then quickly pour into your blender or Vitamix and let it bloom and set at the bottom of the blender until you pour in the warmed melted chocolate mixture. Then slowly blend on low and work your way up too a high blend while the mixture is getting creamed and frothy. Then pour the mixture into little quarter-pint jars or little cups or dishes for serving. Let them stiffen in the fridge for 4 hours or over night. You can make a few days ahead of time and make them ready to serve as well. I serve up with some fresh fruit or some raspberries that have been crushed and combined with a little fresh orange or lime juice. I hope you LOVE and ENJOY! xoxo

Thursday, April 19, 2018

Chicken Schwarma + Coconut Basmati + Cucumber Salad + Cauliflower Chickpea Curry

Here's a meal that you cannot forget. You know the ones... they stick with you. The smells, the textures, the memories. It has all the qualities of warmth, love, nostalgia even. It may just for me because it does remind me of my time of living overseas in Israel. It also reminds me of friends I have eaten it with. It is the kind of meal that you make for a crowd and sit around the table for hours and laugh and tell stories. So I shared this meal with a group of lovely women I cooked for at the most recent Women's Wellness Retreat. I got to share a piece of my story and my heart with these beautiful brave women. And now, I am sharing this meal with you. I hope you give a try and recreate this same nourishing and loving meal for all of your people.  It is the kind of meal that offers space for CONNECTION, LOVE and a shared LIFE together. ENJOY!

Chicken Schwarma Recipe
{gluten, dairy, egg, soy, sugar and nut-free}

2-3 pounds of chicken thighs (I search down local, organic or all-natural meat for cooking)
2-3 TB of olive oil
2 fresh lemons-squeezed for 1/2 cup of fresh lemon juice
2-3 fresh garlic cloves finely minced
1-2 ts. of sea salt
1 ts. of ground black pepper
1 ts. of ground cumin
1 ts. of ground coriander
1 ts. of ground turmeric
1 ts. of ground paprika
1 ts. of ground cardamon
1/2 ts. of ground cloves
1/2 ts. of ground cinnamon
1/4 ts. of cayenne pepper

In a 9x13 Pyrex baking dish spread out the raw chicken thighs, drizzle some olive oil and lemon juice and sprinkle all the spices and salt and pepper over. Then use a fork or your hands to massage the spices into the meat. Then cover with foil and let it chill in the fridge over night or at least for an hour. Then bake in a 350 degree oven for 15-20 minutes covered and 15-20 minutes uncovered until it is fully cooked. Let cool for a minute and then you can either serve as is or slice each piece into a few pieces and make it more easy to serve on rice or pita.
The meat is super flavorful, juicy, tender and full of goodness. I like how it has it's own sauce and can be easily put over rice, lettuce, in pita or on a flat bread. A flawless chicken dish!
Cucumber Salad or Israeli Salad
{gluten, dairy, egg, soy, sugar and nut-free}
4 English cucumbers, sliced, quartered and halved again (1/8th of a circle piece)
2-4 small campari, cherry or Roma tomatoes (basically need 1/2 cup of tomatoes, diced)
1/3 cup of finely chopped onion, I used red onion for this recipe
1/2 cup of fresh finely chopped parsley
1/2 cup of fresh finely chopped mint
2 lemons squeezed for juice (1/2 cup)
1/4 cup of olive oil
big pinch of sea salt and cracked black pepper

Chop all of the above in a large bowl and drizzle in the lemon and olive oil and herbs and viola, it is that easy. You can add more or less of all of the ingredients depending on what you got on hand or growing fresh or your preferences. It is a simple, but absolutely perfect salad. Crisp and cooling- delicious!
I make this curry recipe as a meat-alternative to this meal, but also it is good all mixed in with the meat and over the rice because it not only has all of the same spices but add textures and flavors you can not plan more perfectly! The recipe is here- Cauliflower and Sweet Potato Chickpea Curry, but I will also put it below just to have them all in the same place :)


Cauliflower and Sweet Potato Chickpea Curry Recipe
{gluten, dairy, egg, soy, and sugar-free, vegan if you use vegetable stock}

2 TB of avocado oil for sauteing
1 large onion finely chopped
4-5 garlic cloves finely minced
1-2 TB of finely grated fresh ginger*
1-2 TB of finely grated fresh turmeric*

2 cups of raw washed, cut into bite sized pieces, cauliflower
2 cups of pealed and cut and cubed pieces of sweet potato

1 14 ounce can of diced organic tomatoes
1 can of full-fat coconut milk
2-3 cups of chicken or vegetable broth
1 14 ounce can of organic pre-cooked garbanzo beans
1 ts. of curry powder
1 ts. of ground paprika
1 ts. of ground cumin
1 ts. of ground coriander
1/2 ts. of ground cinnamon
pinch of cayenne
pinch of cloves
1 ts. of sea salt
hearty pinch of fresh ground black pepper
optional: 1-2 TB of tahini, or a nut butter like almond or peanut for extra thickness and flavor

2 cups of fresh finely chopped greens (spinach, kale or chard)
handful of fresh chopped cilantro
1/2 cup of raisins (I like a mix with golden raisins included ;)

for serving:
serve over prepared basmati or jasmine rice (or quinoa)
limes juice and wedges
sprinkle of fresh cilantro or parsley

In a large pot, saute the onion, garlic, turmeric, ginger with the oil and a sprinkle of salt and pepper, when it cooks down, add in the bite-sized cauliflower, sweet potato and spices and cook for another 5 minutes, then add in the coconut milk, tomatoes, beans and broth. Let cook, bubbling and covered for 15- 20 minutes until the potatoes are soft and the broth reduced. Then add in the raisins, fresh greens and herbs and let those get soft. It is ready for serving now, or you can turn off the heat and let it sit and cool a bit and thicken up. Then serve with prepared basmati rice. With a slice of lime and a sprinkle of some fresh herbs too. 

*If you do not have access to fresh ginger or turmeric root, then you can for sure used dried spices. I would start at 1 ts. each and add in more if you desire a little more punch...


And lastly I will give my instructions for the BEST coconut oil infused basmati rice and the steps to make it flawless each and every time!

Coconut Basmati Rice 
{gluten, dairy, egg, nut, seed and soy-free}

2 TB of coconut oil
3 cups of basmati rice
6 cups of pure water
hearty pinch of sea salt

So this recipe depends on how much rice you want to make I would suggest to make at least 6 cups of cooked rice for 4 people- so that would be about 3 cups of dry rice. You can make more or less of that amount. The key is to always have double the water for the amount of rice you have. 

So first step is to melt coconut oil in a medium to large pot. Once the oil is melted over the heat, add in the dry rice and let it toast and saute for a few minutes. It will start to give off an amazing aroma and you will look to see it has almost changed it color to look more toasted. Then add in all the water and the hearty pinch of sea salt and cover. Let the water come to a boil and then turn off the heat to a low simmer. You will have to watch this so that the water does not overflow. Once you start the simmer it will cook for about 10-15 minutes and will start to soak up all the water and you will see little poke holes formed. When you see this- turn off the heat and let it continue its cook in the pot, covered but no more flame. In about 10 minutes it will be ready to removed the cover and fluff up. It will be just about PERFECT- not too sticky or wet! and the subtle sweetness from the coconut oil and sea salt is just the perfect touch for any curry dish!

Layer all of the above recipes to create the most perfect of meals! I hope you recreate this lovely meal and share in CONNECTION, LOVE and LIFE.

Much love as always, xoxo

Monday, February 26, 2018

Chocolate Muffins

It's a Monday. Sometimes Monday's call for muffins, and even more so, some Mondays call for chocolate muffins. Yes!  These are the kind of muffins that will get you out of bed and on your way. They won't let you linger, or press snooze ONE.MORE.TIME. or even have you wish this day never came. It won't be just another manic Monday if you can start it with one of these babies. They will have you ready to face the hard stuff, one step at a time.
And not to mention with a serving of pumpkin, dates and banana hidden in there beneath the energizing cocoa these really are FULL of GOODNESS too. You can nourish yourself with the good stuff and also have fun doing it! Some days call for the big guys to come out and help you through, and if you got some of these sweet muffins on your side I know you can do this. You were born for this. Don't give up on being you and doing what you know best. We all need you and you are the best person for the job. Happy baking and happy Monday, friends!!!
Chocolate Muffin Recipe
{gluten, dairy, egg, nut, seed, soy and refined-sugars-free}

1 1/2 cup of freshly ground certified gluten-free oat flour
(or use buckwheat flour as a replacement)
3/4 cup of white rice flour
1/2 cup of tapioca flour
1/2 cup of cocoa powder
1/2 cup of coconut sugar
2 ts. of baking powder
1 ts. of baking soda
1 ts. of sea salt
optional: add in a drizzle of vanilla
1/2 cup of pumpkin puree
1/2 cup of date puree
heaping 1/2 cup of mashed banana
1/2 cup of coconut milk beverage
1/4 cup of apple cider vinegar
1/4 cup of maple syrup
1/4 cup of avocado oil
1/4 cup of coconut oil

1/2 cup of dairy-free choclate chips to sprinkle on top before baking

In a large mixing bowl, mix in all the dry ingredients together first, then add in the wet and mix together well. Until you get a smooth and creamy chocolately mixture. Then use a 1/3 measuring cup already greased with avocado/coconut oil and measure out heaping 1/3 cup muffins into muffin parchments. This recipe should make about 12-16 muffins depending on your heaps. Top muffins with extra dairy-free chocolate chips to make it real special and then bake in a 350 degree oven for 22-25 minutes or until they are stiff and no gooey middles. Let cool for 15-20 minutes before you serve. 

Then grab your favorite cupa-hot-something and ENJOY your morning...your day... and all of it...because these will get you on the right step in all the right!

Much love, xoxo

Tuesday, February 6, 2018

LOVE Brownies

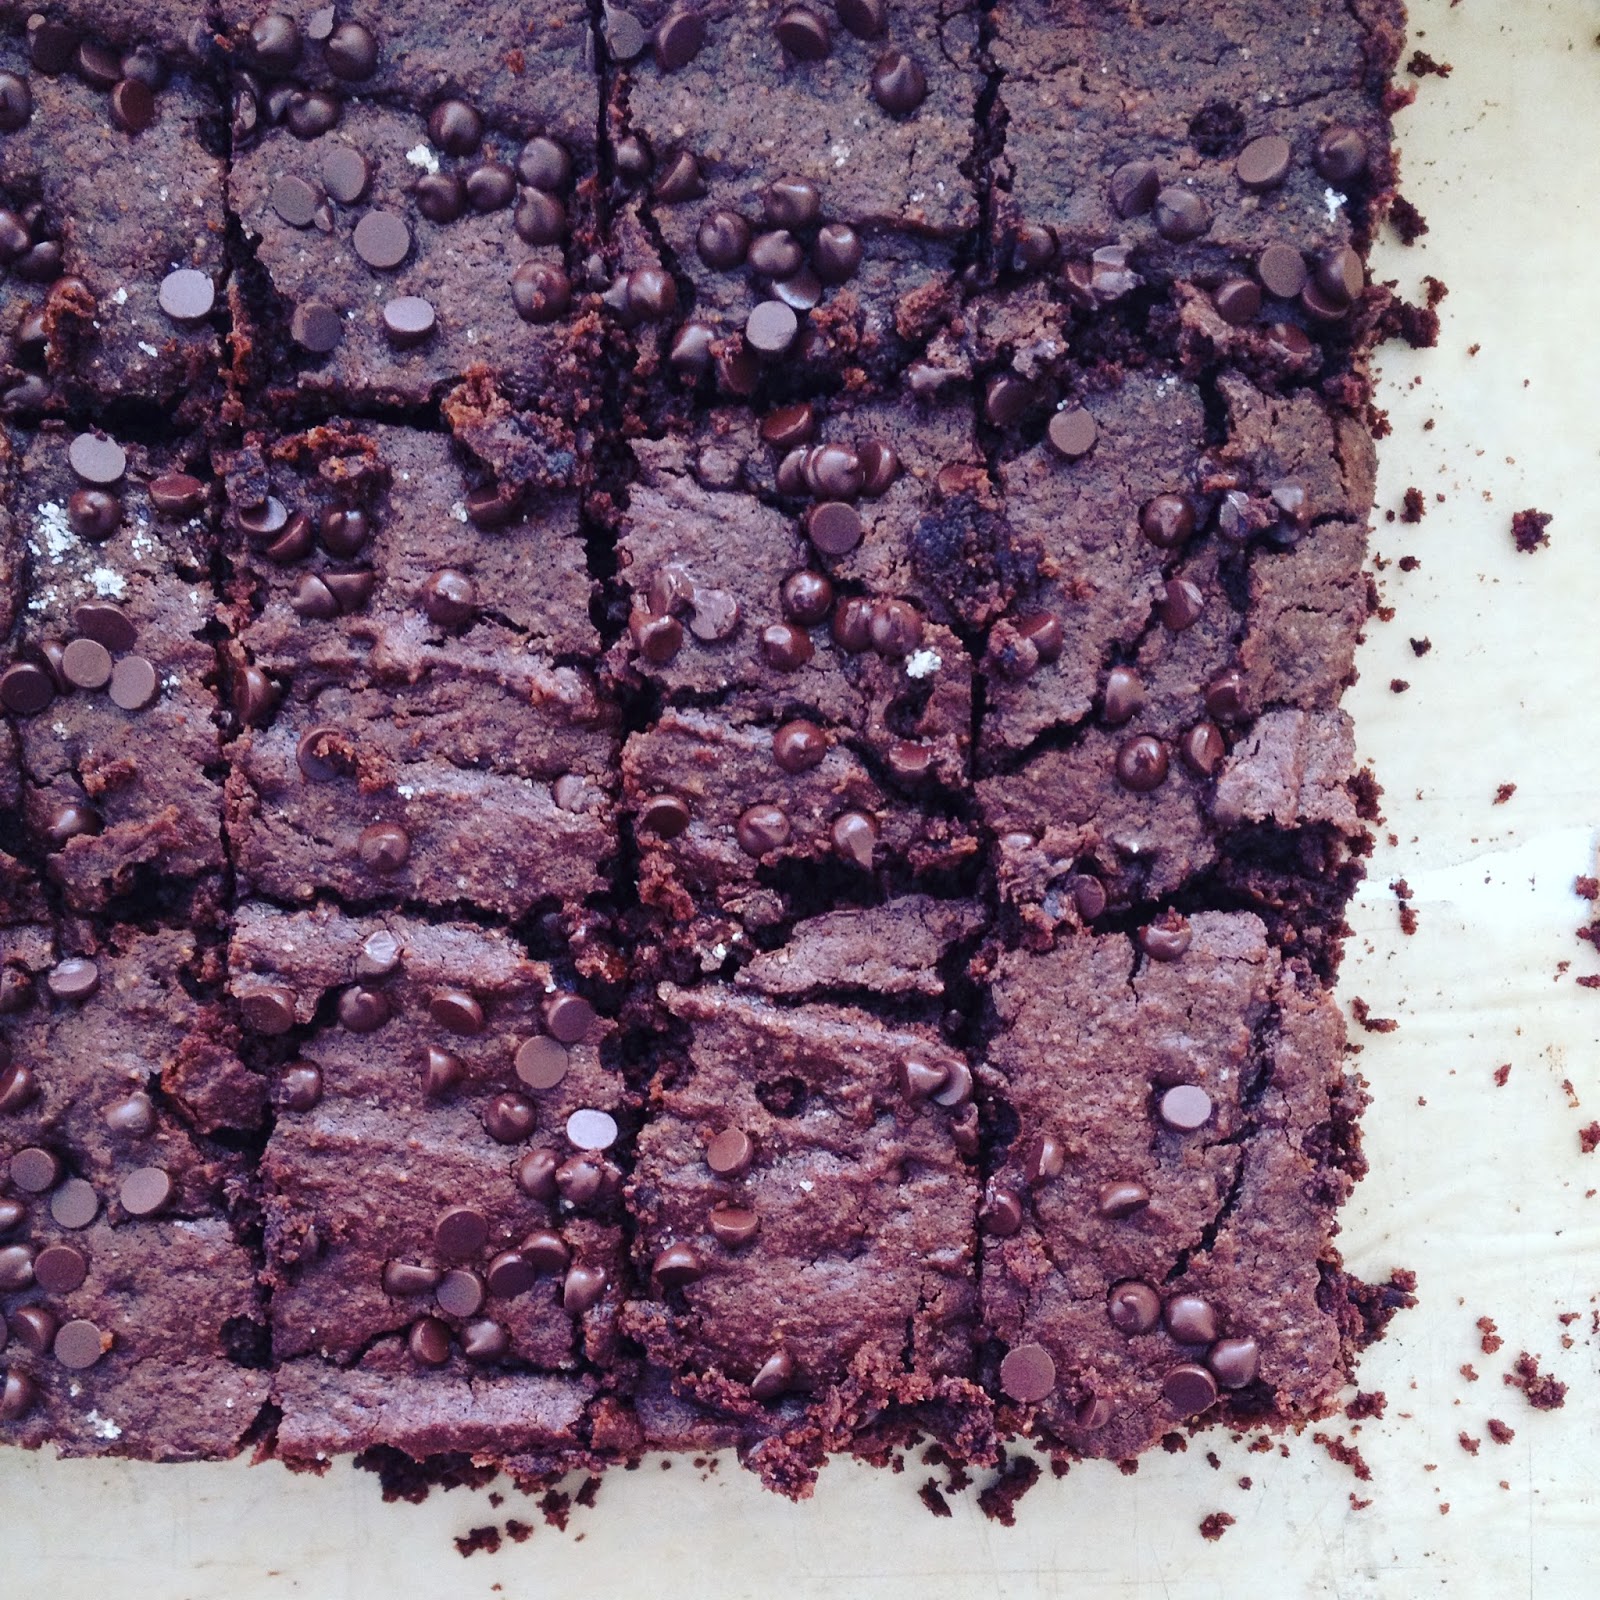
I had the joy and honor to cook for another Women's Wellness Retreat this past weekend. It was another group of fabulous women with such bravery to dig deeper into the inner self for healing, rest, nourishment and self-love. After these experiences, I again remember how I truly believe that women are the force of change and love in the world. They are the ones that are willing to go through the wounds, the pain, and the joys that make us who we are... and then somehow turn that power into superpowers to share with those around them. It's pure magic and amazement to see this beauty unfold!

I make many of my most favorite recipes...my Sweet Potato Lentil Chili, homemade bread, covered in honey butter and berry chia seed jam. And I had to share some of my newest favorite ways to start the day with the warm smoothie or immunity shots. And then there is cookies, and muffins, and so much more...(hot cocoa and marshmallows...) It is so fun...and exhausting in a good way. This time by the end of the retreat I wanted to use up some of the leftover ingredients and I whipped up a pan of brownies to send our guests home with. These brownies were born out of LOVE and leftovers :) And of course they were magic in a pan :)
Love 'Leftover' Brownie Recipe
{gluten, dairy, soy and nut-free}

1/2 cup of GF oat flour
or a mix of a GF flour blend (millet, buckwheat, quinoa, rice)
1/3 cup of cocoa powder (or hot cocoa mix)
1 TB of coconut flour
1 TB of potato starch
1 TB of tapioca flour
1 ts. of baking soda
1/4 ts. of baking powder
1/2 ts. of sea salt

1/4 cup of pumpkin puree
1/4 cup of date puree
2 whipped-up fresh eggs
(you can omit eggs and add in more pumpkin puree or use chia 'eggs')
3/4 cup of coconut palm sugar
1/4 cup of maple syrup
drizzle of pure vanilla

In a saucepan, melt the following together to add to the batter...
1 cup of chocolate chips
1/2 cup of melted coconut oil

optional: sprinkle more chocolate chips in and on top before baking (another 1/3-1/2 cup)
OR if you are nut/seed person you could add some walnut or pecans to the batter here too

In a large mixing bowl, mix together all the dry ingredients and then the wet, finally folding in the melted oil and chocolate chips. Fold all together and then you can add more chocolate chips to the batter or to the top before baking. Spread in a parchment papered  9x9 tin or glass pan to make it easier to pull the brownies out to cut. Spread evenly in the pan and then you can bake in a 350 degree oven for 22-25 minutes. Pull out and let cool for at least 30 minutes before cutting squares to help with less crumbles. 

This recipe will fit into a 9x9 baking pan, or double the recipe up and pour into a 12x15 baking sheet pan. I originally made this recipe doubled and then made it again halved for my own family.

After cutting out squares you can ENJOY just as they are with so much gratitude and LOVE for good deep rich brownies made with wholesome ingredients and ones that you can share :)

Much love as always xoxo

Wednesday, January 10, 2018

Banana Cream Panna Cotta

After eating no sweet treats for the last week, I was getting desperate for a little something and my kids were begging for banana pudding. So then this little treat was created. I wasn't sure what to call it but here it is... A thick creamy custard-type gelatin treat, BUT no sugar and sweetened only with fruit. So my friends, this is ONE special dessert ;)
 
I just love a thick, have to use your spoon, kinda dessert. It's one you might want to lick the jar clean but won't, so you pretend your spoon is your tongue and you try and get every last bit. The cute jars help with savoring each lovely bite too, and you can't help but wish there was another secret compartment on the bottom somewhere. 
But what makes this dessert sweet and worth every bite, is the date puree and the fresh vanilla bean- both with such rich deep flavor- oh and the banana. Which I have found is one of those foods and flavors that people either LOVE or HATE- there is no middle ground on it. I happen to love banana, but some can only imagine baby food. So maybe this recipe is not for you, but if you are a banana pudding or everything LOVER- then this is a must try! Hope you ENJOY!
Banana Cream Panna Cotta Recipe
{gluten, dairy, egg, nut, seed, soy and sugar-free}

2 ripe bananas smashed and pureed
1/2 cup of date paste puree 
1 can of full-fat coconut milk
1/2 vanilla bean scraped for the beans (or use 1 TB of vanilla extract)
1/2 lime squeezed or 1 TB of juice
a pinch of finely grated fresh ginger
pinch of sea salt
pinch of ground turmeric

Put all of the above ingredients in a small saucepan to get warm on low heat. Warm till it is steaming but not boiling or bubbling. Then, in a separate small bowl, mix up the following to let the gelatin bloom...

1/2 cup of coconut milk beverage
1 1/2 TB of pure gelatin 

When the gelatin stiffens, scrap into the saucepan with the rest of the ingredients and turn off heat completely. Then whisk in the gelatin so it is one mixture and pour into a blender and blend until frothy and mixed well and then slowly pour into 1/2 pint glass jars, or even in the smaller size meant for small jams (the 1/2 cup size... called 1/4 pint maybe?). Then put on lids and slide into the fridge for 3-4 hours and then you are ready to eat and ENJOY!

If you are not a banana fan you can add in 1 cup of pumpkin puree in it's place or just leave it as vanilla coconut. I will save those recipes for another post ;)

I hope you give this ONLY fruit sweetened dessert a try! It totally hits the spot when you haven't been enjoying many deserts ;) It is a new favorite around my house and I know Ill be making many more varieties as the month goes on...

Much love and light! xoxo

Wednesday, December 27, 2017

Pumpkin Seed Cranberry Chocolate Bark

Merry Christmas, friends- I hope you are still enjoying in the glow and magic of Christmas! It has been easy for us to do that around here because we have the next week off of school and work. Plus, we have been heavenly blessed with buckets of snow. You can read that as sarcastic or enthusiastic depending on how you feel about it ;) Either way this magical winter land (with a whopping 6 degrees) has allowed us to get all nuzzled and snuggled up inside with old Christmas movies, hot cocoa and marshmallows. So we are enjoying the space to rest and reflect and enjoy each other company (for the most part ;)

This recipe was made before Christmas here and we have been enjoying a little bit every day. I am thinking I will make another batch before the New Year's celebrations- well, because, it's just that good!
I have said it before, simple ingredients makes the best treats! This is defiantly one of those recipes. And one of those that you don't really need a recipe for- but sometimes it's helpful too ;)

This was the easiest treat I made for Christmas, and was my favorite one to go back to! We travelled a bit all over for Christmas parties this year- visiting lots of all-sides of our families and included snowy drives, white-out's, sub-zero temperatures and of course lots of holiday cheer! So this was an easy one to bring with us on all of our travels :)
Pumpkin Seed Cranberry Chocolate Bark Recipe
{gluten, dairy, soy, egg, nut-free}

2 cups of roasted pumpkin seeds
1 TB of avocado oil drizzled
1 ts. of quality sea salt

On a large baking sheet spread out 2 cups of raw pumpkin seeds (green pepitas) with a sprinkle of salt and a drizzle of avocado oil, then roast them in a 350-375 degree oven for 12 minutes. Until they are no longer green but a roasted brown color. Then let them completely cool off. You will hear them snapping and crackling while they cool- such a fun surprise :)
Then when they are cooled, mix with them on the pan...

1 1/2 cup of organic dried cranberries (or raisins... or dried cherries)

Then in a pan or double-boiler, melt the chocolate and coconut oil on low heat until it is all liquefied and then let sit for a few minutes before pouring over the roasted seeds and cranberries. Stir and spread and basically just mix and spread out the mixed seeds with the chocolate. Spread thin all over the 12x15 pan until it is all covered...

2 cups of dairy-free chocolate chips (12 ounces)
2 TB of coconut oil

Once it is all spread out you can put in the freezer or fridge to harden, and then once after 30-60 minutes you can break up in uneven pieces to be a crunchy bark. You could also top with some course sea salt half way through it's cooling process if you want to add a bit more salt to the sweet...

Serve cooled and hard. If you need to keep for a few days if it is not gobbled up- then you can best keep in the fridge or in a cooler place so that the chocolate doesn't melt. This is an ideal winter treat- I be it would turn into a melty mess if it was the 4th of July ;) 


I hope you try and ENJOY this recipe as you stay snuggled up close to all that brings you love and hope. Much love and light to you!!!

Thursday, December 14, 2017

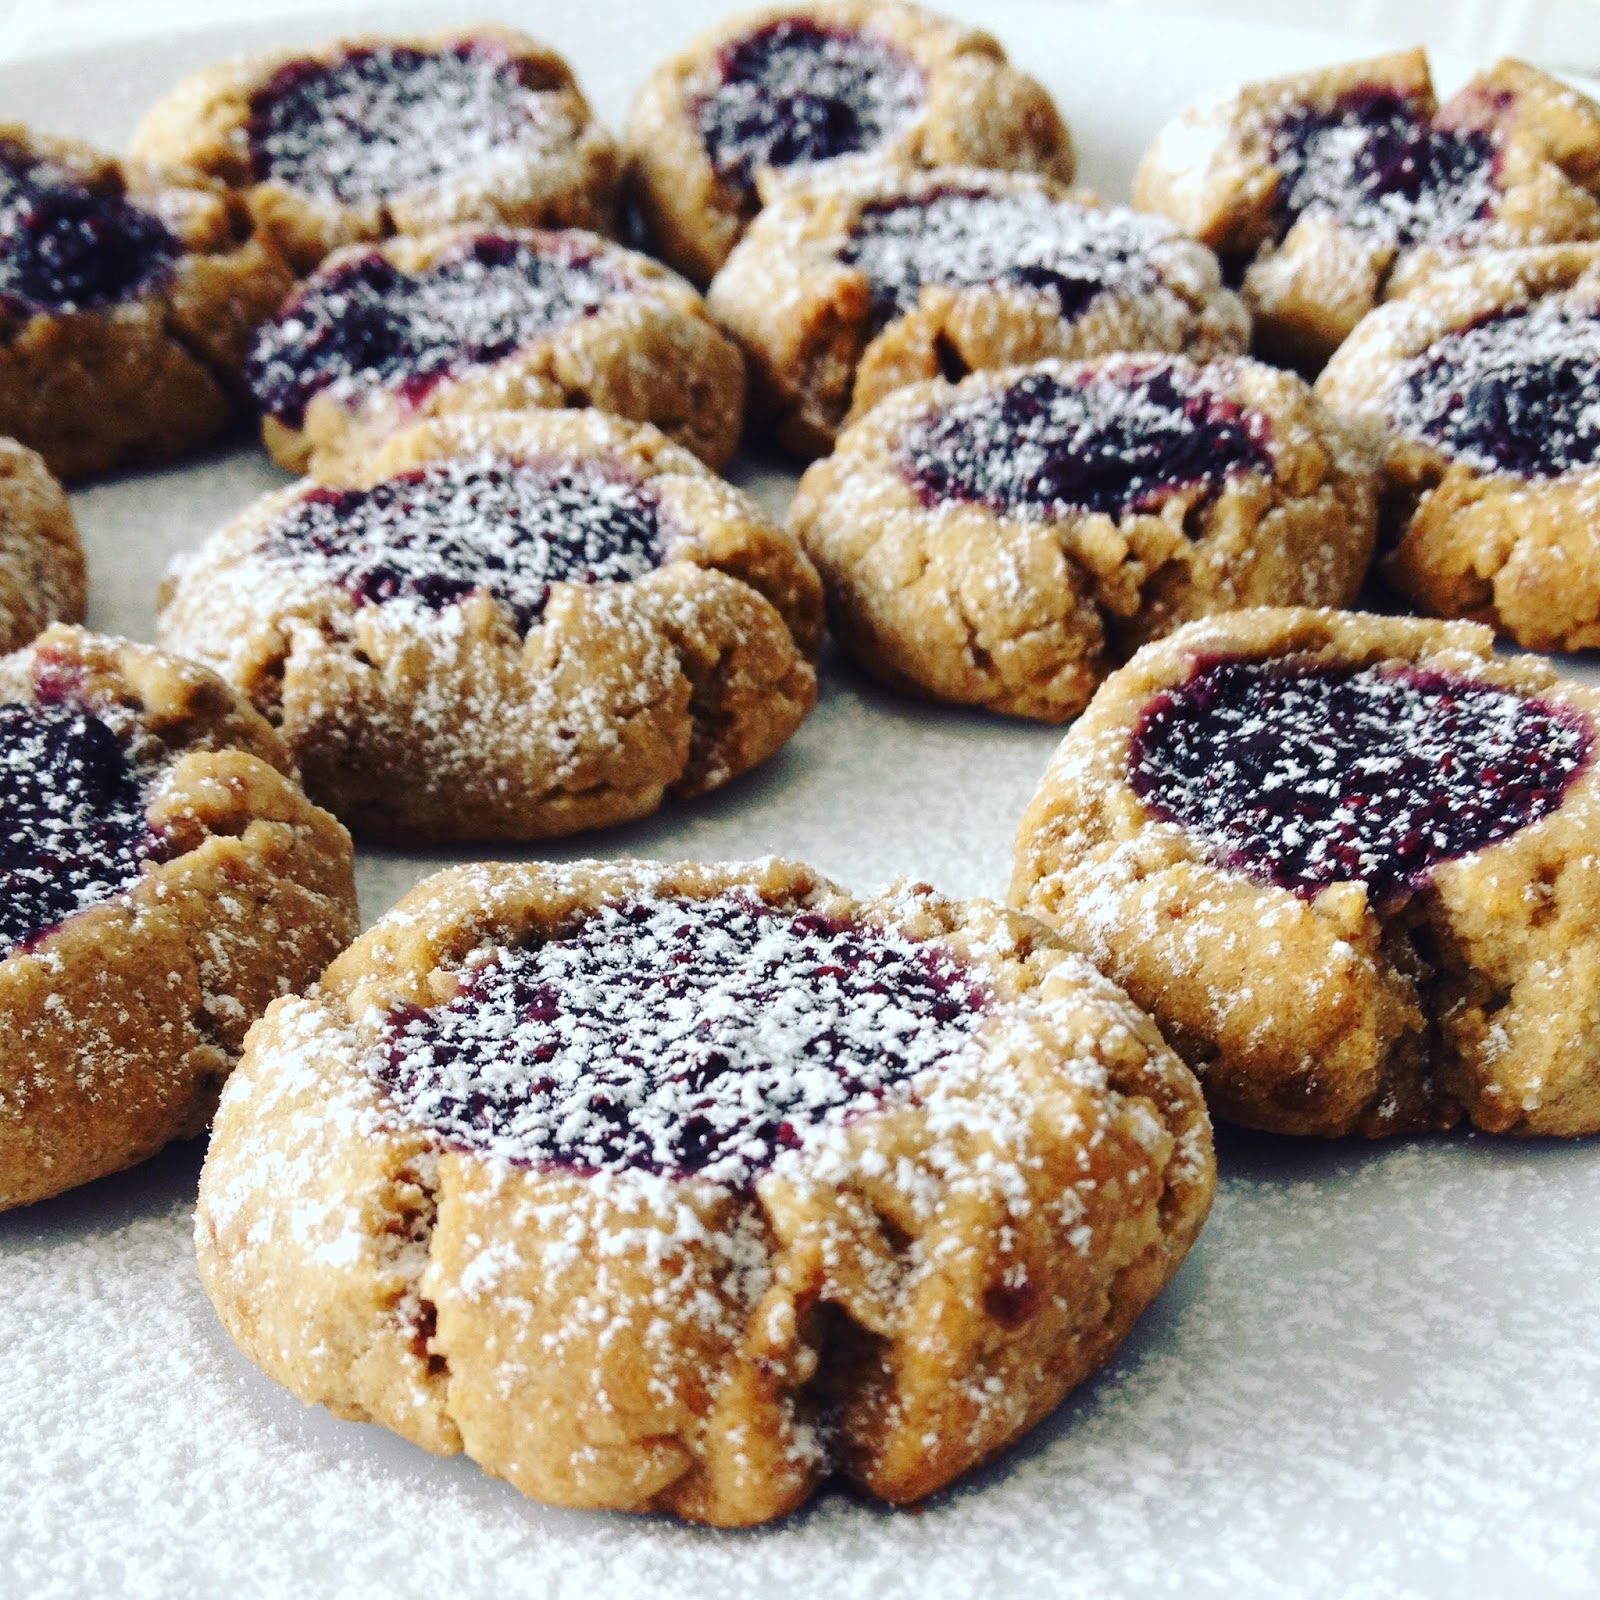
Berry Chia Jam Thumbprint Cookies

This is one feels like tradition to make around Christmas time. It must be because I grew up around an old family version with lots of butter and even cream cheese, but this one is allergy safe with no eggs, dairy or gluten, even can be without nuts or seeds too! I love how it is still soft and crispy and buttery and melts in your mouth. This version also uses my most favorite homemade jam- made with bluberries and chia seeds. It is just the perfect bite-sized piece of wonderfulness! The added sprinkling of powdered sugar matches the powdery stuff falling from the sky today. Warm, cozy and magical is the mood- these are a must to add to the holiday cookie platter- I promise!

Berry Chia Jam Thumbprint Cookie Recipe
{gluten, dairy, egg, soy, nut and seed-free options}

1 1/4 cup of finely ground gluten-free oat flour
3/4 cup of finely ground buckwheat flour
1 cup of white rice flour
1/2 cup of tapioca flour
2 TB of potato starch
1/2 cup of coconut palm sugar
1/2 ts. of baking powder
1 ts. of sea salt
1 ts. of baking soda
1 TB of apple cider vinegar
2 TB of maple syrup
1/2 cup of date paste puree

1 cup of oil: do a mix of either 1/2 cup coconut oil and palm oil shortening OR you could sub in 1/2 cup of your favorite nut or seed butter for the palm oil shortening. It adds a beloved flavor combo of PB and J kinda-touch.

I first blend up my own flours for the GF oats and buckwheat. Then in a large mixing bowl, add in all the dry ingredients first. Mix together well and then add in the wet and room temperature oils. Use a spatula to mix well, or your hands usually do the best trick at mixing equally. You want it to be soft but also all together so you can roll it into balls. It should leave a little oil to the touch on the hands. That is what makes it melt-in-your-mouth- buttery kind of texture too!

Once smoothly mixed, roll into a large ball and put in the fridge for 20 minutes to stiffen up Then pull out and roll large 1 TB-sized balls between your hands to make about 2 dozen cookie balls. Put onto a parchment covered baking sheet and then press your thumb firmly and evenly into each cookie ball. This will leave you a space to pour your jam into. Once 1 large spoonful of jam is entered into the thumb print space on the cookie- bake in a 350 degree oven for 12 minutes. Until golden and bottoms are browned- do not touch or move for another 15-20 minutes to help them from crumbling!
I used my favorite homemade berry jam as follows. If you want to make the full batch and have some more for bread and toast then YES make the full batch, but if you are looking to just make some for these cookies, half or cut the recipe by 2/3's so that you make 1/3 amount to top the cookies :) Here is the recipe for your enjoyment ;)

Immunity Boosting Berry Chia Jam Recipe

2 cups of frozen blueberries
2 cups of frozen cranberries or raspberries
2 cups of frozen strawberries
1 cup of very concentrated elderberry tea*
1/2 cup of juice (I used Antioxidant Force by Smart Juice) but you could use pomegranate or other no sugar fruit juice like cherry, berry mix, or grape. Or at the least you could use water as well.
2 TB of grated fresh ginger
1 organic orange grated for zest and squeezed for juice (could easily sub a lemon)
1/3 cup of pure raw honey
drizzle of maple syrup (or add 1/4 cup more of honey)
pinch of sea salt
pinch to 1 ts. of pumpkin pie spice blend
1/2 cup of whole chia seeds

*Soak 1/2 cup of dried elderberries in 1 quart jar of boiling water and let sit for overnight or longer and then drain the berries out and you have elderberry tea. You could also sub in some already made elderberry syrup if you used up your berries already making that and have it on hand- but you would only use 1/2 cup of the elderberry syrup and add 1/2 cup water. And since the honey is in the syrup as well you may decide to not add as much honey in the rest of the recipe. 

In a medium saucepan, pour in the 6 cups of frozen berries with the tea and the juice and let cook to defrost and get soft. Then add in the ginger and orange juice and zest and bring to a soft boil and bubble and cook from any where to 10-15 minutes until the berries are very hot, juicy and mushy. Then use an immersion blender to blend in half of the mixture to be more smooth and have less chunky fruit. After this it looks like a fruit soup. Then add in the honey and syrup and stir well while it softly bubbles and boils. Turn off the heat and then add in the chia seeds. Stir in well so not to be clumpy and then let it sit in the pan and cool and let the chia seeds soak up the moisture and turn into a thick jammy substance. When it cools for 10-15 minutes you can pour into jars to continue to cool and thicken in the fridge. This recipe makes 3 pint jars. You can half it if you are looking to make less or you can also freeze and then thaw out when needed.

Happy Christmas cookie baking (and jam making ;) I hope you are finding some space to enjoy the baking and make new memories and traditions with gluten-free versions of your favorites. 

Much love and light as always, xoxo

Thursday, November 30, 2017

Creamy Curry 'Leftover' Turkey Soup

You probably made your way through the Thanksgiving leftovers already, so this recipe may be coming a bit too late for you, but maybe you stuck some of that leftover turkey in the freezer or you are still planning on roasting that turkey this coming month. This recipe I have been putting together the week after Thanksgiving the past few years. Turkey soup with a touch of some new flavors, is just the excitement you need after a week of prepping for the big feast. Soup is the easy recovery meal that lasts and nourishes without all the kitchen clean-up. Which then nourishes you in more ways than one when you are needing a little space and time away from the kitchen to rest :)
I think my most favorite meals to make are the one-pot-meals. Ones that have all the veggies, proteins, grains and whatever nourishing roots and vitamins your body craves in one simple pot. It all comes together and to me represents love, family, togetherness. It fills me up in so many ways!
Creamy Curry 'Leftover' Turkey Soup Recipe
{gluten, dairy, egg, nut, seed, soy and refined-sugar-free}

2-3 TB of avocado or olive oil
1 large onion finely chopped
4-5 garlic cloves finely minced
1 TB of fresh grated turmeric
2 cups of finely chopped celery
hearty sprinkle of sea salt
sprinkle of fresh ground black pepper
2-3 cups of chopped carrots
1-2 cups of chopped parsnips
1 TB of Italian spice blend (rosemary, oregano, basil, marjoram, thyme)
Or use fresh herbs if you got them!
1 TB of curry powder

8 cups of turkey stock (or a chicken or vegetable works too!)
1 can of full fat coconut milk

2-3 cups of your leftover turkey (white and dark meat together make the best combo!)
make sure you cut into bite-sized pieces before adding in

1 cup of finely chopped fresh parsley

add in 1 cup of dry small rice pasta or already cooked rice for another added texture
add more sea salt or pepper to your taste
add in a little more water or broth if you want more of a brothy soup

In a large 10 quart pot, saute your onion, garlic, turmeric, celery in the oil for a few minutes. I usually salt and pepper here so to sweat out and cook down the flavors perfectly. Then after 5 ninutes or so when everything softens up I add in the carrots and parsnips and continue to cook for a few more minyes. Then when everything is looking a little softer and smells fabulous- I add in the spices, herbs and liquids. I first cook in the spices the curry and the dried herbs and you can instantly smell them as they are add in and start cooking. Then I add in the stock, coconut milk cream and leftover turkey. This will slow everything down with cooking, but keep the heat the same and let it come up to a boil. After cooking for 20-30 minutes and the veggies are extra soft, add in the fresh parsley and dry pasta. Or if you prefer to add in already cooked rice, that works too! Cook for another 10 minutes and the noodles will be aldente and ready to eat. Serve with a sprinkle of fresh herbs and with a side of bread or biscuits!
Creamy, full of flavor, comforting and nourishing. That is this soup. A bowl of goodness. A bowl of love and gratitude. So much to be thankful for this season, and one way I show my gratitude is cooking nourishing food for my family and sharing it with others. It is a gift that keeps on giving. Happy cooking and resting, friends xoxo

Friday, November 17, 2017

Caramelized Onion and Brussel Sprout Qunioa

This one is my newest favorite combo of fall herbs, vegetables, greens and quinoa. I add in the Dijon mustard and maple syrup for the perfect kind of sweet and tangy and it's just about perfect as a side dish to any side of roast, or make it the main event and add in a few other sides of vegetables or plant proteins and it's a feast better than the any epic feast from the history books. 
I just recently had this discussion with my first grader. He was informing me of all the foods they had at the first thanksgiving feast. And he saw a video about it at school- so he says- so he really knows what he is talking about over here! LOL So I guess according to him a feast should involve popcorn, turkey from a can, and pie with whipped cream?!? I'M SO CONFUSED!!!
Well, I am not sure of whatever they had at 'the first feast'. But I do know what I love to have this time of year to celebrate family time together...a warm, comforting, nourishing, from-the-earth (or backyard or farmer's market) kind of feast. And brussel sprouts and kale are the first on my lists of things to enjoy and have a part of an epic feast :) I'm going to share a few of my favorite VERY SIMPLE sides (or main dishes ;) in my next few recipe posts. It may be too late to add into the Thanksgiving planning but hopefully something to enjoy this time of year as we gather and give thanks and gratitude for all the gifts in our lives.
 Caramelized Onion and Brussel Sprout Quinoa Dish Recipe
{gluten, dairy, egg, nut, seed, soy, and refined-sugars-free}

Veggie Part
1 large stalk of fresh brussel sprouts, trimmed and cleaned from the stalk
(or use 16 ounces of fresh, washed, cut and cleaned brussel sprouts)

1 medium halved onion thinly sliced, not chopped (about 1/2 cups worth)

2 cups of finely chopped lacinato kale that has already been washed and dried

2-3 fresh garlic cloves, finely minced or use 1-2 ts. of ground garlic powder

1/3 cup of avocado oil
1/3 cup of Dijon mustard
1/3 cup of maple syrup

1/2 cup of fresh cut herb combo: thyme, sage, rosemary
healthy pinch of sea salt and black pepper

On a large 15x20 baking sheet, cover with parchment and spread out the kale, sprouts, and onion all over. In a small bowl, whisk together the oil, mustard, and maple syrup, and when all combined, drizzle over the whole tray of veggies. Spread all over and then sprinkle over the fresh herbs, and salt and pepper. Then use a spoon combo or just use your hands and rub and mix the dressing into the veggies. It should soak in and spread out all evenly! Then cook in a 375 degree oven for 25 minutes until everything is crispy, bubbling and caramlized. In the meantime while waiting for it to cook make the following quinoa part...
Quinoa Part
2 TB of avocado or olive oil
1/2 cup of red onion
1/4 cup of coconut palm sugar
1/2 ts. of sea salt

2 cups of dry quinoa
4 cups of water

In a medium pot, saute the onion in the oil and sugar until it gets all caramelly. Then add in the dry quinoa without the water and let it soak up the oil and juices. Then, add in the water and let it come up to a boil, then turn down the heat to low and cook on low until the water is gone and the quinoa starts to poof. Then turn off the heat completely and cover with a secure lid and let it cook the rest of it's time until its ready to fluff and mix with the roasted green part. 

Lastly, In a large bowl add in the cooked quinoa and the roasted veggies and mix together well. Add in a pinch more of salt and pepper and some fresh plucked thyme in the finished product. Serve warm, cooled, or even it is better the next day as leftovers. Isn't the the truth for all thanksgiving sides ;) 

My hope for you is that you find a few simple ways this season to enjoy the fruits and plants from the ground, let it nourish and center you into what matters most. May you be surrounded by those you love most and may you find ways to share and be kind with all of those around you!

Much love and ENJOY! xoxo

Thursday, November 16, 2017

Pumpkin Spice Waffles

Time for a little pre-Thanksgiving treat! I think this year we might start with the pumpkin pie for breakfast or maybe perhaps these pumpkin waffles. Maybe then we can really enjoy them instead of being too full of other goodness. Thanksgiving is not all about the food, yes?!? But so many times it feels that way since it is the focus point of the holiday. But truly, when we have all of our stresses taken away from what the menu is and what the plans are, maybe we can enjoy the simplicity of family and loved ones being together. Slowing down. Saying thanks. Living with amazement and gratitude for the gifts of life and cherishing the memories we can make together.
That is what Thanksgiving we are focusing on this year. Yes, the food. But more so, the time together. We have all had a busy and crazy year in so many ways, but this season begs us to slow down, say thanks and live fully present into our peoples lives. I hope this for you, I hope this for me. And sometimes making waffles and making lattes, is just the way to do it! So I share yet another pumpkin recipe as we gather and slow down and nestle into this holiday week.
Pumpkin Spice Waffles Recipe
{gluten, dairy, soy, nuts, seeds, eggs, refined-sugar-free}

1/3 cup of coconut flour
1/3 cup of potato starch
1/3 cup tapioca flour
1/2 cup of rice flour
1 1/2 cup of gluten free oat flour (I grind my own out of GF rolled oats)
2 ts. of baking powder (Hain brand-corn free)
1 ts. of baking soda
1 ts. of sea salt
2 ts. of pumpkin pie spice (or mix up cinnamon, ginger, nutmeg and cloves)
1/2 cup of coconut palm sugar

1/2 cup of date puree
1/4 cup of pure maple syrup
3/4 cup of coconut milk beverage with 3 TB apple cider vinegar
2/3 cup of pumpkin puree (fresh or canned)
1/3 cup of melted coconut oil or avocado oil
optional addition: 1 ts. of pure vanilla extract

Mix all the dry ingredients together in a large mixing bowl. Then add in the wet and whisk together well. Let the batter sit and stiffen up while the baking powder ignites. Use an oiled 1/3 or 1/2 cup measuring cup to dish out enough batter to pour onto the waffle skillet. I have used this one before...

Then I use my waffle iron according to it's instructions and then even cook for a bit longer than that to get the crispiness we desire. Because this recipe is vegan and has no eggs it can tend to be a bit soft (or soggy) if you do not cook long enough. So its about a 3-4 minute cook time on my iron- but that might be different on yours.  This recipe makes about 6-8 waffles or 12 pancakes. When I make them, we usually eat half and have the rest in the fridge ready to toast up for the rest of the week- so a great leftover!!! Make a big batch and stick them in the freezer ready to go! 
Top with a dollup of maple syrup, coconut cream whip, a pinch of spice, or dried or fresh fruit or whatever your thanksgiving-pumpkin-loving-heart desires!

I hope you give this a try and ENJOY with your people. Much love and warmth as alaways, xoxo

Monday, November 6, 2017

Curry Cauliflower Grain Bowls

Starting out the month of November with a warm and colorful dish. It's one that reflects the colors outside our windows. Finally lots of yellow and orange leaves, and if and when, the sun does come out the golden colors feel magnified all around us. It is my favorite month. November weather is what my body loves after all the heat of summer. I can appreciate this season of going inside because it's getting cold, but also a time to go inward in your soul and reflect the busy months past, or at the least reflect on the many gifts of life what we can hold thanks and gratitude towards. 

This was inspired by one of my first recipe posts of Tahini Roasted Cauliflower... it is the BEST way to eat roasted cauliflower. It literally melts in your mouth and the flavors are paired just about perfectly!
Curry Cauliflower Grain Bowl Recipe
{gluten, dairy, egg, soy, nut, seed and sugar-free}

Quinoa Base
In a large pot, add 1-2 TB of avocado or olive oil, saute 1/2 cup of finely chopped onion, 1 TB of minced garlic and a ts. of fresh grated turmeric and ginger root, then add in 1 1/2 cup of dry quinoa and 3 cups of water (you can double this for a crowd to have more). Keep the heat on high until the water is all soaked in and a slight boil, then turn off the heat completely and cover with a lid and let it finish it's cooking by cooling down and soaking up- about 20 more minutes untouched. Then it will be ready to layer or mix in with the following...

Roasted Curry Cauliflower 
1 large head of organic cauliflower, washed, dried and chopped into bite-sized pieces
2-3 TB of avocado or olive oil
2-3 TB of tahini paste (sesame seed butter)
1 TB of curry powder (or if you don't like spice and want to just use turmeric, that works too!)
1-2 ts. of ground smoked paprika
1-2 ts. of ground garlic powder
a hearty sprinkle of sea salt and black pepper

In a large mixing bowl, add in the cauliflower and sprinkle in all the herbs and spices and oils. Use a large spoon or your hands to rub into the cauliflower, then spread out on a 12x10 baking sheet covered with baking parchment. Bake in a 400 degree oven for 25-30 minutes until the cauliflower is golden and crispy and super soft. 


Roasted Chickpeas and Sweet Potatoes
Use a 28 ounce can of organic Chickpeas/Garbanzo Beans
rinse and wash and pour into large mixing bowl.

Peel and cube 2 sweet potatoes and dump them into the bowl with chickpeas.

Then drizzle with 2 TB of avocado or olive oil. Mix well and sprinkle in the same spices from above, minus the tahini

1-2 ts. of curry powder (or if you don't like spice and want to just use turmeric, that works too!)
1-2 ts. of ground smoked paprika
1-2 ts. of ground garlic powder
a hearty sprinkle of sea salt and black pepper

Then put into a baking 9x13 Pyrex dish or on a parchment covered baking sheet.

Bake in a 400 degree oven for 25-30 minutes along with the cauliflower.

Chicken Addition (optional):
If you are looking to add in a little more protein and/or meat to this dish roast some chicken with a drizzle of avocado oil, lime juice, dried cilantro or oregano, and a healthy pinch of sea salt and black pepper. After I roast the chicken in a glass covered dish in the oven for 25 minutes at 400 degrees, I cut into bite sized pieces and layer on top of the quinoa or mix right in.

Tahihi Cream Sauce
1/3 cup of tahini
1/3 cup of olive oil
1/4 cup of fresh squeezed lemon juice
grated fresh garlic (1-2 cloves)
pinch of sea salt/black pepper
pinch of smoked paprika or cayenne pepper

Whisk all the above ingredients together to get a creamy dressing. You can easily double this amount to make more dressing, the above amounts are good for 2-4 people. 

Then FINALLY, layer all of the above parts and top with a hearty sprinkle of fresh chopped parsley

Optional topping of chopped walnuts, pistachios or sliced almonds as well... if you are looking for a little crunch and finishing flavor and you are not sensitive to nuts. Roasted pepitas or pine nuts work too!

I hope you give this colorful, flavorful and full of color and scents a try! It is absolutely wonderful first time around, but also just as wonderful as a packed lunch or dinner to go the next few days.

Much love and light to you this colorful fall season xoxo

Thursday, October 26, 2017

Apple Spice Crisp Cups

These cuties are ready to eat! Perfect for a fall picnic in the park, school lunches, or just for fun with your friends :) This is basically just another apple crisp recipe, and yes, I could make these in my sleep. But I did add a few different steps and pieces to this one. I also have an alternative option for those of you that want a dessert and still want to eat ONLY fruit as sweeteners, and no maple syrup, honey, coconut sugars. Dates are the perfect sub to just lightly sweeten and moisten the crumble topping and apples just right. Maybe it's because dates taste like caramel to me- and you can't go wrong with apples and caramel ;)
The apples are soft and melty and the crumble is crisp and chewy- the perfect textures and spices to warm your weary evolving soul. The steadfast love for apple crisp never wavers when you can come to this delightful treat again and again and it is always warming and comforting. It doesn't disappoint! It may be predictable and stable- but we all need that to come back to amidst seasons of change.
How perfect that apple season happens to be the season of change and watching the worlds around us die off, nestle in, and go inward. When change is happening it might feel like the world is out of control and there is no more safe spots to land. Until you ground yourself in the earth and the gifts it brings- it seems pretty simple. Pick apples, they are a steady companion. Make applesauce, save for your future months. Make some crisp or pie, and remember who you are and the predictability will bring you back home again. And share, you can never be too lost when you have your people to connect to and share with. So I share yet another crisp recipe with you- I hope you find the space this season to go inward and nestle in- I hope you make crisp and ENJOY!
Apple Spice Crisp Cups Recipe
{gluten, dairy, egg, nut, seed, soy and refined-sugar-free}
Recipe makes 12 jars of crisp or 1 pan

4-5 heaping cups of peeled and finely chopped apples
(use a variety for flavor)
1/2 cup of pure apple cider
1/2 cup of date paste puree*
1/2 cup of applesauce
1/4 cup of maple syrup
1 TB of tapioca starch
pinch of sea salt
2 ts. of ground cinnamon
1 ts. of ground nutmeg
1/2 ts. of ground cloves
1/2 ts. of allspice

*cover 1 cup of pitted dates with 1 cup of boiling water and let soak, and then puree to get a thick and creamy date paste to spread, dip, save and bake with. Once you start- you can't stop! I'm sorry!

Add all of the above ingredients in a saucepan and mix and cook down until they are softer, thickened with the tapioca, and look like an apple pie filling. Turn off the heat and let cool just a bit. Then use a 1/3-1/2 cup scoop and pour into 1/2 pint jars 1/2 way. Or if you are making a pan instead of cups you can just pour the apple mixture into a 9x9 pan. This recipe will make 12 1/2 PINT JARS or 1 9x9 or you could spread it out in a 9x13 pan as well.  

If you are looking to buy these cutie jars to make these crisp cups... you can HERE...

Then you are ready to mix up and top with the oat topping...


topping:
1 1/2 cup quick cooking GF certified oats
1/3 cup of tapioca starch
1/3 cup of rice flour
1/3 cup of potato starch
pinch of sea salt
1/2 cup of coconut oil, palm oil shortening, or a mix of both
1/3 cup of maple syrup
2/3 cup of coconut palm sugar

option#2:
add in 1 cup of date puree paste in place of the coconut sugar and maple syrup in the topping and more date paste in place of the maple syrup in the apple mixture for an only sweetened with fruit option

option#3: You can add in 1/2 of nuts (pecans, almonds or hazelnuts) and sub some of the coconut oil with a nut-butter like almond butter or others...

Mix all of the above ingredients in a smaller bowl, and use your fingers to crumble together and then sprinkle over the apple mixtures in the cups or in the pan. 

If you are making the cups, you will want to put a piece of parchment on a baking pan with 6 cups on each pan. This will help if there is any spilling over to catch on the sheet rather on the bottom of your oven. Bake in a 350 degree oven for 35-45 minutes until golden brown, crispy, and apples are bubbling. Serve warm, just as they are or with a topping of your favorite ice cream. 

These cups are so cute, magical and I must say- SUPER FUN for leftovers, school lunches, picnics, and pretty much the most wonderful food on the go :)

I know you can make these with other fruit varieties as well, I'm sure a favorite would be blueberry too :) But since we are in apple season- I started with apples :)

Happy baking, and happy applesauce making and apple crisp sharing!

Much love, xoxo

Wednesday, October 25, 2017

Squash Pumpkin Apple Soup

It's that time of year again- when I start making all of the same favorites of squash salads and soups, squash pasta sauce, squash mac and cheese, squash risotto and of course, squash soup. It's all you have on the mind when you have mounds of squash, pumpkins, apples and all the savory fresh herbs coming in plenty. Which most definitely includes squash soup- with added coconut cream and a pinch or two of some spice. It's thick and creamy and a bisque without the dairy. It's almost like a cloud of creamy squash that melts in your mouth with each bite. It's at it's best this season and you cannot go through the fall season without it at least once.
This year I tried a few different flavors. I added in leeks and apples for some sweet and tart. I also diversified the flavors by adding in some pumpkin puree along with the squash. And even though, I usually LOVE roasting the squash first in the oven with some garlic, this soup was made much quicker by peeling and cubing the butternut squash and tossing it hard into the broth to cook and soften within 30 minutes. Then lastly I used the immersion blender to cream up and smooth through each boiled and cooked part to blend together to make a creamy...heavenly bowl of goodness.

Squash Pumpkin Apple Soup Recipe
{gluten, dairy, egg, soy, nut and sugar-free}

2 TB of avocado or olive oil
1 large leek chopped (1 heaping cup of finely chopped leeks)
6-8 garlic cloves peeled and roughly chopped
1 large butternut squash peeled and cubed
2 large apples peeled and finely chopped
1 heaping cup of pumpkin puree (fresh or canned)
4-6 cups of broth
1 cup of coconut milk or plant milk of choice
1 ts. of ground cinnamon
pinch of ground nutmeg
pinch of ground thyme and sage
sea salt to taste
ground pepper to taste

raw or roasted pumpkin seeds to top

In a medium pot, saute the leeks and garlic, and then add in the squash and apples and saute for a few more minutes. Then add in the rest of the ingredients and let boil for 20-30 minutes until the butternut and apples get so soft and break down. Turn off the heat and use an immersion blender and blend until so soft and creamy or until your desired texture. You can also cool down and pour soup into a high powered blender and blend on high and then re-warm up for serving. Just be careful this could get dangerously hot :) I like to use the immersion blender for this reason. Serve up with a drizzle of coconut cream and a sprinkle of pumpkin seeds. 

ENJOY!

Happy soup-making! Tis' the season of fall when I make all things with squash and apples- and my kids say...."soup for dinner, again?!?" Yes!!! Yes :)

Much love and light to you, xoxo

Saturday, October 21, 2017

Cacao Pumpkin Spice Muffins

Another happy clappy fall pumpkin muffin over here! This one is my newest favorite (don't I say that every time?!? haha!). It is hearty, rich, flavorful, crunchy and moist in all the right places. It feels like it could be breakfast, or maybe dessert, and nourishing all at the same time. The pumpkin flavor still finds it's place among the deep flavors of cacao, molasses and even the pumpkin seeds. They are chocolatey, but not too much, and besides ALL that, aren't they beautiful!?!?
I wanted to call these "superfood" pumpkin muffins because that's just what I thought of when I made these up with raw cacao powder (the good stuff!) and these crunchy yummy pepitas (raw green pumpkin seeds).  You could add in a few goji berries to the mix and it might just be like my favorite trail mix combo of all time.
If you are looking for a little weekend adventure- give these muffins a try! I made a batch a few days ago, and I'm guessing you could find me in the kitchen again today making another batch. These fall days have been glorious- full of leaves falling and piles, apple and pumpkin picking, and the most perfect of fall nature walks. These muffins want to be along for the ride :) I hope you give them a try and ENJOY!
Cacao Pumpkin Spice Muffin Recipe
{gluten, dairy, soy, nuts, seeds, eggs, refined-sugar-free}

1/3 cup of coconut flour
1/3 cup of potato starch
1/3 cup tapioca flour
1/3 cup of rice flour
1 cup of gluten free oat flour (I grind my own out of GF rolled oats)
2 ts. of baking powder (Hain brand-corn free)
1 ts. of baking soda
1 ts. of sea salt
1 1/2 ts. of pumpkin pie spice mix
1/2 cup of coconut palm sugar
1/2 cup of cacao powder (regular baking cocoa powder works too)
1/2 cup of date puree
1/4 cup of molasses
1/3 cup of pure maple syrup
1/3 cup of coconut milk beverage with 1 TB apple cider vinegar
3/4 cup of pumpkin puree (fresh or canned)
1/2 cup of melted coconut oil

1/4 cup of raw pumpkin seeds (pepitas)
1/4 cup of Enjoy Life's mini chocolate chips


Mix all the dry ingredients together in a large mixing bowl. Then add in the wet and whisk together well. Let the batter sit and stiffen up while the baking powder ignites. Then use a 1/3 cup greased with extra coconut oil and scoop out the batter onto parchment papered muffin tin papers.  You should get 12 large muffins from this recipe or at least 24 minis. Then use some melted coconut oil to brush over the tops before baking, and sprinkle with a mixture of pumpkin seeds and chocolate chips on top of the muffins. You may need to press them down gently to stick to all the tops well. Cover it as much or as little as you like. Bake in a 350 degree oven for 20-25 minutes depending on your oven. Check the middles to make sure they are baked through and then serve after 15 minutes of cooling. 
Gorgeous and tasty! The best combo of fresh and nutritious food! I hope you give these goodies a try, HAPPY BAKING, friends and much love as always, xoxo