Tuesday, May 31, 2011

Sweet Potato & Seed Pancakes (grain & nut-free)

WARNING: These pancakes are extremely healthy, and...they taste like it too :) They are very earthy, chewy and yummy for any health junky or nut. And yet, I know, not all of you consider yourself "nutty, granola off-the-grid-healthy" people, I thought I would share this recipe anyway in effort to share a grain-free and nut-free pancake. And, who knows, this recipe may be just the pancake you are looking for...lots of fiber, minerals and whole goodness. Minus the grains though. The flours and dry ingredients are seed based (hence the title). Like I said, I wanted to try a few grain-less and nut-less recipe ideas, and this is what happened for breakfast. Hearty and fresh!
So, you must considered yourself warned and informed. Yet, let me tell you this, these pancakes are absolutely fabulous for the healthy (and non-healthy) soul...they can be doused in fresh fruit, agave drizzle and a touch of soy-free Earth Balance (or ghee) and you may just feel like you are ready for the day. Instead of maybe on a big breakfast hangover. Trust me, not what you need on a hot summer day like today.
Sweet Potato & Seed Pancake Recipe
1/2 cup of amaranth flour or meal
1/3 cup of buckwheat flour
1/2 cup pre-cooked leftover quinoa (1/3 cup of quinoa flour or flakes could sub)
1/2 cup of sweet potato puree
1 1/2 ts. of baking powder
1/2 ts. of xanthan gum (optional for stiffness, can be made without)
1/2 ts. of stevia powder or 1 TB coconut palm sugar
1 farm fresh egg
1 ts. of pure vanilla
1 cup of non-dairy milk (coconut beverage, hemp, or almond)

Mix all of the above ingredients in a mixing bowl and make sure to whisk out any clumps. Then notices little bubbles in the batter (that is the baking powder doing it's job!). Then, warm a skillet or griddle with a little coconut oil, ghee, or other baking oil. Once skillet is warmed, take a 1/4 cup measuring cup and ladle in 1/4 cup scoop of batter into the pan. You can fit 3-4 small pancakes in a skillet and probably 6-8 pancakes on a traditional griddle. Keep on medium heat to cook, and notice bubbles on the uncooked side that it a sign it is ready to flip to the other side. About 2-3 minutes on each side. Then flip and serve...

Serve hot with fresh fruit, maple or agave nectar drizzle, squeeze of lemon, dollop of ghee or soy free Earth Balance and viola... healthy hearty breakfast ready for eating.
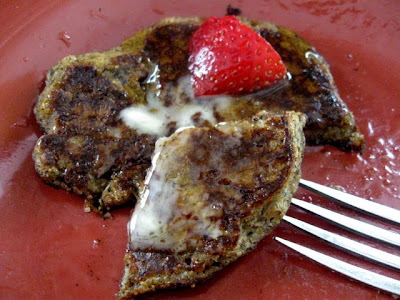
I like how these pancakes offer just as much nutrients as a bowl of porridge, and how they are full of nourishing love. Breakfast should be wonderful...your stomach has been resting and waiting for a colorful nutritious meal. Don't let it starve, and don't feed yourself depleted nutrients. You deserve better. Start out your day with a bang, and you won't feel yucky and sluggish all day. Life is better with breakfast, especially if you are eating some of these lovely healthy babycakes.

May you be filled with love and light today!

Stephanie

Tuesday, May 24, 2011

Multi-Seed Crackers (grain-free, nut-free and vegan)

Lately, I have been researching and investigating more about the grain-free diet and it's ability to help those with IBS, Crone's, and Candida (yeast overgrowth in the gut). Because digestive issues are not always the same for every person it is hard to say that a grain-free diet would be right for every person with these issues. That is the same for the gluten-free diet, yet I do think from my own experience and also working with others that going gluten-free for a time whether you are sensitive or not will bring changes in a good way to your life. Sometimes going gluten-free for the average person will just help their body detox from all of the toxic build-up from our conventional foods. That is why I always encourage those who are having health issues or trying to heal from sickness or other ailments that maybe trying GF for even just a time would help them heal quicker or they will be surprised by the results. Of course, this is much easier said than done for the average person. Going gluten-free may seem like traveling to another country and trying to survive without a translator or directions. But, it really doesn't have to be THAT scary...
Some of my first tips for those trying to start the gluten-free diet:
1. Consider yourself an explorer or a scientist. You are going on an adventure and you want to discover how your body will react to gluten. This means you have to change your mindset and think positive about the changes. Get excited about trying buckwheat cereal and quinoa stir-frys. It will be a trip, and an exploration...

2. Cleanse your pantry of all the gluten-filled foods. Out of sight, out of mind. Then, fill your pantry with new foods that are gluten-free and you want to try. Stick to the basics, vegetables, fruits, and whole grains. The plant based diet is your guide. If it didn't grown from the ground, should you even eat it?

3. Get support! Either connect yourself to other GF bloggers, friends, or groups. This will help you stay accountable, stay encouraged and get support with new recipes and food ideas. You do not have to do this alone. There are literally millions of us that like to eat gluten-free. You are not alone.

I share these tips/ideas/thoughts with you because I feel like I am telling myself this as I try to see what it would be like to go on a strict GRAIN-free diet. This 'diet' seems to step it up a notch because you cannot eat rice (a huge GF staple food). Some things I learned in this process of researching grain-free living more. Quinoa, buckwheat, and amaranth are all SEEDS. Amazing. So, I guess I knew this before, but I really didn't think about it in comparison to the GF grains. This means that to go grain -free, gluten-free, you just have to give up grains like rice, millet, tapioca, sorghum and corn. Which could be difficult, but like as going gluten-free, if you notice digestion changes in a good way, then it may be worth a try to go grain-free for a time.

So, I decided to try this grain-free diet out for a few weeks and see if I like it, notice any changes, or at least identify with the diet so that I can help others who are trying to do the same thing. So you may notice a few grain-free recipes on this blog over the next week or so. And this may be helpful to those on the SCD-Specific Carb Diet, ACD-Anti-Candida Diet, and even the Paleo diet. Just trying to be adventurous myself and have a little fun with it...
And now, I have been showing you my tempting pictures of grain-free crackers for a while, and you have been patiently awaiting a recipe... I know :) I will share. These crackers are made from all the very nutritious seeds that can be made into meals/flours when ground in a food processor or blender. So I made these simple and nutritious grain-free crackers to try out, and they turned out very yummy and could be comparable to the famous Mary's Gone Crackers (my husband's favorite!)

Multi-Seed Crackers Recipe (grain-free, gluten-free and vegan)
1 cup of ground raw sunflower seeds, in a food processor or blender
1/2 cup of ground amaranth seeds, or amaranth flour
1/2 cup of ground quinoa seeds, or quinoa flour
1/3 cup of ground flax seed (flax meal) or chia seed could work here too
1/4 cup of pure water
3 TB of olive oil
3 TB of non-dairy, non-grain milk (So Delicious Coconut Beverage) or (Tempt Hemp Milk)
2 TB of gluten-free tamari sauce (optional ingredient if want to be soy-free)
1 ts. of ground mustard
1 ts. of either dried thyme, oregano or marjoram (or a mix or combo of the herbs)
1 ts. of dried garlic powder
1/2 ts. of sea salt, or more to your taste
1/2 ts. of ground black pepper, or more to your taste
a drizzle (about 1 ts. or so) of agave nectar, maple syrup or stevia ( just to sweeten a touch to take off the earthy edge of the seeds)

Grind the seeds, or use seed flours and mix all together in large mixing bowl. Then add the seasonings and the wet ingredients. Mix together with a spatula to evenly mix all the way through. The dough should be stiff and pliable. Then take the dough and roll in on a parchment papered large baking sheet. Have the parchment paper under the dough, and place a large pieces of paper or plastic wrap on the top and then use a rolling pi to roll out a paper-thin dough on your sheet. You can either use a biscuit cutter and make circle crackers, or use a pizza cutter and cut squares. You MUST cut the crackers before baking for them to be crackers and easier to cut.

I rolled out my dough to be 16x20 ish, and cut about 36 crackers or so. Sprinkle some raw seeds on the crackers before baking if you want....maybe sunflower, sesame, or flax. Then put in a preheated 350 degree oven for 25-30 minutes, until the crackers are golden brown. Then pull from the oven and let cool at least 5-10 minutes before moving. Then when crackers are cooled you can stack them and store them in an airtight container. The longer you let the cool on the stove or counter, the crispier cracker you will have.

This recipe should make 3 dozen crackers, but could be more or less depending on your size.

Things you can eat with your yummy multi-seed crackers:


Or I think a nut or seed butter or even some homemade fruit preserves could be yummy as well! The sky is the limit for these crackers. Make them feel loved! I have a cracker pictured below covered in my yummy homemade hummus.

These crackers are very simple, vegan, and grain-nut-gluten-free. So, as you can see, it isn't that hard to have a snack that you could enjoy and be on a 'strict' diet. If you are new to this world of grain and gluten free, I suggest you take a deep breath, and then go out and buy some quinoa, amaranth or buckwheat to try. Yes, they may only be found at a special health store, or you may get looked at funny at the store you shop at while looking for it, but like I said before...You are on an adventure. So, don't get discouraged. Take a big step of faith forward and try something new!

Aren't these crackers pretty too?! I think so. So cute and wrapped up and ready to eat. You don't even have to cut through a box and plastic bag to get to them. Hm, how convenient! :)

I hope you have a fantastic day! Much love to you!

Sunday, May 22, 2011

Sunflower Chocolate Pudding Pie (vegan)

I love when 'after-the-baby-goes-to-bed' cravings evolve into amazing dessert treats. Well, that is how this one started a few weeks ago. I was just sitting on the couch reading a magazine waiting for my husband to get home. Baby was asleep. It was a long day of diapers, tomato plants, teething and cleaning. And, I was putting my feet up. That is a good feeling, no?! I think so. I sometimes even get a second wind at this time and forget how tired I was.

Well, this night in particular I was craving just a bite of dark chocolate. I think you can understand. But there was no dark chocolate in the house to satisfy this craving. So after looking in the fridge, the freezer and the pantry, I came up with dark cacao powder, sunbutter, and sunflower seeds. Hm, what could I make with sunbutter and cocoa?!

Well, I made a pudding like substance on the stove top and wasn't sure what I was really making. But, it turned out and it was tasty. I have been on a sunbutter kick lately, and have really fallen in love with sunflower seeds all over again. I licked my bowl and spoon and then saved a little for my husband, and thought that this pudding creation would make a great pie.
And, that's just what I did a few days later :) I made a yummy pudding pie dessert to celebrate 6 years of marriage with my hubby, a new garden, a healthy baby, and the first year in our new house. And of course the list could go on and on for things I am thankful for...

Sunflower Chocolate Pudding Pie Recipe (vegan)

Crust Ingredients:
1 cup of ground raw sunflower seeds (grind whole seeds in food processor)
1/2 cup of ground gluten-free rolled oats, or GF oat flour (grind in processor)
2 TB of tapioca flour
2 TB of coconut palm sugar 
1/2 ts. of sea salt
1/3 cup of warmed coconut oil, or Earth Balance, soy-free

Grind the sunflower seeds and oats and mix them together in a bowl with the sucanat, tapioca and salt. Then add the warmed coconut oil (or Earth Balance) and mix into a nice crust dough. Then pour the crust into a 9x9 pie pan and spread very thin all over pie pan and form a nice crust with your fingers or a fork. Crust will be crumbly before baking, but do your best to have it stick together and be the same thickness in the pie pan. Then bake in a preheated 375 degree oven for 15-18 minutes until the crust is golden brown. This crust can be made with ground almond as a sub for the sunflower seeds, and any GF flour could be a sub for the oat flour. I made this crust with the sunflower and oats because I wanted it to be a replica of a graham cracker type crust. It turned out perfectly crispy and "buttery". Pull from oven and let cool completely before pouring in the chocolate pudding.

Chocolate Pudding Filling Ingredients:
1 cup of creamy sunbutter (sunflower seed butter)
1 1/3 cup of non-dairy, no-nut milk (either hemp or coconut beverage will work, I used So Delicious Vanilla coconut milk beverage)
2 TB of dark cacao powder
2 TB of tapioca flour
1-2 TB of pure maple syrup

Mix all of the above ingredients in a sauce pan on the stove on low to medium heat. Whisk in the sunbutter with the milk and make sure there are no tapioca or cocoa clumps. Use a whisk or spatula to mix well, and within minutes you will get a pudding like substance. Let cool just a minute, and then get ready to pour into a cooled pie crust. When ready, pour the chocolate pudding into the pie crust and spread out to look pretty. Then put pie in the fridge for at least 2 hours, but you can keep in fridge as long as you want before serving. After two hours, the pudding pie will be stiff and ready to serve.

You can top the pudding part of the pie with some added toppings if you desire...

Optional Toppings:
more crust batter
raw sunflower seeds
strawberries or raspberries
banana pieces when ready to serve

Cut slices of pie with a clean knife and serve up with an optional topping.

The best way to keep this pie is to refrigerate.

I topped my pie with some raw sunflower seeds and then also some fresh organic strawberries for an added touch of color and fresh flavor as well. The fresh berries with the chocolate pudding was a really yummy combination too, which may lead to another desert idea soon ;)
This dessert will seem a bit decadant. It's true... how can you be eating such a delicious dessert and it still be gluten and dairy free, and vegan too? Well, friends, real foods and fresh ingredients make it again. You gotta love how you can get creative with some simple ingredients and come up with a beautiful and yummy pie.
It was a perfect treat to celebrate an anniversary, and I am also looking forward to when I can make it again for other friends and family gatherings. This pie will impress anyone you plan on making dessert for, I promise. I mean, just look at the bite of crumbly crust and rich chocolate...best.pie.ever.

So friends, I hope you find space to celebrate with your loved ones. Remember, good health and life comes out of having deep relationships, love and gratefulness. I know times when I am stressed, sad or greedy is when I start feeling sick again. Eating real food and gluten-free for me is what it means to be the healthiest I can be, but just as important to good food and a pure diet is healthy relationships and love. So, if you are like me and sometimes spend too much time on a strict diet, I say loosen up today and let yourself live. Don't let your gluten-free living define you or your relationships. Be free of the restrictions and find a balance of joy, love and gratefulness in all areas of your life.

May you be blessed with love and happiness today, and find peace in the simple joys of life and chocolate pie...

Much love to you today!

Saturday, May 21, 2011

Lentil Baked Beans (vegan option)


Baked beans were one of my favorite cook-out sides growing up. And, I did get made fun of for it by my siblings and cousins. If I pronounced my love for them out loud, someone would for sure start up the famous beans song, which ends in how it is good for your heart and makes you know what. So, I am always a bit shy in proclaiming my love for baked beans. But seriously, I am all grown up now and confident in my food choices. So, why not love baked beans?! They are delicious and nutritious and can most of the time be made vegan if you desire. And, lentils tend to be a lot easier to digest than other legumes. So, if you do for some reason have issues in your gut with beans, I say try lentils! Throw away your misconceptions, strap on your big girl boots, and make yourself a nice dish of baked beans. With lentils? Yes, with lentils. Not traditional, like my last recipe of homemade baked beans, but interesting and tasty for sure.
Lentils are so simple to cook. You just need at least an hour and you will have yourself a dish. You can forget the grilled meat and stick to baked lentils, veggies and fruit for dessert and still stick to a complete plant-based diet for a summer gathering or holiday. Yes, Memorial Day is just around the corner, and an unofficial official way to start the summer. I added some uncured, all-natural, unprocessed, turkey bacon to my dish at the end for some added spunk and flavor, but you do not need to add this. Or if you desire could add other forms of 'meat-sides' or vegan versions of bacon (I think this eggplant version would be yummy) as well. Really, it is what you make of it. Stick to the basics though, good green lentils, and spices to sweet and spicy you up.

Lentil Baked Beans Recipe
1 medium finely chopped yellow onion
3-4 garlic cloves minced or grated
2-3 TB of olive oil drizzled on the bottom of the pot/pan
1 1/4 cup of dry green lentils (soaked overnight if you wish)
3 cups of pure water
1/2 cup of organic ketchup (agave sweetened)
1/4 cup of mustard
3 TB of tamari sauce
2 TB of agave nectar (or sucanat is a good option as well, more or less if you desire)
2-3 TB of apple cider vinegar (if you like tangy, use 3 TB, if not too much use 2 TB)
1/4 cup of blackstrap molasses
2 ts. of dried cumin
2 ts. of paprika
2 ts. of dried cilantro (added touch of flavor)
1/2 ts. of sea salt
1/2 ts. of ground black pepper


Start with sauteing the chopped onion and grated garlic in the olive oil in a large 5 quart pot on high heat. Saute till onions are translucent and garlic is toasted. Then add the dry lentils and toast those up for just a few minutes, continue stirring on high heat. Then add the water and the rest of the ingredients and spices. This is when you will need to turn the heat down to medium and cover your pot to let the lentils cook. This process can take anywhere from 45 minutes to 1 hour depending on how high your heat is, and how fast your water soaks into the lentils.

If after 45 minutes your water is soaked up and your lentils looked cook, pull out a spoonful of them and try them and see if they are soft and ready for eating. If they are, then turn your heat off and continue to let the lentil sit and finish cooking/cooling off a bit. But if they are still a bit "crunchy" and you want them soft... then I suggest you add another cup of water and keep cooking on low until the water is soaked in and the lentils will be softer. When lentils are soft and sauce is all soaked in and thick, you are ready to serve...

To have these lentils be 'baked-beans' I suggest after you cook them that you put into a serving glass bowl that can be covered and also warmed in the oven. This is when you would add your extra bacon options or even an added dollup of ketchup or molasses for warming and added topping. To warm the baked lentils just add to a 275 degree oven for 20-30 minutes to have the lentils be warmed and baked for your special occasion (or for dinner ;)

I hope you get outside and enjoy this amazing pre-summer weekend and be blessed!

Much love to you!

Monday, May 16, 2011

Garlic Lemon Asparagus Spaghetti (vegan)

I made it to the farmer's market this weekend and was excited to see the first of spring's bounty. Asparagus and rhubarb are my favorites in May! So, of course I bought enough to enjoy for the next week, and decided on a making a little 'rachael ray' style pasta dish with my fresh ingredients.

All of the main ingredients to this dish are so good for you this time of year. Because as your body cleanses from the winter month's buildup and gets ready for the warmth and sun of summer, you need a good detox kick. Here is my ingredient list with a few notes on why this foods are so good for you:

Garlic: Once known as the wonder-drug because of it's healing properties to help with the common cold and sicknesses. It helps build up your immune system with it's high antioxidant qualities and also kicks the butt of free radicals in your body. So, in the fight for better health, you want garlic on your side for sure!
Lemon: Is a high-alkaline nutrient that will cleanse your cells so that you can contain more oxygen in your cells and body as a whole. It is anti-cancer fighting because it allows your cells to stop bad cell division which leads to more free-radicals and cancer cells in the body. Lemon will help balance your digestive tract and bring more light to your life. I mean just look at them, it's like sunshine gave birth to a citrus fruit :) So bright and cheery!
Asparagus: Packed full of folate, vitamins and even calcium. It's antioxidant and phytonutrient components will help against inflammation that could cause a defect in motor skills and in your cells. It is said to help in digestive ailments because of it's ability to clean and build up your body to reduce the risks of heart disease, bad cholesterol and cancer. Pretty much if you are looking for a solid vegetable to add to your diet, especially in spring, you need to get some asparagus...oh how convenient that it is in season, eh! P.S. Isn't it pretty too!!! :)
Kale: Kale is said to be one of the healthiest vegetables available. So, it is a #1 pick for detoxing and cleansing the body. Most recommend slightly cooking, steaming or sauteing it to get the most health benefits out of it. This is because it allows the fiber-related content to bind with the bile in your body- which allows it to secrete the bad cells and cholesterol from building up. So basically this cruciferous veggie will find the yucky in your body and carry it on out. So Kale is your detox best friend. Did I mention- a ginormous amount of vitamins and antioxidants as well.... pure goodness.

Parsley: This herb is said to be the world's most famous herb and garnish, but it is so much more powerful that even that. It contains vital flavinoids and oils that can neutralize carcinogens and can actually stop the growth of tumors. Therefore, is a HUGE cancer and free radical fighter. And in some places is in the world is considered a super-food that is more medicinal than garnish. Fresh parsley is always best and contains the highest quantity of vitamins.

Brown Rice: Brown rice is a staple, not only to the gluten free diet, but really to the world. In some parts of the world, languages translate "to eat" as "to eat rice"... it really is that popular. Not to mention, full of whole grain goodness and high levels of magnesium and iron to strengthen and balance your body. Don't waste yourself on white rice ever again- eat brown rice to gain the true benefits of this powerful and helpful grain.

So, If I have not convinced you already from some of the great detox-rockstar ingredients in this dish, let me just say that this dish is simply beautiful. Beautiful to the eyes and nose. Just look at that pretty asparagus and kale. But then the aroma of lemon, garlic and parsley will have you either crying or drooling. And, with the simplicity of mixing vegetables, garlic and lemon and pasta is so pure and simple that it will have you feeling like a real gourmet chef. So, let's get to the recipe, shall we?

Garlic Lemon Asparagus Spaghetti (vegan):
1 pound of freshly snapped asparagus
8 ounces (about 2 cups) of chopped raw kale (curly or lactino both work)
3-4 grated, diced or minced garlic cloves
1 organic lemon (use for juice and zest)
1/4- 1/3 cup of extra virgin olive oil
sea salt and black pepper to taste
1 cup of fresh chopped parsley
1 12 or 16 ounce of brown rice pasta (Tinkyada GF pasta is my FAVORITE)

To get the best flavor and freshness out of this dish here is the process I followed to make this great recipe:

1.) Soak, wash and slice your asparagus into little saucer-circles. About 1/2 inch thick is best. Then steam or boil the little asparagus pieces for about 5 minutes until they are soft and bright green. Then drain and set aside ready to add to the following saute...

2.)Start boiling water for your pasta. Then start sauteing the grated fresh garlic in the olive oil in a large saute pan. Just cook the garlic enough to start smelling it and do not burn. Then put in the finely chopped fresh kale (about 2 cups) and then you will have the oil, garlic and kale cooking. Zest one lemon and save the zest for the end, and then add the juice of one lemon to the sauteing garlic and kale.

3.) Then add your spaghetti pasta (or other pasta shapes work too) to the boiling water, and let cook until al dente- ready for eating. Then in the meantime, add the steamed asparagus pieces to the sauteing kale and garlic. Let cook for 1-2 more minutes, but you should end up with a kale, asparagus, garlic, lemon sauce that is covered with olive oil. Set aside until pasta is done.

4.) When pasta is cooked, either add to the large saute pan of veggies and oil, or get a big serving fish to add the pasta and veggies together and stir. Stir the veggies and pasta together to get a good blend of the asparagus and kale throughout the pasta. Make sure you drizzle a little extra olive oil if you need it to finish it off, and top with fresh parsley and the lemon zest.
5.) The lemon and parsley will add the final touches of flavor, if you need to add some sea salt and black pepper to your taste, then go for it, and if you eat dairy or are not on a detox, then I bet some parmesan or goat cheese would be a great topping as well.

6.) Serve warm and fresh. A side salad could be a nice touch, but really this dish will speak for itself with a balance of flavors and veggies and grain. It is a great one-plate dish. If you have leftovers I suggest you either eat them warmed or even pour some hot marinara sauce over the cold noodles to have better tasting leftovers (sometimes the cold brown rice noodles are not so great the second day) But the hot sauce will soak into the noodles and you may have better results.
7.) Now, lastly, ENJOY! This could be a great detox meal and is just perfect this time of year because you can get the best fresh asparagus around (especially if you live in Michigan) and the fresh, clean taste is just something I know your body is craving!

Well, friends, I hope you enjoy this simple dish. And enjoy this spring season. It is so amazing to plant a garden and also to start to get fresh local produce again. That alone must bring special goodness to any spring detox...maybe there is hidden vitamins in that too. :)

Many blessings, and much love to you today! Happy Monday!

Friday, May 13, 2011

No-Bake Sunny Fudge Bars (vegan)

FYI: this post was lost on 5/12/11, and had to be reposted on 5/13/11, sorry about the confusion and loss of recipe. Hopefully everything is up and running again!
Well, so far it's been busy in the month of May, and it's not even half way over. I have to attend a graduation, two weddings, a wedding shower, end of the school year events, and so many other random commitments. May is like a holiday extravaganza! It's nuts! All happy, joyous occasions for sure, but still crazy! I guess I can't blame others for weddings... my husband and I will celebrate 6 years this month. Very exciting as well. I think if we were to plan our wedding again, I would say we should have gotten married in March... a slower time of the year. OK, I am mostly kidding. :) But May is a great time of the year with spring time leaves and flowers... and did I mention my vegetable plants growing and waiting to be planted. Yes, the goal is to have the garden planted and set by the last week of May. A good time, just busy.
So, when I was given a convenient gluten-free cereal to try and review , I was pretty excited. I had some leftover cereal from Nature's Path Organics ... the Crunchy Maple Sunrise, and it was so good that I had to make something more with it. That is how these quick yummy bars came into being, and did I mention, EASY!


Sunny Fudge Bars Recipe (vegan)
optional additions: sunflower seeds, dried fruit, mini chocolate chips (1/4 cup of any or all)

Mix the above ingredients in a mixing bowl and get the fudge ready to pour in and stir...

In a saucepan, mix on low heat:
1/2 cup of sunbutter (sunflower seed butter, or other nut butter will do)
1/4 cup of agave nectar, or a touch more if you want them sweeter
1/4 cup of non-dairy milk ( I used So Delicious coconut milk )
2 TB of dark cocoa powder

After to mix the above ingredients on low-heat and they have become like a fudge sauce, pour the hot syrup over the cereal mix in the bowl. Mix well and pour into a greased (coconut oil or palm shortening) 8x8 pan. Press the cereal down kinda like you are making rice crispy treats. Then, cover and put in the fridge for at least 2 hours, but you can do more. (You can try the freezer to speed up chill time). Then when chilled and stiff, cut into square pieces and serve.
Pretty darn easy if you ask me. And a nice treat for a busy week of running around. Whole grains, and healthy fats, and a touch of cocoa will keep you moving for sure.
I better get back to working on the plants for the garden, so I can have lots of greens and veggies this summer. In the meantime, try and remember to take deep breaths and relax this month. It's a busy one! I think I am telling this more to myself than anyone else :)

Much love to you today as always!

Tuesday, May 3, 2011

Sweet Potato Quinoa Chocolate Cake (vegan)


This cake may just look like a slice of chocolate cake to you. But let me tell you, that there is sweet potatoes, quinoa, avocado and cocoa hidden inside there to make it a nutritious bite of heaven. No sugar, no nuts (or tree nuts), or any gluten, dairy, soy and pretty much fits the bill for being the most nutritious CAKE I have ever made! :) And, it was delicious too. I do not know why it took me so long to make frosting out of avocado puree. It is so easy and so delicious... seriously plants and real food are AMAZING!
I started experimenting with this cake a few weeks ago because I started feeding my baby solid foods (CRAZY!) and one of our first food was sweet potato puree. My baby loved the sweet potatoes (as I thought he would). And I made a huge batch of sweet potatoes puree to freeze for my baby food in the future. I still had more sweet potato puree in the fridge though, and wanted to experiment with some leftover quinoa as well. So, I made my sweet potato quinoa patties (and made some revisions), and then decided on making something a little special too. Here is my first attempt at making a cake that may be good enough to feed a baby on their first birthday that does not contain any allergens or toxic sugar. I am VERY happy with the results and probably will make it again for myself (forget about baby food!) and will also probably brag about it more than I should :)

Sweet Potato Quinoa Chocolate Cake Recipe (vegan, gluten, nut, dairy and sugar-free)
2/3 cup of quinoa flour (or make quinoa-meal yourself from dry quinoa in your blender/food processor) ***other sub flours to use: GF oat, sorghum or brown rice***
1/3 cup of millet flour
1/3 cup of tapioca flour
1 1/2 cup pre-cooked quinoa
1 cup of sweet potato puree
1/4 cup of coconut palm sugar
1/4 cup of pure maple syrup
1/4 cup of light olive oil
1/2 cup of non-dairy milk 
3 TB of real cocoa powder or carob powder
1 TB of flax or chia meal
1 1/2 ts. of baking powder
1 ts. of baking soda
1/2 ts. of sea salt
1 ts. of ground ginger
Mix all of the above ingredients together for 1-2 minutes to create a smooth and creamy cake batter. Then pour into a 9x9 circle pan that has been greased with oil/organic palm shortening. Bake in a 350 degree oven for 50-55 minutes, until you can stick a toothpick through the middle of the cake and no gooey-ness comes out. It should be pretty crispy and brown on top and stiff when shaken just a bit. Let cool for 10-15 minutes and then transfer from pan to a plate using the flip-plate method. Continue to let cool before you put on cooled frosting...

If you prefer to make this recipe into cupcakes, then by all means, pour batter into lined a lined cupcake tin and cook in 20-25 minutes and check with a toothpick as well to check if fully cooked and done. Pull cupcakes from pan to cool best.


Avocado Chocolate Frosting Recipe
In a small blender, food processor, magic bullet or vitamix mix the following:

1 small RIPE avocado (about 3/4-1 cup of chopped avocado)
2 ts. of pure raw cocoa
3 TB of pure maple syrup
3 TB of hemp milk (or non-dairy milk of choice)

Blend in a blender and you should get a mouse looking substance. Taste and see if you want to add more syrup, or if it is too thick, then add a touch more milk and blend again. Blend and add liquid according to your liking.

Then spread the mouse/frosting on the cake in a one inch layer. If you are frosting cupcakes, then top with as much or as little as you desire. Then serve right away! The avocado mouse tastes best to serve fresh, but if you are keeping the leftovers you defiantly need to keep this cake in the fridge for best results.

SOME NOTES:
---My sweet potato puree was a mix of about 4 cups of soft (boiled) potatoes with about 1-1/2 cups of water that was blended in a blender to get a thick but pureed consistency. You can add your sweet potatoes however you like, just know that this factor may affect your cake batter consistency and you may or may not want to add a touch more liquid if your batter seems too thick.

---If you do not want to use sweetener in this recipe at all, then I suggest you omit it and add 1/4 cup of really ripe banana puree to add sweetness or experiment with stevia.

---You can make this recipe without the cocoa if you desire. An orange cake with green frosting may be the look you are going for ;) Or I would suggest using carob as a perfect sub for the cocoa as well.

---Some optional ingredients to either cake or frosting: touch of pure vanilla or cinnamon

Now, friends, I suggest you run, not walk, to the store and get some avocados so that you can make this delicious recipe (especially the frosting-even if you want to wait on the cake recipe). Together this cake and frosting are a masterpiece and a perfect disguise to any person that may or may not think they are eating chocolate cake. I hope you enjoy!

Much love to you!