Tuesday, April 25, 2017

Chocolate Buttercream Birthday Cake

Well, I said I have been doing a lot of baking lately and it turns out I made another birthday cake the same week of my birthday to celebrate with some friends who all had our birthdays within a 6-week stretch. We work together as facilitators and hosts for Holistic Health Woman's Solitude Retreats. It is our heart and desire to give women a space to breathe, heal and rest with yoga, outdoor hikes, meditation and naps. Or a place to take the next steps of self-love and self-care, or even a place to explore what are the next steps for relationships, career or whatever may be stopping you from becoming what the Divine created you to be. It truly is a special 3 days of these women being loved on and nourished in mind, body and spirit. So, it was fitting that we would offer love and celebration to ourselves as we encourage and desire other women to do for health and love.

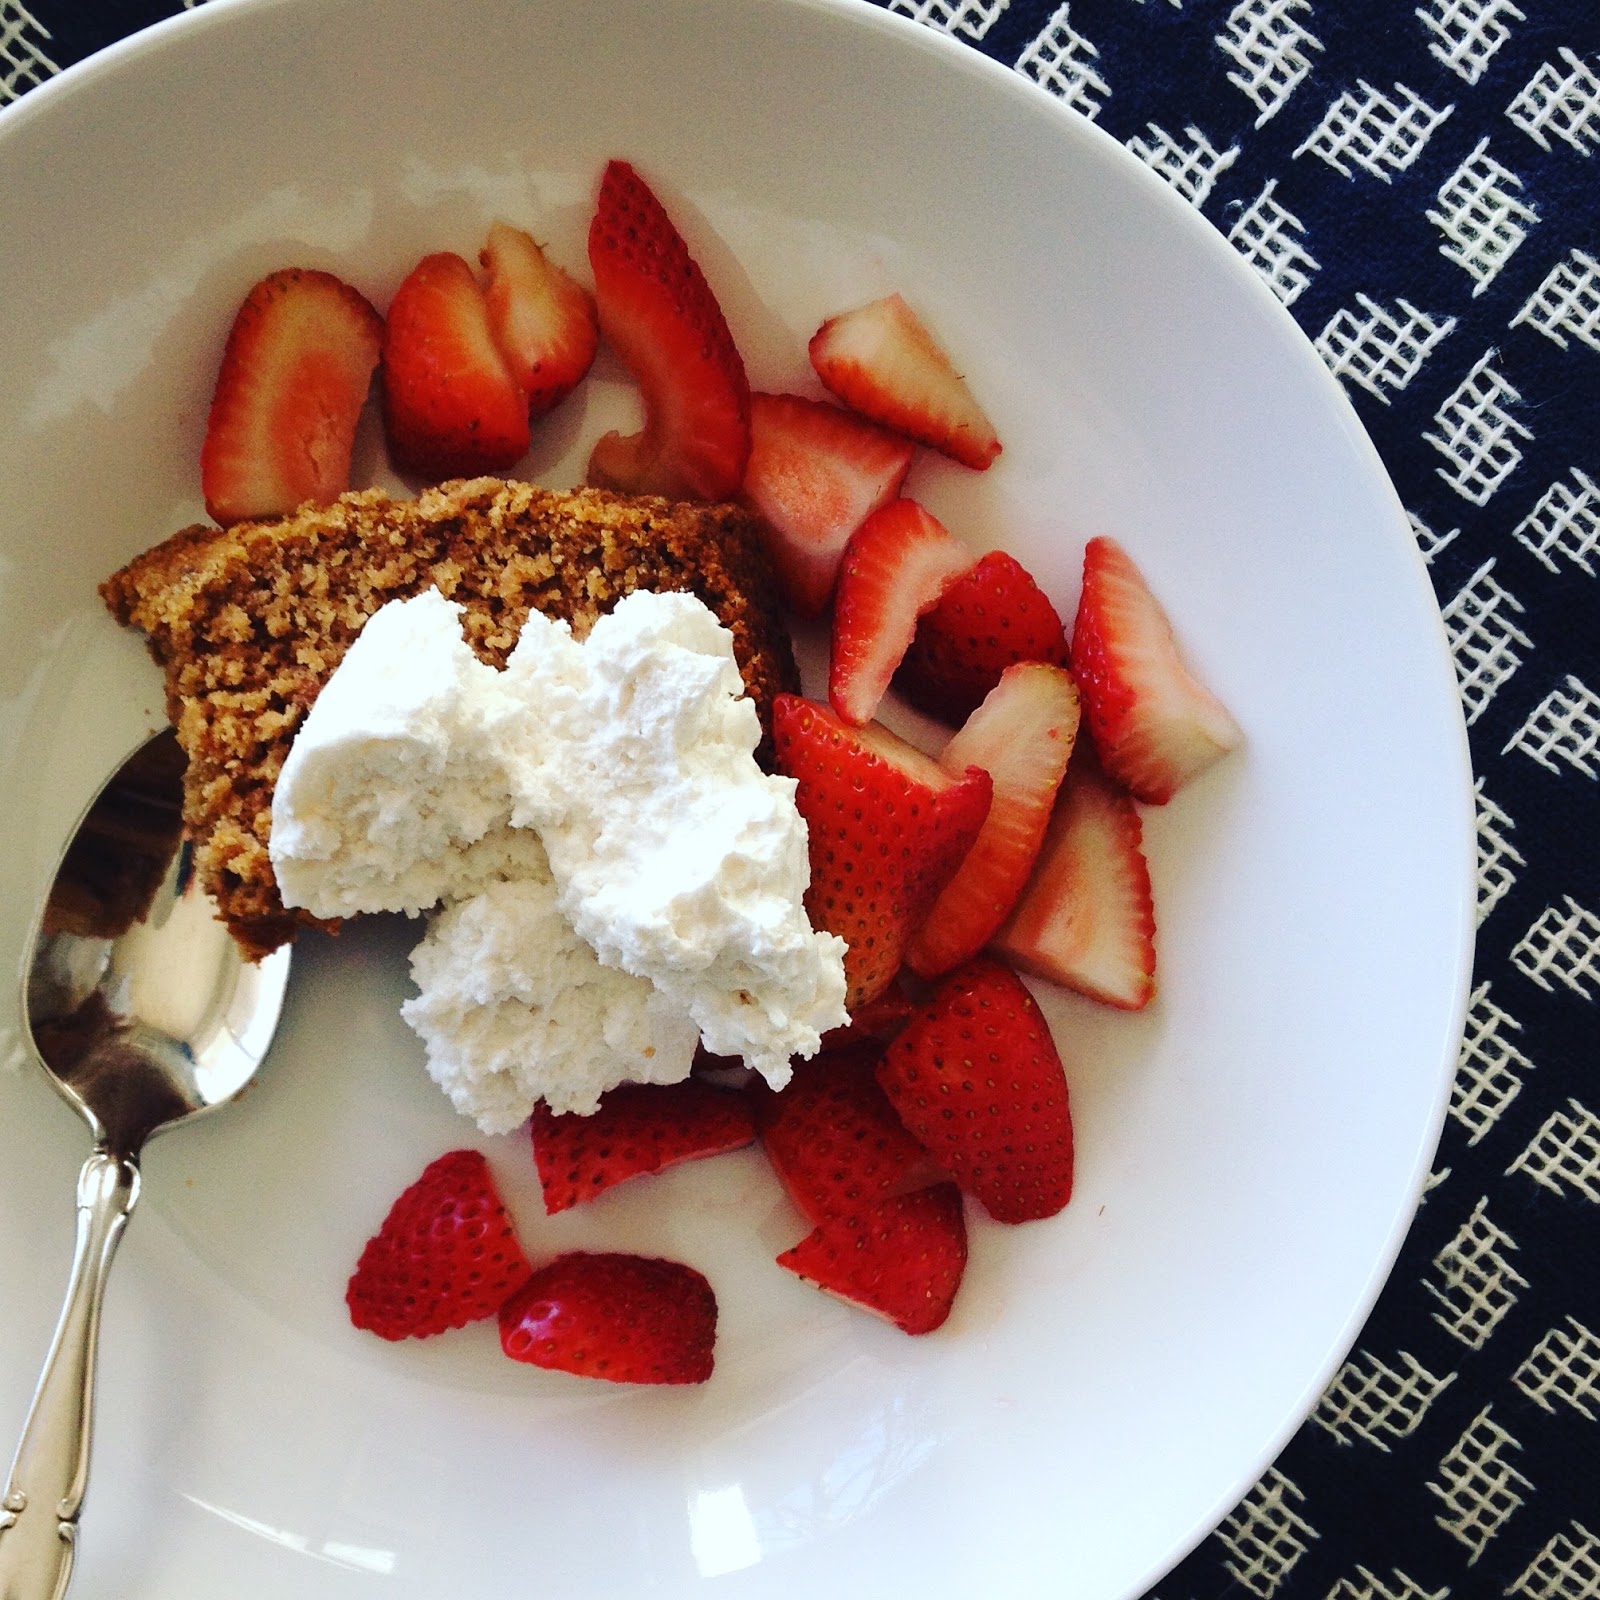
I love an opportunity to be intentional about pouring love into food that shows love to people and that was this cake for my friends. I had some of those organic strawberries on hand and tried my hand at making some strawberry hearts to bring more love. It's sometimes the little things that make that make the biggest statement. I wanted to share this recipe as well just for the fun and love of it.... it is closely based on my Chocolate Snow Cake that I made last Christmas with dates and cherries. So this cake is extra moist and thick and creamy. Super delicious and perfect for any GF friend looking to celebrate a birthday or special occasion. I hope you give it a try and of course....MUCH LOVE and HAPPY BAKING, xoxo
Chocolate Buttercream Cake Recipe
{free of gluten, soy, corn, nuts and seeds, and optional dairy}

1 1/4 cup of gluten free oat flour
2/3 cup white rice flour
1/3 cup of tapioca flour
1/3 cup of potato starch
1 TB of coconut flour
3/4 cup of coconut palm sugar
1/2 cup of cocoa powder
2 ts. of baking powder (I use Hain brand)
1 ts. of baking soda
1 ts. of sea salt

1/4 cup of applesauce
1/3 cup of maple syrup
1 cup of date puree ***This involves pouring 1 cup boiling water over 1 cup of pitted dates and letting it sit for 5-10 minutes and then blending in a high powered blender to whip up a creamy date-pudding like substance.

1 ts. of pure vanilla
1 cup of warmed coconut oil
1 cup of coconut milk beverage (I use So Delicious)
2 TB of apple cider vinegar

1/2 cup of chocolate chips morsels (Enjoy life brand)

First grind your GF oat flour and mix well with all the other dry ingredients. Then mix in the wet ingredients, date puree and lastly the warmed oil. Mix well and you will start to see the vinegar and baking powder do it's work and make the batter poof up a bit. Fold down and then mix in the chocolate chips. 

Pour in a coconut-oil-lined baking pan. I baked in 2 9x9 circle pans to layer. But you could also do a bundt or angel food cake pan. In the 9 inch pans, bake in a 350 degree oven for 30 minutes or until it is no longer wet and giggling. If you bake in a bundt type pan, then you will keep in the oven for around 45 minutes instead.

The cake should show a clean toothpick from the middle of the cake and firm, but soft. no wetness. Pull from the oven and let it cool completely. 


Choclate Buttercream Frosting Recipe
16 ounces or 2 cups of  soft ROOM TEMPERATURE butter of choice
(I have used Earth Balance Soy-Free, Kerrygold-Irish butter Dairy, and even have used butter-flavor Spectrum Organic Shortening)

1/2 cup of maple syrup (or honey if you prefer the taste)
1/3 cup of organic powdered sugar (I use Wholesom Brand to avoid corn starch in the sugar)
pinch of sea salt
1/2 cup of cocoa powder

Put all the above in a large mixing bowl and use a hand held powder mixer, Or dump in a Kitchenmaid mixer and whip up on high for 2 minutes until you get a fluffy frosting. I taste test a few times ;) to make sure it is sweet enough or needs another pinch of sea salt. 
To essemble the cake: 
Find the plate you want to serve on and tip one cake upsidedown to the serving plate. Spread a 1 inch or so thick cover of buttercream frosting and then use a plate to tip the other cake upside down and then while on its top on the plate, turn back side UP on top the the frosting bottom.

Spread a thick coat of the frosting over the top and then to the sides. Use a flat knife or spatula to help smooth over the tops and make it a clean spread top. Then you can decorate with whatever you got. Sprinkles, fruit, chocolate chips.... options are endless.

Do not refridgerate cake before serving. Or if it is very hot before serving you can place in a cooler location to help from melting, but make sure to have it sit at room temperatue for at least 30 minutes before serving for best results.

Cut and Serve! Delish!!

Happy baking and much love xoxo

Sunday, April 23, 2017

Strawberry Shortcake Cake

It's another year for me. My 32nd birthday. A day to celebrate life, my life, and all it's good things.
It's a day to remember the suffering and joys of the past year and look forward to the next. Maybe a day to think of some adventures or goals to encounter over the next year too. Some of mine for this coming year include getting my first tattoo ;) and being outside as much as I physically can!
This work of seeking more of who you are is brave and courageous work. Sometimes looking inward can be so ugly and exhausting. But once you start turning the mirror on yourself you can also see the light and the Divine within as well. This discovery is pure magic and brings so much love for thine true self. You don't have to go seeking very far and long before you find what you truly are and want to be already within. You are created very good- and now to live forward with this belief is revolutionary! This self-love will also allow you to have more empathy for yourself, and will in turn allow you to offer more love and empathy for others all around you as well. This love is what wins. 
I feel like my cake was simple this year. Just how I wanted it. I have been doing a lot of baking this past season, and was not overly looking forward to a decadent, rich, and overly sweet dessert. I felt inspired by some fresh organic strawberries I picked up at my local health store and decided that it just what I wanted... a little sponge shortcake and a dollop of berries and cream. It was perfect!  
Strawberry Shortcake Cake Recipe
{gluten, dairy, soy, egg, seed and nut-free}

1/2 cup of finely ground GF oat flour
1/2 cup of rice flour
1/2 cup of tapioca flour
1/2 cup of potato starch
2 ts. of baking powder (I use Hain brand to have corn-free
1 ts. of baking soda
1 ts. of sea salt
1/2 cup of coconut palm sugar

1/2 cup of maple syrup
1/2 cup of melted organic coconut oil

1 cup of strawberry-milk puree- this includes 1/2 cup of fresh or frozen strawberries with 1/2 cup of coconut milk beverage or other non-dairy milk and blend all together in high powered blender with 1 TB of apple cider vinegar to make 1 cup of strawberry cream puree

1 organic lemon, zested and juiced for 1/4 cup of lemon juice

In a large mixing bowl, mix all together all the dry ingredients first. Then add in the liquid ingreidents and mix well together. Pour into an oiled pan (I used an angel food cake pan for this one) but you could use a 9x13, or bundt pan too. Bake in a 350 degree oven for 30 minutes. The can will turn a slightly golden brown color.  Let the cake cool for at least an hour before serving. 

You can either decorate and top the cake with coconut whipped cream, cut up strawberries or leave it all on the side and you can just have it seperate to serve for a more toppled version. I like it both ways. I decided to leave the cream off so that it would be easier for leftover this time around. 
Coconut Whipped Cream Topping Recipe
1 can of full fat coconut milk (use the cream only)
2-3 TB of pure maple syrup

Chill the can of coconut milk for at least a few hours or speed up the process in the freezer. Then right before serving, open the can and scoop out the separated coconut cream on the top and pour all of the remaining coconut water in a separate container to keep and use for other baked goods or smoothies. After putting the coconut cream in a bowl with syrup, use an electric mixer and whip up the cream for at least 3 minutes until you get peaks and a thicker cream. Then you can top the pie with this cream however you like. 

You can sub 1-2 TB of honey for the maple syrup. And if you want, prefer or like dairy you can use just regular whipping cream whipped up to perfection. 

Also, I have used this So Delicious CoCoWhip Cream in place of making my own coconut whipped topping and it is just fabulous too! Kinda like good ol fashioned cool whip from when I was a kid int he 90's :)      
I don't really do anything to prepare the strawberries, besdies, wash, dry, and slice. You could add a sprinkle of some sugar and let it sit in the fridge to make a more juicy and saucing strawberry topping, but that is totally preferance too. This recipe will be the best when the Michigan strawberries come into season in a few months. But I have found some organic strawberries that are coming into season in California right now- and they taste heavenly this spring and have me looking forward so much to our own berries very soon!
Well, it's no secret that I love celebrating birthdays, especially with cake. This picture above is how I savored a piece for breakfast the next morning- because it's my morning after tradition ;) So here's to another year and may it be a year of being brave to encounter more of who I am and who I want to be. Happy baking and much love to you, xoxo

Saturday, April 22, 2017

Revised Oat Baguette Bread A.K.A. "Soup Bread"

I have now been making this bread for over 3 years and I was reminded that my blog recipe for this bread is a bit off in what I have actually do in making it. I have made this bread several times a week for the last few years and I would not be surprised if I had made it up from 1000 times and if I could make it in my sleep. I love the rolling and the kneading in bread making. This bread is no different and in hope to sharing this amazing recipe with you, I find myself again sharing more of my "fairy-dust" secrets to help you achieve a great loaf of your own to love and share.

My kids call this bread "soup bread" because when I first started making it, they would always want it with soup. So that is what it is known as in our house and seeing how that this is a revised recipe from my original, it seems like a new name might be in order :) Or not :) you decide what you call it. It's mostly just known as bread at our house, but not too interesting I know. If you think of a good name, let me know :)


Oat Baguette Bread
A.K.A Soup Bread Recipe
free of gluten, dairy, soy, nuts, seeds, sugar, and can be vegan

3 heaping tablespoons of psyllium husk powder
1 cup of pure water
1 cup of coconut milk beverage (or other non-dairy milk)
2-3 TB of apple cider vinegar
2 TB of olive oil
2 TB of pure honey (or coconut nectar, or maple syrup for vegan versions)

Mix well with a hand whisk until you get a pudding like substance. It make take 3-5 minutes before the psyllium husk powder is fully thickened.

Then add...

2 cups of finely ground fresh GF oat flour (start by adding 1 cup at a time while kneading in)
1 cup of rice flour (white or brown)

1/4 cup of potato starch
1/4 cup of tapioca starch

2 ts. of Hain Baking powder
1 ts. of baking soda
1 ts. of sea salt

1/2-1 cup of rice or oat flour extra for rolling and kneading the dough ball to reduce sticky dough and get a skin of the dough so that you can roll into a loaf or ball for baking.

I've been told the magic is in the kneading- and that might be true. I learned to knead bread at my first bakery job in high school so I have been perfecting the knead for over 15 years now. It is an art. If you are looking for a simple tutorial- I bet googling it will come up with many teachers ;)

Once you knead the loaf into a 12 inch roll with a soft skin then place the loaf on a parchment papered baking sheet and you can use a serated knife to do a few criss crosses or lines. You decide ;)

Bake in a 350 degree oven for 50-60 minutes depending on your oven and your altitude. If you like a dark crusty crust then I suggest 60 minutes for sure :)

Happy baking, friends!

Much love as always :)

Thursday, April 20, 2017

Lemon Berry Muffins

Tis' the season to start seeing new life pop up all around you. Right now, I am looking out my kitchen window at my budding trees, swaying daffodils, and my neon green grass after a night of thunderstorms and rain. The colors are so vibrant and new. This live backdrop gives me such a feeling of creativity as I step into my day, also wanting to get outside and soak up all the newness. My 3 year daughter even mentioned this morning while driving the pink 'leaves' on all the trees that she loved from the backseat. She was actually noticing all the flowering trees that line our streets this time of year. But I was excited that she was watching and wondering about so much beauty and newness all around her. It's hard to ignore - the earth is waking up all around us!
This time of year usually also gets me all excited about lighter and fresher flavors in my baked goods and kitchen. Ones of lemons and berries and less creamy thick spice filled flavors that seem to keep me warm and comforted throughout the fall and winter months. So today lemon and berries made it into our muffins. And it has me sharing these sweet and tart beauties with you as well...
Lemon Berry Muffin Recipe
{gluten, dairy, soy, egg, nut and seed-free}

1 cup of finely gournd GF oat flour (or buckwheat flour)
1/2 cup of white rice flour
1/2 cup of tapioca flour
1/4 cup of millet flour
1/4 cup of coconut flour
1 ts. of baking soda
1 ts. of sea salt
1 1/2 ts. of baking powder

2/3 cup of maple syrup or pure honey or a mix of both*
1/2 cup of soft or melted coconut oil
1/2 cup of coconut milk beverage or other non-dairy milk
1 TB of apple cider vinegar
1/4 cup of applesauce
1 organic lemon--- use the 1/3 cup of fresh lemon juice + the zest from the whole lemon (1 TB)
1/2 ts. of pure lemon flavoring (or use food-grade lemon essential oil 10-12 drops [I used Young Living Lemon Oil])

1/2-1 cup of chopped fresh strawberries
1/4 cup of frozen or fresh blueberries

*I used a mixture of honey and maple syrup to keep the muffins a lighter color as well,plus their flavors with the lemon is amazing- but if for some reason you want to use coconut sugar instead or regular sugar you can add in 1/2 cup of sugar of choice 1/4 or so cup of either honey or maple syrup. 

First, mix all the GF flours and dry ingredients together in a bowl, then add in the wet ingreidents and whisk together well. Then you can use an oiled 1/4 cup scoop and pour batter into the mufin tins. Then I distribute the fresh and frozen berries on the tops of all the muffins... you can squish them in and cover each top generously. You could also pour all the berries into the batter and fold in bfore you scoop into muffin tins- I put the berries on top this time around so that they would look pretty and bake right on top. Either way is great or do a little of both too. You just have to be carefut to not over stuff each muffin with too many berries. 
Bake in a 350 degree oven for 25 minutes and then take from oven and let cool well for at least 15 minutes before moving to avoid crumbling. 

These muffins could be made into minis too- just maybe make sure your berries are cut smaller and do not domintae the smaller size. 

I must say, lemon and berries is one of my most favorite flavor combos. So for me, these are a comfort muffin - but I hope they offer you some color and fresh flavor to your spring steps. 

Much love and happy baking, xoxo

Thursday, April 13, 2017

Abundance Bowls

I have been seeing recipes pop up over and over again on Pinterest and Instagram for such a thing called Buddha Bowls, or Healing Bowls, or Layered Bowls, or Abundance Bowls. Have you seen these too?!? I love it because it seems like they are always just a touch different, but really are all in the same recipe pool with a few common layered parts to make it complete. You can make them with different flavors or veggies depending the season or what you got left in the fridge or pantry. They are fully flavorful and always amazing in color and appeal. I am forever hooked!!!
The common thread for all these bowls is this....
-a grain base (basmati rice, quinoa, buckwheat, millet...)
-a roasted veggie or root option
-a legume or bean protein
-a fresh veggie or green salad option
-a fresh avocado or herb topping

I like to stick to these bowls being vegan, but you could obviously add a meat protein or egg if that is more up your alley than some lentils or beans. If you ask me, this is the best version of a vegan meal...It covers all the bases of feeling nourished and satisfied after a meal.

Truly a beautiful bowl of what real healing food entering your vessel should be all about. It makes you stop and be mindful of each bite as it enters your mouth and as you swallow and reach for the next. The textures...the colors...the warmth and love....So good!
The name "Abundance Bowl" really stuck with me though and thought it would be worth a recipe post to help teach us that this "bowl" really is not super hard if we take the time to make the pieces and have it available for a few days of meals on end. I love that name though because it truly describes to me what it offers. Abundance. You don't need more than what this bowl can offer. It covers all the bases of tastes, textures, nutrition and on and on. It is more than enough. It offers abundance and maybe even a little hope for the journey....(to your mind, soul and body). And because they can so easily be made to be full of abundance without meat or animal proteins I like making them that way. You can add meat to many other meals through your week if that is your diet, but this one really can be so satisfying without meat. If you are looking for ways to eat less meat for health or environmental reasons- here is your start...!
Abundance Bowl Recipe Layers

Cooked Basmati or Quinoa are my go-to's. I like making at least 2 cups dried (4 cups cooked) for these recipes to enjoy and then have easily ready in the fridge as leftovers. 

I almost always cook my basmati in 1 TB of coconut oil and then add the water or even more coconut milk as the liquid part. I usually add a sprinkle of sea salt to the water as well. I cook on medium heat half covered until the water is gone and then I turn off the heat completely and fully cover and let it sit for 15 minutes and then it is always ready to fluff up and serve.

I mostly like to cook my quinoa with a little more flavor... I usually saute a little onion, shallots, or garlic first with some olive oil and then toss in the dried quinoa and after a few minutes add in the water part and sea salt and maybe some pepper. I cook on medium heat till water is gone, half covered and then after water is gone I turn off all heat and cover fully and let it sit for 15 minutes. Then it is ready to fluff up and serve. 
Roasted Roots
1 medium Japanese Sweet Potato
1 medium sweet potato
2-3 carrots
2 medium beets
1-2 TB of olive or avocado oil
sprinkle of sea salt and black pepper
1-2 TB of fresh or dried rosemary, oregano, sage and thyme

Cut up cubes of all the above roots and spread out on a parchment covered baking sheet, rub with the oil, salt, pepper and herbs and bake in a 375 oven for 25-30 minutes until soft and crispy.

Green Garlic Lentils
3-4 fresh garlic cloves sauteed in 1-2 TB of olive or avocado oil
1 cup of green lentils that have been washed and/or soaked and rinsed
2 ts of dried turmeric
1/4- 1/2 ts. of black pepper
1/4-1/2 ts. of sea salt
2 cups of water

In a medium saucepan, saute the garlic, and then add in the lentils, spices and water and let cook n medium heat, half covered until water soaks in and lentils are soft. Then turn off the heat and cover and let it cool and cook the rest of the way. Then within 15 minutes they are ready to serve.
Crispy Curry Garbanzo Beans
1 large 29 ounce can of Eden Garbanzo beans
sprinkle of sea salt
sprinkle of black pepper
1-2 ts of curry powder
1 TB of olive or avocado oil

You can cook these two ways... To get them crispy, almost like crunchy chips or nuts, rub them with the oil and spices and spread them on a baking sheet and bake them around the same time as the roots, or maybe closer to 20 minutes at 375. Or you can put all the ingredients in a sauce/frying pan and warm and crisp up over the open flame in a pan and cook for 5-10 minutes. The crispy ones are great for snacking and topping almost anytime- the ones from the pan are a little more soft and easy to make the main dish with the rest of the ingredients. 

Kale or Mixed Greens Salad
1-2 bunches of lacinato or curly kale washed, dried and cut up in chunks
rub with 1/4-1/3 cup sweet lemon dressing and then top with some of the following...

thinly sliced red onion, or celery, or radishes
sliced pears or apples
roasted pecans, almonds, sunflower seeds, or pumpkin seeds
shaved carrots, raisins, craisins, pomagrante seeds, or dried cherries

Sweet Lemon Dressing
1 fresh lemon squeezed (about 1/4 cup of juice)
add fresh zest from lemon too
1/3 cup of California olive oil
1/4 cup of pure honey or maple syrup
1-2 TB of apple cider vinegar
pinch of sea salt
pinch of black pepper
pinch or dried Italian blend herbs

Put all of the above in a small 1/2 pint jar and shake up until it is all well mixed and emulsified. Then you can pour over the salad or just have available to drizzling over as an option for your guests. 

Add fresh slices of avocado 

Add LOTS of fresh cut cilantro, parsley or basil or a mix of it all if you have a fresh herb garden
You can eat all the parts separate in the bowl, or you can layer and pile it on and mix it all up, or you can put it in a wrap or make a larger salad with it all. It really is what you make it. These have been my go-to layers and like I said I am hooked! This is me on my deck the next day after I did all the cooking enjoying the left-overs and abundance...

I hope you give this recipe idea a try, or even at the least it inspired you to eat more whole, fresh, and colorful. You deserve it- this is a way to show love and kindness to yourself and to those around you.
Much love and abundance to you my friends!! xoxo

Tuesday, April 11, 2017

Blueberry Lavendar Chocolate Cupcakes

It seems like I can't go more than a few days without having the joy of baking a GF baked goodie for someone. Whether it be for someone in my family or for someone that we are bringing or sharing food with. I have been known to always offer dessert and I am ok with that :) Even if some weeks I make a resolve to not bake any sweet treats this week- it usually un-does itself within a few days because of the need and desire to love people with gluten-free and allergy-free treats.
These little cupcakes were whipped up on a whim a few weeks ago when we were having a little spring birthday celebration. They were a fab flavor combo and would be a great addition to any spring gathering or Easter celebration.
The combo reminds me of a ice cream from a local ice cream parlor (LOVE's) that makes the best ice cream in my city. They make so many fun and adventurous combos, but more importantly for my family they make coconut ice cream with no dairy or egg ingredients. So this means that my allergy-prone kids can actually enjoy going out for ice cream every now and again and we can feel half-normal as a family. Our favorite flavor is one called Blueberry Lavendar Vegan Gelato and we call it 'superman' for the reason you might guess. Yes, it is because it is the closest thing you'll find to all-natural blue ice cream ;)
But this combo of blueberry, lavenadar and chocolate really knows how to bring me tears of joy. I truly stop each time I taste this combo and slow down and actually close my eyes and enjoy it. This combo truly is my go to when looking for a chcolate-fruit mix and adding in the flowery flavor of lavendar is calming and brings out a whole aromatic experience. Happy baking and ENJOY xoxo
Blueberry Lavendar Chocoalte Cupcake Recipe
{gluten, dairy, soy, nut, seed, egg, and refined-sugar-free, vegan} this recipe is derived from my chocolate vegan cupcake recipe...

3/4 cup of finely fresh ground GF oat flour
1 cup of coconut palm sugar
1/2 cup of organic cocoa or cacao powder
1/3 cup of rice flour
1/3 cup of tapioca flour
1/3 cup of potato starch
2 ts. of baking powder
1 ts. of baking soda
1 ts. of sea salt

1/4 cup of applesauce
1/4 cup of pure maple syrup
1 ts. of pure vanilla
1/2 ts of pure lavendar flavoring  or use a culinary grade lavendar oil (4-6 drops)

1/2 cup of coconut milk beverage (or other plant-based milk)
2 TB of fresh squeezed lemon mixed into the milk beverage to make 'buttermilk type mixture' if you do not have fresh lemon you can use apple cider vinegar to do the same thing

1 heaping cup of fresh or frozen blueberries

First, mix all of the dry ingredients in one large bowl, then in a measuring cup or glass mix the coconut milk beverage with the lemon juice and let it curdle for a few minutes. Then add that and all the rest of the wet ingredients to the mixing bowl mix well. Then fold in the blueberries and the mix may even get stiff as the coconut oil cools down from the cool berries. It may also look more like a brownie batter. Use an oiled 1/3 cup scoop to spoon the batter into the cupcake tins in the pan. Bake in a 350 degree oven for 20-22 minutes until stiff and no more gooey center. 

Let the cupcakes cool well and then frost with this little treasure frosting below...

Blueberry Lavendar Dairy-Free Frosting
In a small saucepan, cook down 1/4 cup of frozen blueberries with 2 TB of maple syrup to make a thick blueberry sauce. let it cool and then mix it in 1 TB of the sauce with the following.... or can add more or less for color and wet-ness of frosting....

1/2 cup of Spectrum Organic Palm Oil Shortening
1/4 cup of very soft coconut oil
1/4 cup of honey or maple syrup
1/2 ts of pure lavendar flavoring  or use a culinary grade lavendar oil (2-4 drops)
1/3-1/2 cup of organic corn-free powdered sugar
(I like Wholesome brand)
pinch of sea salt

Use a hand-held high powered mixer to whip up the frosting to become a thick and creamy frosting without clumps. You may need to mix for a few minutes to get it to the texture you want. 

In the photos of the cupcakes I added the chocolate shavings to the tops of the cupcakes, but you can also add a sprinkle of culinary grade lavendar blossoms or dried tea lavender for an extra touch of aroma and sweetness.

Much love, as always, xoxo

Saturday, April 8, 2017

Kale Pear Quinoa Salad

This quinoa salad is your new best friend. Once you learn the ways of quinoa and buy the bulk bag at Costco- you and quinoa will be BFF's for life. You can make a quinoa salad in a variety of ways, but I always come back to adding fresh greens, herbs, and sneaking in a fresh fruit and finishing it off with a little crunch of seeds, nuts or maybe even some crispy chickpeas. These are my quinoa salad guides- learn it's ways and you will be forever be inspired by how to mix it up.

It's true- a great earthy, spring salad like this will carry you through till summer. Also once you make a quinoa dish like this, it is easy to see how you can make this same salad a hundred times with mixing in and out whatever fresh or dried ingredients you have on hand. I do this throughout the whole summer with whatever lovely and fresh produce and veg I can scrounge up at the market that week.  Let this recipe be your teacher and before long you will be the master of the quinoa salad.
Kale Pear Quinoa Salad Recipe
{gluten, egg, and soy-free, can be made without nuts, seeds and dairy as well}
1/2 cup of minced red onion
3 grated cloves of garlic
2 TB of olive oil
2 cups of dry quinoa
1 ts. of sea salt
pinch of fresh ground black pepper
4 cups of water

In a medium pot saute 1/2 cup of red onion with 3 grated garlic cloves in olive oil until they get soft and then mix in the dry quinoa and stir around for a minute or two, then add in the water and let it cook until it boils. Then turn down the heat, half cover the pot and let it cook until the water is cooked in. Then when you see no more water, turn off the heat, and cover the pot to let it sit for 10-15 minutes. Then add in the following...

1/2 cup of finely chopped fresh cilantro
1/2 cup of finely chopped fresh parsley
(more or less of the above according to your taste...)

The warm quinoa will help wilt the herbs and cooked quinoa will soak in it's flavor. Let it sit for another few minutes and then pour into your serving bowl and mix in the following...

1 heaping cup of finely chopped lacinato kale
1/4 cup of finely minced fresh red onion
1 fresh bartlet pear cubed, about 1 cup's worth
handful of dried cranberries (or cherries)
handful of crushed pecan (or pumpkin seeds)
diced ripe avocado

Toss all ove the above together and then the following you can add as much or as little as you want...

Sweet Lemon Dressing
1 fresh lemon squeezed
1/3 cup of California olive oil
1/4 cup of pure honey or maple syrup
1-2 TB of apple cider vinegar
pinch of sea salt
pinch of black pepper
pinch or dried Italian blend herbs

Put all of the above in a small 1/2 pint jar and shake up until it is all well mixed and emolsified. Then you can pour over the salad or just have available to drizzling over as an option for your guests. 

Also, it is also a great touch to rub the dressing into the fresh chopped kale leaves before mixing as well- it helps the leaves soften and even taste less bitter too.

Also, if you are going to serve and eat right away, finely dice up a ripe avocado to top with as well. Or if you are going to chill and then serve, cover with fresh avocado when you are ready to serve so that avocado stays green and fresh.

optional addition of goat cheese sprinkles over top is a great touch if you can tolerate dairy

Serve warm just like this or if you want this salad can be easily stored in the fridge to pull out as a chilled salad for any gathering. It is a great side dish or could also be the main course- especially if you add some nuts, or you could even add some garbanzo beans for more protein and substance. It is also a great salad to make ahead of time for lunches on the go or for a picnic dinner at the park. It truly is a versitle protein packed delicious meal. 

Much love to you friends, xoxo

Wednesday, April 5, 2017

Candy Bar Oatmeal Cookies

This has been my go-to cookie recipe as of late...but the original is as simple as my chocolate chip oat cookies that I use that recipe batter as the base to many of my cookie creations. It's pretty simple and basic ingredients. Plus, I usually have all the ingredients on had if I need them on a whim. And we all know we may need a killer GF/vegan cookie combo on hand if the ever-present need arises ;) And this is it...my no-fail oatmeal cookie recipe to please the masses.
The baked dates add a whole caramelly-divine level and the crunchy sweet coconut makes the cookies moist and chewy- so that's why I call these my candy bar oatmeal cookies because it is the closest version to a candy bar I would want to eat :) Give it a whirl and try it for yourself.
Happy baking and much love to you xoxo

Candy Bar Oatmeal Cookie Recipe
{gluten, dairy, nut, seed, egg and soy free}

1 cup certified GF rolled oats
1 cup of certified GF oat flour
1/3 cup of tapioca flour
1/3 cup rice flour
1/3 cup of potato starch
1 ts. of sea salt
1/4 ts. of baking powder
1 1/2 ts. of baking soda
1 cup of coconut palm sugar
1/3 cup of date puree paste
1-2 TB  of maple syrup
1/2 cup room temperature or very soft/warm coconut oil OR you can sub in
Organic Palm Oil Shortening or use a mix of both to make 1/2 cup

add last:
3/4 cup of dairy-free chocolate chips
1/2 cup of finely chopped dried dates
1/2 cup of shredded coconut flakes

Mix all the dry ingredients together first, then add the wet and mix well and add the oil and mix into a sticky dough. Use a TB to spoon the dough into balls onto a baking sheet. For best results one your baking sheet with parchment paper. Bake in a 350 degree oven for 15-18 minutes or until your desired crispy cookie liking. Let the cookies cool for at least 15 minutes before moving to platter because they will start to crumble if they are still warm. 

Happy baking and hope you give this combo a whirl or create a special candy bar cookie combo of your own ;)

Much love as always xoxo